Followers

Wednesday, August 31, 2011

Happy Birthday Blog Hop

Good morning


Hi and welcome to McVic is 36 Birthday Blog hop! I was so honored to be asked to participate in this blog, so please sit down, stay a while, and enjoy the cards or crafty projects we have made. Also  make sure you comment on each blog, Kacee is going to give away some blog birthday candy to a follower who comments on all the blogs, and lives in the United States. There may be other candy along the way.
If you just happen upon my blog today, and would like to play along, please start over at Kacee's  Blog. www.youhadmeatscrap.blogspot.com, I wouldnt want you to miss out on any candy!

If you just came from Rhonda you are in the right spot.

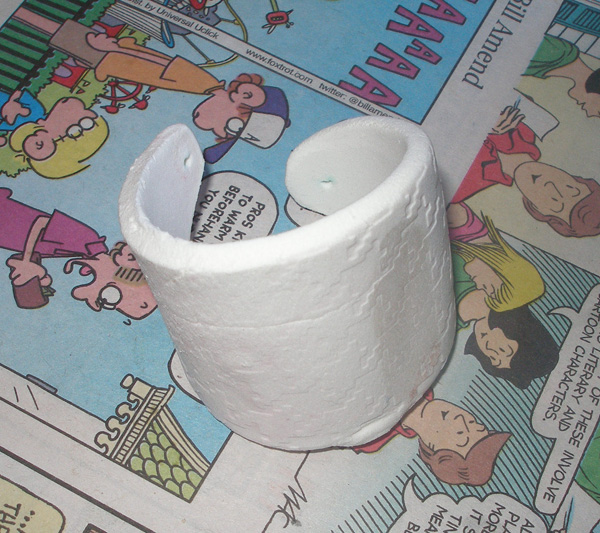
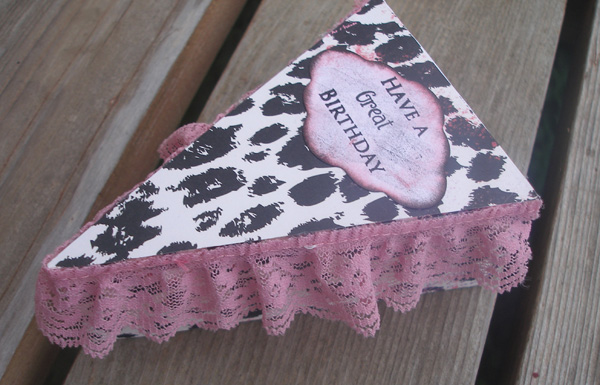
It's been a while since I've used my cricut as I am loving my E-Craft, but if you saw my cake last week you know I finally put it to work and I knew I wanted to make this for Kacee.  Her favorite colors are pink, white and black so I had this fabulous paper in my stash.  I cannot remember who it's from, but this is all I had left of it.  1 single sheet of a 12 x 12.  First I cut the piece of cake out in white cardstock at 11 inches.  After it was cut out, I cut my pattern paper to fit over it piece by piece.  
 I added some lace trim around the 
edges to give it a real girly look.
 Now technically the backside should have
had the lace trim, but I liked the look 
around the sides the best for a single piece.
 The label was from a free nestabilities svg file I had received somewhere 
and inked in pink and black around the edges a bit.  Then I distressed the center of the tag a bit more also.   I used the sentiment from the 
Getting Cricky Coffee and Tea set.  
It's a mix and match set and I can make up almost any combination.
Love that idea!!!
Now you can fill your piece of cake with some goodies
 and you have yourself a unique gift.

I hope you've enjoyed hopping over here and checking out my project, so please leave a comment and I will be sending someone a piece of cake that you can assemble and some papers and lace to decorate to your liking.  I will announce the winner on Friday so you be sure to tell your friends to come and check it out.

Now head on over to my friend Audrey and see what crafty project she has made!

Thank you for hoping with us today! Here is the hop list incase you get lost....

Tuesday, August 30, 2011

New DT member at ...

Good morning,


I hope everyone is doing great this morning.  I think life is getting a bit better on my side of blog land...at least there hasn't been any set backs in the last 5 days.  It's been a little rough over here, but the sun might just be shining on me sooner than later.  


I wanted to let you all know that I have been added to the Filekutz Design Team....yeah for me!!!  LisaJane has some awesome, awesome svg files and since I've gotten my E-craft I've really enjoyed cutting some intricate designs and she sure has some beautiful ones.  I know you cricut users are saying that you can cut intricate with your cricut, but seriously, I have a heck of a time.  Either my mat is too sticky, not sticky enough or I get uneven cuts.  I am still using my cricut as I have invested in quite a few cartridges, but I also love the idea of cutting ANYTHING I want.  Joining Filekutz Designs is giving me some more abilities to share with you and maybe enable a bit also.  LOL


Now here is the card I created for my first DT submission...I hope you like it as much as I do.  I cut everything on my E-Craft and am very pleased with how the scroll came out.
You can find the Flourish frame and flowers here
It's only 99 cents right now, so head on over there and 
grab it and create a beautiful card with it.
I pop dotted the flowers and added
some flat pearls I had gotten at Michaels
a long time ago.  Still shopping my stash...
The background paper is an embossed
felt like and the teal is also from my stash.
The sentiment is from Sympathetic Sayings

So with all that has been going on in my life, I decided to make this card for me; to remember that it's not always and end, but sometimes a beginning.  I just have to look for that open window after the door has been closed.  I hope I've inspired you to make a card for YOU!!!  Sometimes we just have to do something for ourselves.

Monday, August 29, 2011

Blog Award


I just love awards and this one is no exception.  Two very special ladies sent me this award last week and they just have no idea how much that meant to me.  I am thrilled to death over their thoughtfulness.  Audrey and Kacee, thank you from the bottom of my heart!!!
In accepting this award I must answer the following 12 questions, and pass the award on to 10 others:
Name your favorite color?  Purple 
Name your favorite song?  I don't really have a favorite song
Name your favoirte dessert?  German chocolate cake, nummy!!!
What wizzes you off at the moment?  Too much too bore you with...
Your favorite pet?  My cat Smoki, she is the bestest, I really believe she knows when I am down and wants to just hang out on my lap.
Black or white?  Black mostly
Your biggest fear?  Never finding a job!!!
Best feature?  My new teeth...hehehe
Everyday attitude?  upbeat to those around me, even when I don't "feel" it
What is perfection?  knowing we are all imperfect
Guilty pleasure?  sneaking in crafty supplies when "he's" not looking
When you're upset?  watch a sad movie to justify my crying...
This award is being passed on to:
Thank you, again, ladies for my beautiful award!!!  And thank you for thinking of me!

Now I will be back tomorrow for a special announcement and then don't forget about the 
                                                       
blog hop on Wednesday, I am so excited to be a part of this fun birthday hop.

Sunday, August 28, 2011

Simply Sunday "Winged Things"

Good afternoon dearies...
"If you are looking for my Lasting Memories layout, please scroll down"

Welcome to another Simply Sunday at Getting Cricky.  As you probably know, Kristal came out with another 3 brand new sets of stamps and this week I am showcasing you the Winged Things.  I LOVE this set, but I do believe I say that about all of them.  This set is truly beautiful.  I love all the mix and match ideas, but my favorite part of this set is the stamped tag you can create.  Wait till you see what I mean.

Do you see it? and look
at that cute bee and
the butterfly.

Okay, so here is my card:
I love, love this sentiment
and look at this tag...isn't it just the neatest?
Now, you have all seen this awesome pins that
are floating around right now, right?  Well, I decided 
to make the body of the butterfly from a pin.
Of course it's not as elaborate as most of the pins 
that are floating around, but this is just supposed
to be the body of the butterfly.  I also wrapped
a bit of black jewelry wire around the "head"
for the antennas.  Love the look.

Now I hope I've inspired you to create something with Wings and head on over to Getting Cricky and enter her challenge.  If' you've already ordered her Winged Things stamp set, get creating...and good luck!!!


Lasting Memories #53 Who or what inspires you?


Good morning to you all...today is another Sunday filled with Lasting Memories.  Not only is there a new challenge, but Karen is also looking for new Design Team members.  So if you are interested in getting on the DT, all you have to do is play along EVERY week in August.  That's how I got on the DT and I've been having a blast doing it.  Karen and the other ladies are so inspirational and encouraging.  So, if you have thought about it, get that layout done and join in the fun.

This week, Karen has challenged us to do a layout about someone or something that inspires you.  This one was a challenge for me for sure, because I usually only scrap my family.  Of course they inspire me all the time, but I wanted to really make something else.  So I thought about what I like doing most outside of crafting and came up with darts.  I've been throwing darts for about 10 years now.  My husband got me interested in the game and we've been to many tournaments and I've won my share of trophies also.  Whether it be playing singles, doubles, mixed trips or even team, I LOVE the game.
Since purple is my favorite color and my darts are
purple I thought this color combo was a nice fit.
I decided to do the layout more about what I throw
and the meaning for it.  It is an obsession with me.
I added a matchbook that I made as used it
for my sentiment "one match at a time".
It's a way for me to remember that you have
to take it one match at a time...
Then when you open the matchbook, I also
added "my" darts inside.  I scanned my darts,
printed them out, and cut out around them.
I love how this turned out.
I hope I've inspired you to scrap something or someone that inspires you.  Now don't forget that Lasting Memories is looking for some new people to add to their DT and the next person to inspire others could be you


Saturday, August 27, 2011

Wedding Cake

Good morning my dearies,


I'm sorry I haven't been here much this week, but my personal life is a bit crazy at the moment and I've just had a lot going on.  I am hoping I can get out of this stuff soon and get back to normalcy...is that even a word?  I won't bore you with all the details because I really want you to come back to visit...hahaha.  I do think that crafting is my therapy and I needed to dig into something time consuming so that I would be able lose myself in a project and this is what I came up with.


My friend Amy at Love to Crop has a challenge for the Decorate to Celebrate blog.  The theme for this challenge is WEDDINGS, ENGAGEMENTS, and BRIDAL SHOWERS!!  So we want to see all of your decorations and party supplies celebrating everything fantastic about the UNION of two people in LOVE!!   I just couldn't resist in creating this beautiful Wedding Cake.  Now as I said, this was very time consuming, but I just LOVE, LOVE, LOVE how it turned out.  So here we go, (picture heavy):
Here is the cake....
doesn't that just look nummy?
The cake was cut with the Tags, Bags,
Boxes and more cart on my cricut
at almost 7 inches
I inked the edges with a soft 
pastel pink for definition.
If you want to know where I got the idea from the Roses
head over to Penny Duncan's blog.
The rose for the slices were cut on my E-craft from
white copy paper at 1.5 inches.  I misted the flowers with my 
homemade glimmer mist before assembling them. 
 I did not coat each flowers to it's fullest to give it highs and lows shadows.
The roses for the center were cut at 1 inch and the
green leaves were cut from glitter paper also on my E-craft.
The slices open up.
I embossed each piece of cake with my cuddlebug
and the Textile texture folder.  Isn't this just gorgeous?
The lace was from my stash, but I believe it came from
a yard sale or maybe a thrift store.  I have tons of this stuff.
It looks so real.
I used my E6000 glue to glue the plate onto a candlestick
One last look.  I am so happy with how this turned out.

Before adding this to my blog I had shown some of the pictures to a friend the other night.  Her daughter is getting married on 9-10-11 (what a cool wedding date) and she commissioned me to make one for her with teal and brown.  As soon as I've completed it, I will post it on my blog.  
I am also going to etch the last name and the date onto the plate.  
That will be my "gift" to them.

So now hurry on and create something for a Wedding, Engagement or Shower and enter the challenge.

I am also linking this up over at Sew Woodsy.

Friday, August 26, 2011

It's a Jungle out there

Hello again


***If you are looking for my Festive Friday's card, please scroll down***

I know, I've been absent the last couple of days and here I am with 2 posts in one day....geesh.  LOL  

My very good friend Amy over at Love to Crop asked me to be a guest designer for this week's challenge on her blog.  I was thrilled that she asked me because she is such a wonderfully talented person.  Have you seen some of her stuff?  Amy and I have been blogging buddies for quite some time now and when she joined the Getting Cricky DT we became even better friends.  She is such an inspiration so you better hurry on over there and check things out.  When she told me the theme was going to be "It's a Jungle out there" I was even more thrilled.  As most of you know my favorite animal is the Elephant; I have such a collection of them from the tiniest stone carving to the biggest wood carving.  I love them so much that I even have a tattoo of one.  I know, a bit obsessive...But the one thing I didn't have was a wall hanging...so this is what I came up with.
Isn't this cool?
 The base is made from foam core, covered 
with some elephant print paper.  I cut the elephant
head with my E-Craft and the file I got here.
 I cut the head out in 3 layers each shadowed a bit larger
 I inked the base layer and the top layer for dimension
 and then popdotted them on top of each other
I also used an svg tag, but I'm not sure where I got
it from and stamped the sentiment with the Amazing You
stamp set from Getting Cricky and inked around the edges also.

Now make sure you head on over to Amy's blog and link up your "jungle themed" project and you just might be a winner.
  • You may enter as many NEW projects as you would like as long as they fit in the challenge theme.
  • Please include a link to www.lovetocrop.com so that others may play along.

I also have a winner to announce from a previous blog hop, but that will have to wait until tomorrow...sorry for the delay, but life has gotten in the way of things this week. 

Festive Fridays 8-26

Good morning and welcome to another edition of Festive Fridays. If you are new to us, sit back, grab a cup of coffee, relax and enjoy some wonderful Christmas Cards. Yes, I did say Christmas...Festive Fridays will be every other Friday with samples of Christmas cards. This way, you can be making your cards all year long and you will avoid the mad rush when you could be enjoying the Christmas Season. You should have just come from Amanda. If you stumbled upon this post you can go back to Terri and start at the beginning. There is also a complete list of the Festive Friday hop on the left sidebar under the Festive Fridays blinkie in case you get lost along the way.


Today I've got a simple card for you.
I started out by stamping the hollies all over the front
of the card and coloring them in a bit.
Then I stamped a larger version of the holly in the inside
bottom right hand corner.  I folded the outside corner
up and added a scrap piece of green triangle and an eyelet.
I added  a strip of ribbon and stamped 
Pease, Joy, Love onto some scrap
cardstock, backed it with some green
scrap cardstock and there it is.

Again, this was super simple.  I didn't use a cricut or E-craft at all this time.  Sometimes simple is best.

I hope you liked my Festive Friday card and hope to see you back in two weeks for another Christmas card.  Now head on over to Angela and check out what she has for you.


Tuesday, August 23, 2011

Creative Paperclay Bracelet Cuff


Good morning friends

Today I want to share a project that was thought up almost last minute.  As most of you know, I am also a designer over at Creative Paperclay.  I love working with it for embellishments for my scrapbooking and cardmaking, but recently I've begun to think a bit outside the box and experiment a little.  This was extremely  fun to make.
Here are my step by step instructions, kinda picture heavy.
First I layed out my paper clay and cut it with my blade
in the shape I wanted for the cuff
The I cut the ends off
I added some texture and wrapped the clay
around a bottle that was a close fit to my wrist.  
The paperclay will shrink a bit so make sure you have 
something a tad pit bigger than your wrist.
I didn't let it completely dry so that I wouldn't
be able to get it off the bottle.
I also added some holes for a chain if it didn't hold well.
I painted it with a glossy paint in black
and added a glossy pink over 
the top to seal it
and there is my cuff and it fits perfectly.
No chain needed, it actually fits tight enough.

Isn't it just gorgeous?  Well, I think so anyway.  I hope you liked my Creative Paperclay project today and I will see you again in about 2 weeks for another project.  I hope I've inspired you to create your own bracelet cuff using some Creative Paperclay.  You can purchase Creative Paperclay here or you can even get it at Hobby Lobby or Michaels.