Followers

Showing posts with label Stamps. Show all posts

Wednesday, February 11, 2015

Amazing Remelt to stamps

Good morning friends,

today I want to show you how I came up with a project by accident.

Not too long ago Amazing Crafting Products came out with a new product called Amazing Remelt.  This is such a neat product.  It does however come in this giant container and I didn't like the idea of remelting it each time I wanted to use just a little.  So I decided to melt the entire container and pour it into some ice cube trays so that I could just pull out a bit at a time to melt to create my molds.


Now whenever I want to create a mold I can pull the right amount out to melt.


So while getting ready one morning I pulled the cap off of my deodorant and saw that the inside had a unique shape.  Of course my mind started spinning...could I actually make something from this? 


I pulled my remelt out and poured my "mold"  You can see I also created a cup from my Amazing Mold Putty.  The remelt does get warm and in using the mold putty cup I can just peel it out when I am done.


Loved it


Then I cut the inside out and made another mold.  
Now you are probably wondering what I was going to do with these?
Well ....


I created a stamp and using various other pieces I created some more stamps.  
See #2 and #4 are the stamps I created using the deodorant cap.
#1 and #6 were the pieces from the ice cube trays.
#3 and #5 were created from a breast cancer medallion I had made a while back.

I can't wait to use my "new" created stamps to make up some cards.

I hope you've enjoyed my tutorial today and leave me a comment telling me what unique item you would mold to create a custom made stamp.

As always, have a great day and God Bless.

Sunday, September 21, 2014

Fore! Sucker Favors

Good day all and happy Sunday,

So ... you all know that my DS is a golfer and I love making things for him, but I also forget that he is now a Freshman in high school and doesn't want mommy making him things to take to school.  He still wants me to make things for HIM alone, but taking things for his classmates (in this case) his golf team was NOT going to fly.

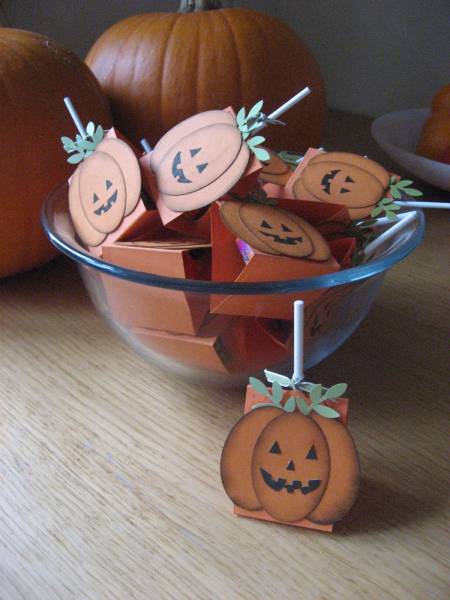
How this all came about was I was on Pintrest (my addiction, I pin ALOT, but hardly make anything) and the other day and saw these cute Halloween favors.  Aren't they adorable?  Now she didn't have a how to tutorial here, but I think it's pretty self explanatory on how to make these.
                                                    
Well, that got me thinking, I could make something for his golf team using this general idea, so off to my craft room I went.  I haven't paper crafted in a quite a while and actually shopped my stash and this is what I used.
Supplies:
Maroon (Highschool colors), white and black cardstock.
Google eyes
Green ribbon
Stamp
Sucker
Tools:
Scissors
SCAL
Scoreboard
Gluedots 
Using my SCAL program I made 4 pieces of rectangles 6.25 by 2.75 and added to circle cutouts on each end for the ribbon.  
Then I scored them at 2.5 from each end 
I also cut 4 circles at 2 inches 
This was a super duper find on my recent "junk-ing" trip at Savers.  All three stamps made by Stampin Up for $2.99, FORE, uh I mean SCORE! 
I used the Fore Stamp for the mouth after highlighting the edges a bit with my black inkpad. 
I kinda think this was ingenious if I do say so myself.
Then pop dotted my googly eyes eyes and free hand cut out tiny triangles (not uniformed at all) and attached them also with glue dots.  I glued them onto the base of the maroon cardstock holder and tied a green ribbon to hold them shut.  
And here you have them.  
Now I showed the first one to my DS and he said "cute mom, but please don't make them for the team!"  I wonder how he knew that that was my intention, hehehe!  I guess high school boys don't want golf sucker holders.  So instead, Coach has FORE (4, seriously) little children, so I will be giving them to him to give to his kids.

I really do love how they turned out and this project took me maybe half an hour.

I will be entering this project over at Decorate to Celebrate for their Anything Goes challenge.

Thursday, June 5, 2014

Luscious Stamped Pendant with Embossing

Good morning friends,

Today I am going to show you a technique I hope you will enjoy. Many times I use my products not like they are supposed to be used. I love to experiment and with that let's see what I have to share with you today.


I received the new Frog Dog Studio May Mixed Media Kit and wasn't quite sure how to use it. There are a lot of cool items in this kit, but for me it was a bit overwhelming. I'm not much of a artist in the sense of drawing and painting. Today I am sharing what I have done with some of the parts and pieces.


In the April Kit we received these awesome acrylic pieces. Of course I had to mold them before using them. You can go here to see a video how to make your molds using the Amazing Mold Putty. I molded this piece with the Amazing Casting Resin and Alumilite Metallic Silver Powder.


I applied the Beach Hut Paper Artsy Chalk Acrylic paint directly to my stamp and pressed my Amazing Casting Resin piece directly onto the stamp upside down and let it dry. Then I used the Pastel Peach Quick Dry Fluid Chalk onto another part of the stamp and pressed my resin piece directly onto it upside down again. The reason I did it this way is so that I could control which part of the stamp I was using, since it is a big stamp.


I just ran my stamp under some warm water soapy after I was finished stamping and it came pretty much clean. The paints do not alter your stamp in any means, just not as gray as it was brand new. You just don't want to let the acrylic paints dry and clog up the detail in the stamp.

Now before I did all this I knew I wanted my piece to have a textured, 3D effect. How was I going to create that texture of the stamp? How about embossing it? I of course did not have any colored embossing powders to match those colors that came with the kit – but last month we also received these fabulous Aumidust Powders. SO off to experimenting again... I combined regular clear embossing powder with the Orange Alumidust and mixed them together.


Eureka!!! DIY Orange Embossing Powder!


Then after I had stamped my image from above, I sprinkled the embossing powder over the resin piece IMMEDIATELY. The Pastel Peach says its quick dry and I didn't know how "quick" drying it was.


Poured the remaining embossing powder back into my container and, then I set the embossing powder with my heat gun. The result is fabulous shimmery detail.


I wanted my piece to shine so I mixed up some of the Amazing Clear Cast Resin and added a layer to dome my piece. You might be curious as to what I have my pendant suspended on... CLICK HERE to see my DIY Doming Platform for resin.

That had to set up and cure for about 24 hours...


and now I have another pendant created all while experimenting.


I hope I've given you some ideas on how to use your products – not the way they were intended... don't be afraid to experiment. Sometimes you may "fail" but I always have fun trying new and different things. I really love the dimension and layers of texture captured in the Amazing Clear Cast Resin.

Until next time, have a great day and God Bless!

Thursday, March 13, 2014

Special Girl sign SimonSays

Happy Sunny Day to you all,

It's so beautiful out today.  I cannot wait to finish this post and get outdoors.  It's been a very, very long winter.  I believe the high today should be around 60 degrees.  YEAH!

So, I've been entering some challenges over at Simon Says Stamp Blog.  They have a Monday and Wednesday challenge and this week's Wednesday challenge is "Mother's Day/Special Girl"  My granddaughter will turn 2 on Sunday and since she's pretty special I thought I'd make her something for her room.  I had purchased these foam signs a LONG time ago at my favorite store...The Dollar Tree and had planned on making something for the girls but never got around to it.  Going through my stash of "stuff" I came across this one and knew it was time for Alexis to get her own room sign.  


I started out with my cricut and cut Alexis in a basic block font and then again as a Shadow Black Out Round to give it some depth.  I also created the butterfly and flower from my Amazing Crafting Products.  You can go here and see how I originally did the butterfly.  This time I used my Casting Resin instead of the Paperclay (less drying time) to create my pieces and painted them both with my Terri Sproul mixers from Sakura Craft.  It's super easy to mix the mixers with some 3d crystal lacquer and it paints onto the resin fabulously.  I also created Alexis' name in resin, but the letters were just too small for the sign.  I will just have to make her another project :)

I glued all my pieces to the foam sign after "stamping" some flourishes directly onto the foam sign.  I tried it on the back first to make sure it would work and it was fabulous.  Then I highlighted the edged flourishes with some purple glitter glue. 

a few glitter glue dots to the letters 
more glitter glue to the rhinestones 
more glitter glue dots as butterfly's flight pattern
and now she has her own room sign.  

I just love how this turned out...now I should make one for Miss Bella also.

I hope you've enjoyed my post today and as always,
have a great day and God Bless.


Wednesday, June 1, 2011

Getting Cricky Fashionable Friends Stamp Preview

Good morning,

I am so excited to talk about the new Getting Cricky stamps.  As you know I am the Getting Cricky DT-Coordinator so I have seen these stamp previews for awhile already.  I am sitting on pins and needles to get them into my hot little hands.  Each day I will feature one of her new sets.  She has them all on her blog, but I will have a giveway at the end of this post.

Today I am showing off her Fabulous Friends sentiment set.  These are available for preorder on her site here.  She will also be giving free shipping for ALL preorders off of her site.  Remember, for every stamp set you order she is also donating $1 per set to a charity.  Fabulous Friend's benefit is for Cancer Angels.  She did a lot of research to find out about all the charities she is donating to.  This is what Cancer Angels is about:

Taken off of Kristal's post -
Cancer Angels is a non-profit organization that helps aid Level 4 cancer patients of ALL kinds. Many of these patients have such severe cancer and chemo that working or holding down a job is near impossible. Cancer angels gives them hope and monetary help while undergoing treatment in this stage. Imagine finding out you have cancer, and losing your job, home, and everything else because you can't work. Sometimes you just need an angel...and this is my way of becoming a silent angel (all of us together) to those who so desperately need some good news in the midst of such a storm.

Isn't that just great?  I know I have had a few friends who could have used an angel and I am so proud to say that I have ordered a few of these sets, so I know that part of my money is going to help someone who is going through a rough time.

Okay, so here is the Fabulous Friends set:

I can't wait to get my hands on this set for some cards for some of my really good friends.  I have a hard time with sentiments, so these stamps will come in quite handily.  I already have a few card ideas and one of my favorite sentiments is "From one ol' bag to another".  hehehehe, my friend will get an absolute kick out of that.  And "The right shoe can change your life...just ask Cinderella" is another favorite of mine.  I also have an idea for that sentiment.  Really, I think I can use each and everyone of these sentiments.  That is one problem I have buying sentiment stamp sets, some of them just don't pertain to me, but I am pretty confident I will be using these alot.

Okay, so now for the giveaway...I am featuring a set each day for the next three days.  You will get an entry of each of the things you do.  I will add up all the comments left by Saturday night at midnight and announce the winner in the Simply Sunday challenge post and you will get to choose which stamp set you would like.  Ha, no, I am not giving you a random set, you get to choose which one you want or need.  So here is what you need to do: 
*Please leave a comment telling me which sentiment you like the best. 
*Become a follower, please, and/or leave a comment letting me know you are one and I will be sure to come and find your blog and follow you back.
*Post this on your facebook with a link back to me here and leave a comment telling me your facebook page.
Post a picture of the stamp set on your sidebar with a link back to me and leave me a comment telling me you did that.
*become an email subscriber  or let me know that you already are one and leave a comment.
Now that's 5 chances per day if you choose to do all of them times 3 days...so you have 15 chances to win a set of your choice of the new Getting Cricky Stamp Sentiments.  Woot, Woot.

Good luck