Followers

Showing posts with label Giveaway. Show all posts

Sunday, October 21, 2012

DT Announcement

Good morning everyone... so glad you all came back to join me on another adventure.  As many of  you  know, I used to be on the DT for Creative Paperclay®. When my term was up I did not reapply because I had a lot going on in my personal life.  I was sad to leave the team, but things come up and ... well you all know how it goes if you've been following my previous posts.  So about a month ago, Terri, the DT leader for Creative Paperclay® put out another request.  Well, I applied, a bit late, but I applied.  I really didn't think I'd get back on the team since my project was 12 hours late...lol.  BUT I did and here I am to start showing you what I've been up to again.  I really have to say, even when I wasn't on the DT I was still using my paperclay.  I LOVE this stuff.  It is so versatile and since I am a multi media crafter, meaning I use about  everything and anything and try almost everything I can incorporate my paperclay into almost any project I do.  Today I am going to show you how to make a personalized pin.
 
We go to a lot of airshows and they are forever handing out trinkets.  Last summer Austyn received this pin from FED EX and I took it from him.  Remember, I will use about anything to craft with.  Anyhow...I used my Amazing Mold Putty to make a mold.  Yes, if you remembered correctly I used to be on the DT for them also and now I am running out of this stuff.  Luckily my Michaels carries it, so pretty soon I will have to use my 40% coupon to purchase some more :(
Then I pressed my paperclay into the mold.  I DO NOT leave my paperclay in the mold very long.  I like to ease it out of the mold and let it completely air dry.  I do flip it occasionally and it usually takes about 24 hours to dry, depending on the thickness of course. 
First I used a tiny emery board to get into all the crevices and made everything smooth.  Then I painted the wings in this white Pearl Metallic paint.  I got this on clearance for .59 cents and it gives it the most beautiful sheen.  I wish the pictures were better, but I lost my camera and have to use my phone right now.
After the paint was dry I added a Extreme glitter Acrylic paint to the Wings ONLY.  
It really highlights the wings 
Then I printed a picture of little Miss Alexis and white copy paper and attached it to the center with the 3d Crystal Lacquer.  Again I wish you could really see how glassy this is.  I also sealed the entire piece with the lacquer and it really gives it a finished look. 
After everything was nice and dry, which, with the crystal lacquer doesn't take long to dry at all, I glued a pin  to the back of the piece with my E6000 glue to make sure I get a good solid bond. 
and here is Miss Alexis on my shirt.  

Now, I hope you liked my little tutorial and remember, I am giving something away each time I put up a post.  Today's giveaway is for these wings made out of paperclay.  I will just be sending you the actual piece made out of clay.  You can paint it, sparkle it and use it any which way you want.
This is what you will receive...
Also, remember, that paperclay is very light weight, so you can add this to a card or a scrapbook layout.  You can do whatever you choose with it.  If you win this and use it and post it on your blog or wherever, please send me a link and I will link back to you.
Now how do you win this?  Well here are the rules:
You have 5 chances to win these wings.

1.  Become a follower and let me know but if you already are just leave me a comment stating so.

2.  Leave a comment about my post and tell me what you might do with this.


3.  Tweet about my giveaway and leave a comment below with your tweet URL


4.  Facebook about my giveaway and comment below with your FB URL.


5.  Follow me on pinterest and let me know so I can follow you back.


I will announce the winner next Monday, October 29th right here.
So last week I made a post about my zipper pulls and I didn't get as much of a response.  Either no one saw them or they just didn't like them.  So I decided since I only had two comments I would give each of them one.  So, Nanette and Edwina, please send me an email at burffrau @ gmail dot com to claim your zipper pulls.  Put winner in the subject line so that it doesn't get lost in all my other junk.  :)


Friday, October 7, 2011

Amazing Molding Putty is in the HOUSE

Good morning


 (if you are here for my Creative paperclay submission project, please scroll down)


I am so excited to share a new product with you today.  As you know I've been involved with Creative Paperclay and now we have teamed up with a company called Amazing Molding Putty to give you even more uses for your clay projects.  I've been playing for a couple of days now and I can tell you this is so much fun.  I haven't touched much of anything else, my bad!!!  Ok, so here we go:


First this is what you need:
Here are my containers
now Terri  has an awesome video showing 
exactly how to make your mold, but since my
flip doesn't seem to be working right now, I can't
show you exactly how it's done.  :(
So I started out with this pin
when adding two equal parts of the putty and 
blending it together you create the beginning of a mold
I inserted my pin into the putty and let it cure for about 5 minutes.  
Here is your mold
Now you are ready to cast your mold.  Adding
two equal parts of the Amazing Resin cast and 
a drop of cranberry alcohol ink
pour the mixture into your mold slowly
and let that cure for about 10 minutes
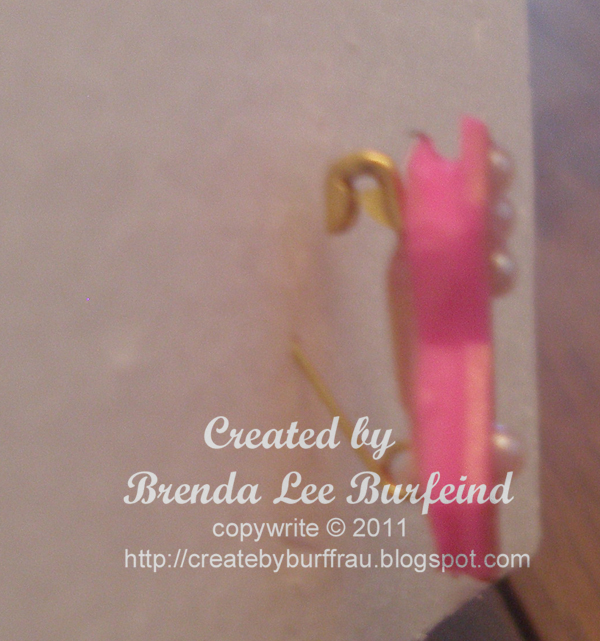
now I added a safety pin to the backside of the
pin using some E6000 blue
see how nicely that holds?
and then I added some flat back pearls to the pin
I then attached the pin 
to a flower I made 
for this card.
The sentiment is from the Getting Cricky
"Positive Thoughts" stamp set
in honor of National Breast Cancer Awareness Month
Isn't it beautiful.  The possibilities are ENDLESS
If you can mold it, you can cast it, you can pin it.

Now, for the start up of this new DT I am giving one lucky commentator one of these pins.  Would you like one?  Leave me a comment and tell me if you have ever created your own mold or cased anything.
2.  Like AMP on FB and tell them I sent you and come back here and tell me you did that
3.  Follow AMP here on their blog and tell me you did that.
4.  Post this giveaway on your blog and come back here and tell me you did that.
This gives you up to 4 chances to enter.  I will choose a winner on Tuesday, October 18th for the pink ribbon pin.  I will be back on that day with another post

I am also entering this over at JustYolie for the First Annual Link up for PINK.  It's a great cause and there are so many prizes to be had.

Tuesday, September 27, 2011

Creative Paperclay

Good morning friends

Today I want to share a project that was super easy and fun involving some more alphabet cookie cutters.  As most of you know, I am also a designer over at Creative Paperclay.  I love working with it for embellishments for my scrapbooking and cardmaking but this time I used the paper clay to make a sign for Miss Bella's door.  I am taking over decorating for her room and everything is coming together black and pink...

Here are my step by step instructions, kinda picture heavy.
I laid out some paper clay to the size I wanted the
sign to be...it measures 2.5 x 9 and then used my
fiskars embossing plates to add some flowers
Then I used my alphabet cookie cutters 
to cut out her name
now the centers of the B and A don't depress
enough, so I thought I'd cut heart out in the middle
I used the hole of a mechanical pencil to cut 
out the holes for the ribbon to hang
Here are all the pieces dried and ready to paint.
As you can see the holes in the A and B didn't
work, so I changed my mind...
I painted the sign first pink, then black and then 
washed a pink over it again.  I also painted all the 
letters pink and....
highlighted the edges with black
I glued all the letters to the sign, hot glued some lacy
ribbon around the back...glitzed up the letters with
rhinestones and added some bows with the lace.
I also made one stick pin for accent to the top
and added some pink and black ribbon as the hanger
I really love the way it turned out.

So, today I am giving away (1) 8 oz brick of Creative PaperClay.  I used half of a brick to make this sign and all the embellishments, so depending on what you want to make, it can last a while.  Be sure if you do not use it all at once to put it in an airtight container or it will harden on you as it dries by air.  I store mine in ziplock baggies after I've sucked all the air out of it.  

So, now to qualify to win this please let me know what you would make with it...have I given you any ideas or do you know of something you'd like to try?  
Also, please go to Creative Paperclay FB page and "like" them for a second chance and tell them I sent you and then come back here and tell me that you did that
For a third chance go to the Creative PaperClay blog and become a follower and come back here and tell me you did that

This giveaway ends on October 2nd and I will announce the winner 
October 3rd, so please make sure to come back here to see if you have won.

Thursday, July 28, 2011

Adams Acres giveaway

Just a quick note...remember those cute dinosaur cards I made awhile back?  
 
and 
There are 5 different dinosaurs in the file and Charity at Adams Acres is giving three sets away, so head on over there and see what you need to do to win them.  Super simple ...

Tuesday, June 7, 2011

Layered Flowers for swap

Good morning

I just wanted to quickly share the flowers I made for my Facebook swap group I belong in from last month.

Diane over at Capadia Designs made these and I followed her directions for the most part.  I really love the way they turned out, but my camera wasn't cooperating.  Hubby just got a new one, so I might have to "borrow" his.  LOL.  I did use the flowers from the Paisley cart so that I could do most of the creating at work using my gypsy.  I cut them all at 3.5 inches, 2.5 inches and 1 inch.


I used alot of my scrap paper so therefore they were all a bit different. 
Also, this way I didn't get bored with making 15 of them.  hehehe
I added buttons, bling and brad to most of them.

Don't forget about my "Getting Cricky" stamp giveaway here.  I will be drawing a winner on Sunday.

Wednesday, June 1, 2011

Getting Cricky Fashionable Friends Stamp Preview

Good morning,

I am so excited to talk about the new Getting Cricky stamps.  As you know I am the Getting Cricky DT-Coordinator so I have seen these stamp previews for awhile already.  I am sitting on pins and needles to get them into my hot little hands.  Each day I will feature one of her new sets.  She has them all on her blog, but I will have a giveway at the end of this post.

Today I am showing off her Fabulous Friends sentiment set.  These are available for preorder on her site here.  She will also be giving free shipping for ALL preorders off of her site.  Remember, for every stamp set you order she is also donating $1 per set to a charity.  Fabulous Friend's benefit is for Cancer Angels.  She did a lot of research to find out about all the charities she is donating to.  This is what Cancer Angels is about:

Taken off of Kristal's post -
Cancer Angels is a non-profit organization that helps aid Level 4 cancer patients of ALL kinds. Many of these patients have such severe cancer and chemo that working or holding down a job is near impossible. Cancer angels gives them hope and monetary help while undergoing treatment in this stage. Imagine finding out you have cancer, and losing your job, home, and everything else because you can't work. Sometimes you just need an angel...and this is my way of becoming a silent angel (all of us together) to those who so desperately need some good news in the midst of such a storm.

Isn't that just great?  I know I have had a few friends who could have used an angel and I am so proud to say that I have ordered a few of these sets, so I know that part of my money is going to help someone who is going through a rough time.

Okay, so here is the Fabulous Friends set:

I can't wait to get my hands on this set for some cards for some of my really good friends.  I have a hard time with sentiments, so these stamps will come in quite handily.  I already have a few card ideas and one of my favorite sentiments is "From one ol' bag to another".  hehehehe, my friend will get an absolute kick out of that.  And "The right shoe can change your life...just ask Cinderella" is another favorite of mine.  I also have an idea for that sentiment.  Really, I think I can use each and everyone of these sentiments.  That is one problem I have buying sentiment stamp sets, some of them just don't pertain to me, but I am pretty confident I will be using these alot.

Okay, so now for the giveaway...I am featuring a set each day for the next three days.  You will get an entry of each of the things you do.  I will add up all the comments left by Saturday night at midnight and announce the winner in the Simply Sunday challenge post and you will get to choose which stamp set you would like.  Ha, no, I am not giving you a random set, you get to choose which one you want or need.  So here is what you need to do: 
*Please leave a comment telling me which sentiment you like the best. 
*Become a follower, please, and/or leave a comment letting me know you are one and I will be sure to come and find your blog and follow you back.
*Post this on your facebook with a link back to me here and leave a comment telling me your facebook page.
Post a picture of the stamp set on your sidebar with a link back to me and leave me a comment telling me you did that.
*become an email subscriber  or let me know that you already are one and leave a comment.
Now that's 5 chances per day if you choose to do all of them times 3 days...so you have 15 chances to win a set of your choice of the new Getting Cricky Stamp Sentiments.  Woot, Woot.

Good luck