Followers

Showing posts with label Amazing Mold Putty. Show all posts

Wednesday, October 31, 2018

Spooktacular Ghosts and Pumpkins

Happy Halloween everyone,

today I'm going to show you a quick tutorial using my Amazing Mold Putty and some Scentsy! This is super easy to make and can be used for any holiday you wish!

I started out by cutting some ghosts and pumpkins with my Silhouette out of chipboard.  I cut 5 pieces of each and hot glued them ontop of each other to give them some height.


I added some washi tape around my ghost to give him some dimension.  My pumpkin kinda looks like an apple :(


Then I mixed up my Amazing Mold Putty, and you can go HERE to watch
a video on how to create your own molds using the mold putty.


Molding only takes a couple of minutes and with your imagination, 
you can create any shape you want.

Once the mold has set up, I began by melting some Scentsy wax in a glass 
dish in the microwave at 1 minute intervals and poured it into my mold.


I used Clarity for my ghosts and honey dew for my pumpkins.  
I didn't have an orange colored Scentsy flavor, but you get the idea!


Then I packaged them up and made them look cute.  
Wouldn't these make cute teacher or coworker gifts?


Please leave a comment and let me know what you think of my cute halloween gift.

As always, have a great day and God Bless.


Wednesday, June 14, 2017

#100daysofmolds

Good afternoon,

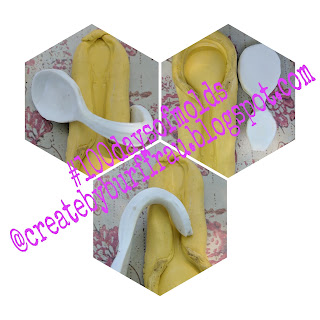
I'm not sure if you're aware but we are doing #100daysofmolds over on Instagram!  Head over to Instagram and check out what were talking about. Here's just a few examples of what I've been doing.


These are just raw resin pieces, but soon I will have finished products to show you with tutorials!

Make sure to also stop by the Amazing Mold Putty blog and check out what all the designers are creating over there!

Thanks for coming and I hope to see you soon!

Thursday, April 20, 2017

Elephant Mosaic

Welcome to our Stencil Girl's Bloghop.  I'm super excited to share a fun project with you today, but first a little backstory about myself before we get into the tutorial.  My name is Brenda and I've been with Amazing Casting Products since the beginning and I've enjoyed every minute of it.  My blog is Creativity is a State of Mind because I believe each one of us has a different view on artistic talent.  I've definitely come a long way since working with this Amazing team.  Also working with these products has taught me so much and I've enjoyed learning new techniques.  Therefore, whenever we can partner up with another designer or design team, I look forward to expanding my horizons.  

Since I've been on the design team for so long, I've accumulated ALOT of pieces.


Anytime I'm making a project I wind up with more and more resin pieces.  Some finished, some not.  And this is how my project was born ...

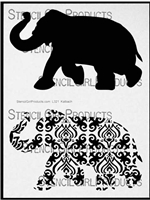
I started out with a foam core piece that I cut to 10 x 10 and I painted green with acrylic paint.  Next I took my Stencil Girl Elephant Parade (which by the way is my obsession)

 Elephant Parade Stencil by Nathalie Kalbach

and traced the elephant with a pencil after the paint was dry.


It doesn't have to be perfect because I'm only using it as a guide.

Next I got out my box of resin pieces and began laying them inside the elephant outline.  It was kinda like putting a puzzle together.  Absolutely every one of these pieces has a story for me.


Here are a few pictures of some of the pieces I used with their molds.  (I've made ALOT of molds :)  The Amazing Mold Putty is still by far my favorite product.  I love duplicating little charms and such that I find while antiquing or junking because I don't want to use the original piece.  Especially in a project like this one.

Some butterfly charms

A Fleur De Lis I found in a box I bought at an antique shop.

The Fleur de Lis that I embedded into an 
Amazing Clear Cast Resin bezel.

Some leaves that were molded from a broach that I got
in a jewelry lot at an auction.

Branches that were hair barrettes to start out.

I just have tons and tons of molds...

After I had all my pieces laid out the way I like it, I glued them down.  After they were all securely adhered I took the piece outside and spray painted it black.


I didn't let it dry completely though.  
In fact, I took a hairdryer and gave it a 3 minute blast on the cool setting.

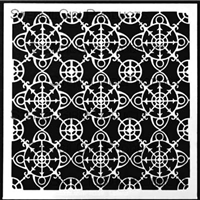
Stencil Girl's Ornamental Compass Screen was my next addition to this piece.  

Ornamental Compass Screen Stencil by Gwen Lafleur

I dry-brushed it with purple metallic acrylic paint around the edges of the corners.


While that was drying I also used the same acrylic paint and dry-brushed the 
elephant mosaic-ed pieces to give them some dimension also.

In my box of pieces I also found some roses I made a long time ago with the Amazing Clear Cast Resin.  I absolutely love how they looked like glass, but I did  want to give them a bit of dimension also.  I dry-brushed a bit of black and the purple metallic around the edges.  Just enough so that you can still see their clearness, but also some definition.  


After everything dried a little, I  saturated the entire piece with the Amazing Clear Cast Resin.  Not only does this give it a nice GLASS touch when it's cured, but it will also keep everything  in place.  But now here comes the magic.

I took a toothpick and ran it around the edges of the elephant outline while the clear cast resin was still wet and also within the stenciled area to "scrape off" some of the black and purple to expose some of the green base.  It gave is just enough color to make it pop.


After letting it cure for 24 hours I was able to display it in my elephant collection.  Now, the best part of this is it's weight.  If you would have used this many heavy trinkets, your piece would have been very heavy.  The Amazing Casting Resin is so super lightweight. 
This by far is one of my favorite projects up til now.


I totally love how this turned out and I hope you have found my tutorial useful.

Now for the bonus fun stuff.  There is a giveaway involved...


One lucky winner will receive both a $25 Gift Certificate to StencilGirl Products

AND a $25 Gift Certificate to Amazing Casting Products!
Visit the fabulous designers from both teams and comment for your
chance to win!
The more blogs you comment on, the more chances you have to WIN!
(One comment per blog please.)
You have until Sunday, April 23rd at 11:59PM Central Time to leave your comments.
Winner will be announced on
StencilGirl's Facebook page and Amazing Casting Products’s Facebook page
on Monday, April 24th.

So thank you for coming and hopping along with us today and be sure to leave a comment so you get entered in the giveaway.  Until next time, happy crafting.

Monday, May 16, 2016

Butterfly keys dancing with Amazing Casting Products

Good morning friends

I love perusing Pintrest and sometimes I find something that I want to make immediately.  Sometimes I have what I need on hand and sometimes I have to punt.  This is one of those times.

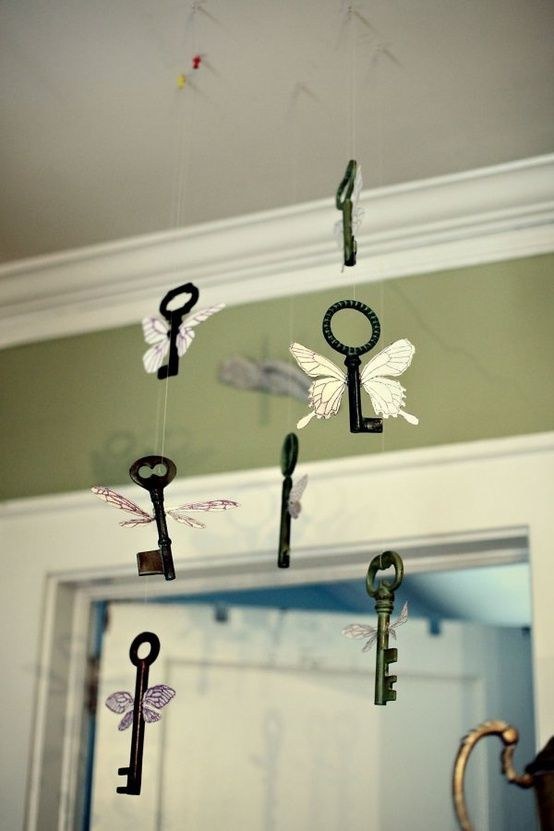
This is what I found on Pinterest:
Decorate with winged keys.

And this is what I made:


I started with my molds of keys that I made using my Amazing Casting Products.  I love keys!!!


I made my very lightweight keys.


Then I hot glued my butterfly wings to the keys


all different shapes ...


... and sizes


I tied fishing line to the keys and 
to an old embroidery hoop


I even glued some of the butterflies around the embroidery hoop


I love Pinterest, but I don't always make what I find 
exactly the way I saw it!  I like putting a spin on my project.

I hope you've enjoyed my version of the butterfly keys.

Thanks for looking and I hope you leave me a comment.

As always, have a great day and God Bless.


Sunday, May 15, 2016

Lucky Horseshoe #Reclaimedbarnwood


Happy Sunday to you all!

Today I wanted to show you something I am super proud of.  I've been creating a lot of reclaimed barnwood signs as of late.  I'm hoping to show some of my signs off in the upcoming weeks.  But today I wanted to share this one with you. Remember when I made my horseshoe wreath of sorts?


You can view that post HERE

Well I wanted to use the horseshoe mold again for this project.
I haven't used this mold for about 8 months, but it's still as pliable as the day I created it.


First I "painted" the mold with the Alumilite powders.
Just dip your dry paintbrush in the powder and dust the mold.
I also used my Amazing Casting Resin mixed with the 
Alumilite Silver Metalic Powders for the base of the horseshoe
I made it look old and rusty.


The resin piece is super lightweight and it was easy to screw into my board.
I also painted the screws over so that they didn't look "new".
You can hardly even see them! 


I just love how grungy this looks.


And here is my L U CKY sign, painted and ready for it's forever home.  
Now had I used a real horseshoe this sign would also have been very heavy.

I hope you've enjoyed this quick and simple tutorial and would love if you left me a comment.

As always, have a great day and God Bless.

Saturday, May 14, 2016

Keychain with Amazing Casting Products

Good day

I was gifted this lovely key chain a couple days ago and while I absolutely love it it's a bit heavy to put on my keyring.  You do know that too many things on your key ring is not good for your ignition right?  When your keys are heavy it weighs down on the ignition.  I really wanted to use this key chain, but don't want to wreck my ignition, so of course what do I do?  Yup Amazing Casting Products to the rescue because the resin piece will be super light weight!


First I mixed up equal parts of the Amazing Mold Putty and you can view mixing instructions HERE


After my mold was set which took less than 10 minutes
I mixed up equal parts of the Amazing Casting Resin with some 
the preparations for mixing HERE.


That set up within 10 minutes also.
I did run a little bit of Rub n Buff over the resin and
added some rhinestones. 


I love how this turned out and now I can proudly hang my 
car keys on it and not worry about wrecking my ignition.