Good day friends and crafters. Today is another challenge over at Simply Create Too and I'm so excited to show you a project I made that came about from a fail. This week's challenge is ALL GREEN. I love to experiment and sometimes it works and sometimes it doesn't.

It all started with a butterfly cutout I had. I really wanted to turn this beautiful butterfly into a stamp. I mixed up some Amazing Mold Putty and you can see mixing instructions HERE. I pressed my butterfly cutout into the mold putty and waited for about 10 minutes.

When I pulled the butterfly out I realized it didn't look perfect, so I cut around it anyway using regular scissors. There were definitely some imperfections and when I stamped it, it didn't give me a clean look (sorry no picture of the stamped image). I really didn't want to waste all that mold putty and so I thought and thought about what I could do with it.

I remembered a tutorial I made for this Valentine's day pendant.
You can go and view it HERE!
You can go and view it HERE!

I used the same concept again. This time however, since the Amazing Mold Putty had already set up, I couldn't get my heart clay cutter to go through the putty. I could get a bit of an indentation of the shape and then I just used my scissors to cut the hearts out. Since the putty was so thin, it was very easy.

Here are my hearts and I even used an edge of the butterfly to create the stem for my shamrock. You can see that it had even been stained with the ink.

Now, the hoarder I am... I had these cute little ceramic
coasters that I purchased eons ago at a thrift store.

I tried hot gluing the putty pieces down, but they just popped right off. I sprayed some Krylon Spray Adhesive to the pieces and glued them onto the ceramic coaster. That worked like a charm!
Then I mixed up some Amazing Casting Resin and poured it into the dish, just enough to fill around the shamrock shape. There is a video HERE you can view on mixing instructions.

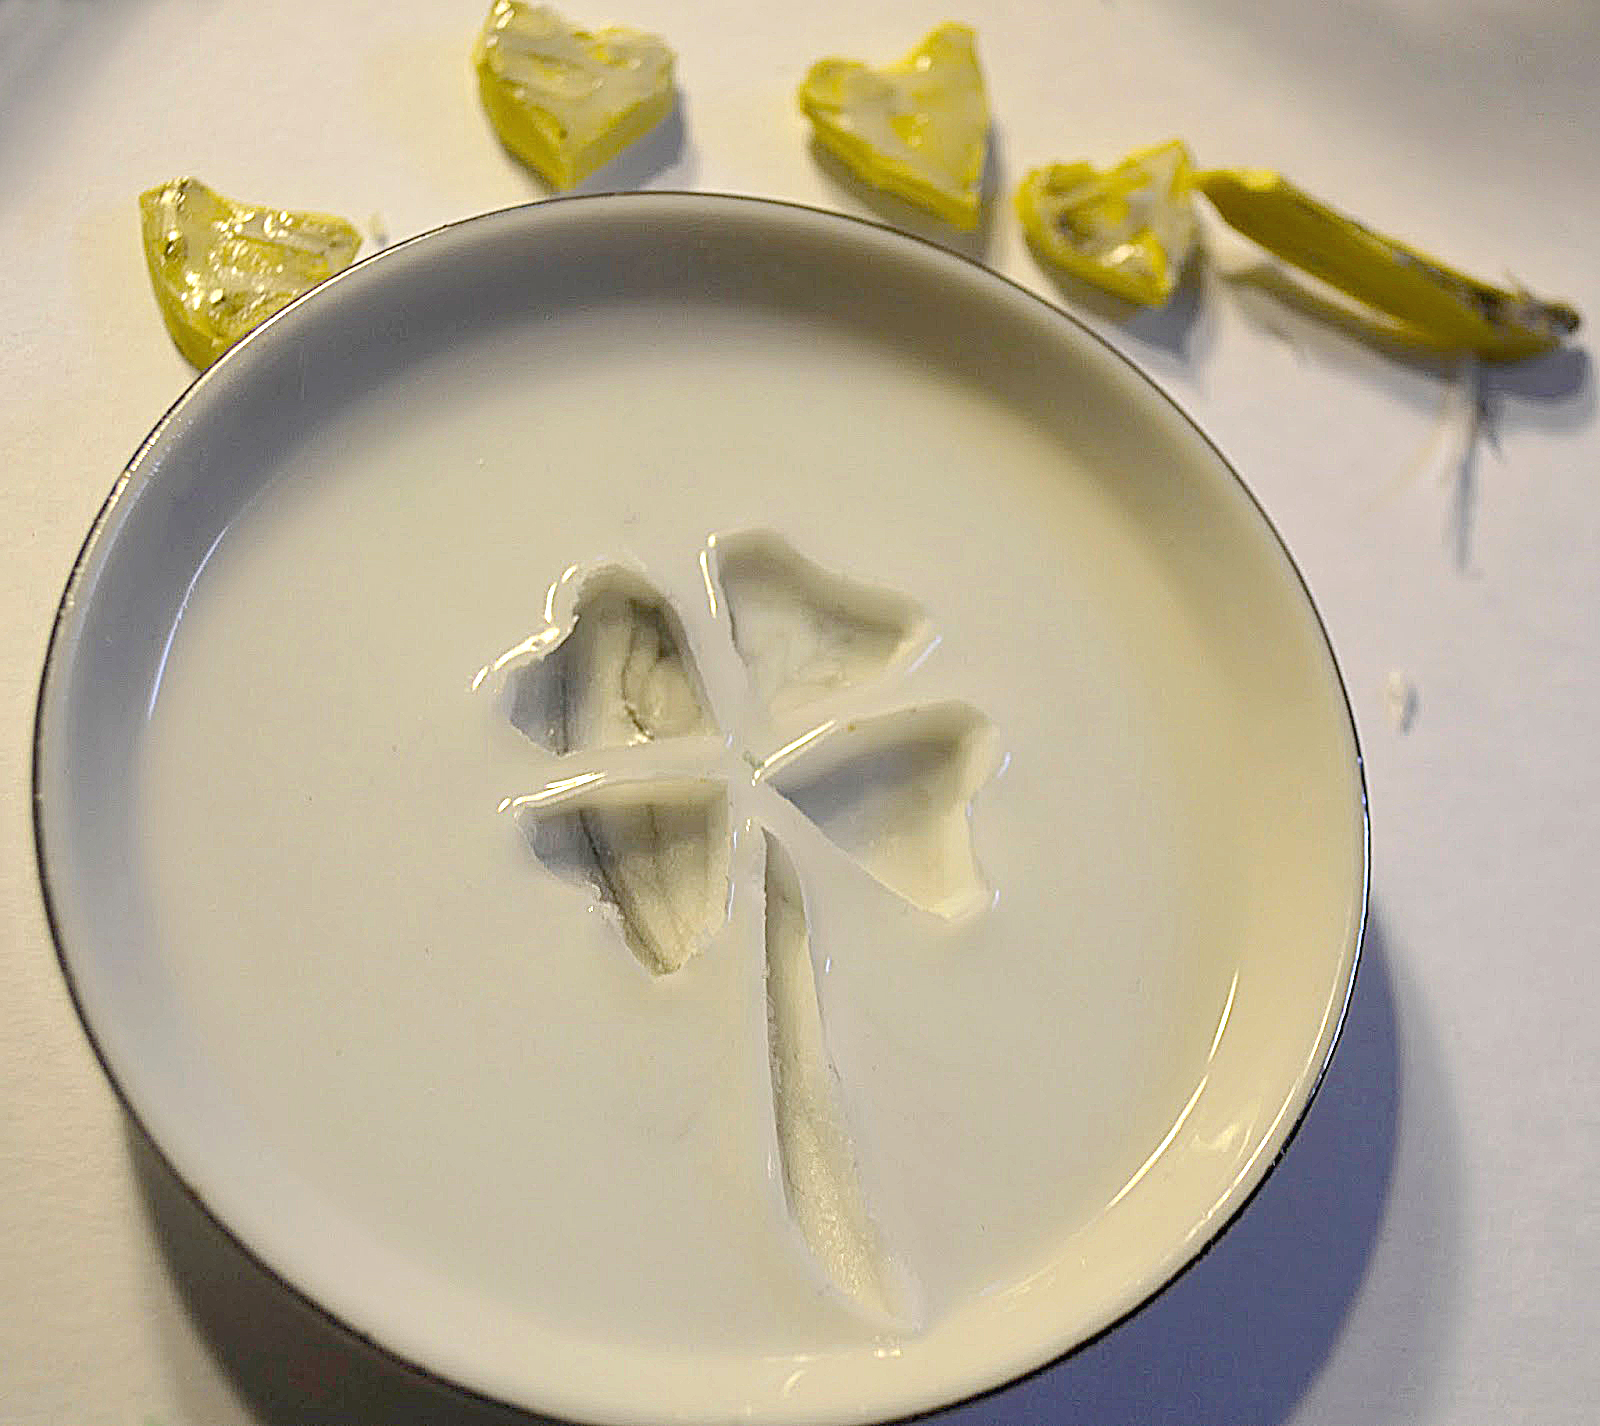
That set up to cure for about 10 minutes and then I gently pulled the pieces out.
Pretty cool huh?

Then I mixed up some more Amazing Casting Resin with the Fluorescent "FLO" Green Dye and filled in the open areas. That also set up in a matter of minutes.

And here you have an Amazing Shamrock ring dish!
You can view more projects by the design team over at Amazing Casting Products HERE
You can view more projects by the design team over at Amazing Casting Products HERE

I am so excited about my (failed) fabulous Shamrock ring dish!
Have you had a failed project
that you turned into a masterpiece?
I hope you will head over to Simply Create Too and join our challenge.
Until next time, have a Lucky Day!
I hope you will head over to Simply Create Too and join our challenge.
Until next time, have a Lucky Day!


