Good morning and welcome to another Creative Paperclay® post. With Christmas literally just days away I am scrambling for those last minute gifts. Sometimes you just need a little something for someone and that is what I have for you today. I had made a project awhile ago using some snowflakes that I cut out of vinyl and then I was left with all these scraps of snowflake cutout from the vinyl. I hate to see anything go to waste so I used them up like this... I started out using an empty bottle because I have soooo many and adhered those pieces randomly on the bottle.

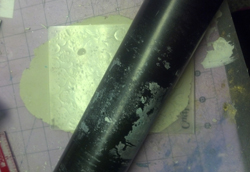
 Some of those pieces were pretty close to the edge and if I was to etch them I might go over, so I just used some scrap pieces of contact paper and adhered those close to those edges. Then I added my glass etching paste and let that sit for about 10 minutes.
 Because I hate waste I use whatever I have on hand and scrap the etching cream off of the item that's being etched and put it back into the bottle. I've been using this same bottle of etching cream forever.


Once I removed those pieces of vinyl the snowflakes came to life.
I LOVE IT!!!
 Now you might be wondering why this is a paperclay post? Well, the bottle was a Maggi bottle and the lid wasn't going to cut it.
 So I rolled out some paperclay and put it around the lid. I wasn't worried about smoothing it out because...
 while it was still wet I rolled it over my "wood grain" embossing folder to give it dimension.
 Once it was all dry, I just used my exacto knife to cut away some of the clay so that it had a perfect fit
 and painted it brown, black, brown, watered down black, etc. until I got the "look" of a cork
 See the dimension? Isn't that cool?
 and here is my faux cork. (really baaaad picture)
 Next I rolled out some paper clay and


used an embossing folder and sandwiched the paperclay between it.
 and gently used my rolling pin to get a good image embossed.
 Then I used my snowflake cookie cutter to cut the shapes out randonly
 and let them dry overnight.
 I made a boat load of these and have another project to show you soon.
 Very cool embossed snowflakes.
 Then I painted them white and embellished
them with some gold glitter glue.
Then I painted them white and embellished
them with some gold glitter glue.
 I filled the bottle with hot cocoa mix and added two of my paperclay
snowflake ornaments and now I have the perfect gift to give to someone.
I am really liking this project and I have just the perfect person in mind to give this to.
I filled the bottle with hot cocoa mix and added two of my paperclay
snowflake ornaments and now I have the perfect gift to give to someone.
I am really liking this project and I have just the perfect person in mind to give this to.
 I really wished the camera could pick up on the etching better,
 but in person this looks magnificent.

I added a bow and now I have a perfect "gift"

I hope I've inspired you to use some Creative Paperclay® and hope you come back to check out more of my projects. Until then, as always, have a great day and God Bless.


I added a bow and now I have a perfect "gift"


