Followers

Showing posts with label faux Baker's Twine. Show all posts

Friday, October 21, 2011

Circles Challenge at LTC

Good morning friends
Today is another challenge filled day over at Love to Crop.  I just love Amy and her blog challenges...  Have you seen some of her explosion boxes?  WOW.  She is so gifted and I am always honored when she wants ME to guest design.  Well, every other Friday she hosts a challenge on her blog and this week it's all about "CIRCLES".  Easy, right?  So here is my take on the challenge and I hope you like it, cuz this was probably the easiest card to create.
I started with my circle Halloween paper as my background
and punched 3 circles each in black and orange.  I inked around
the edges of the orange circles in black and using my alphabet
stamps I embossed the words BOO with gold embossing powder.
I used my glitter gel pen and traced around the black circles
then pop dotted the orange circles on top of the black ones.
I added my "faux" bakers twine that I colored both
in orange and black and tied a knot in the middle.
Then I added a few rhinestones to keep with the circles 
challenge  that I colored orange with my bic markers. 
I just love making all my own embellishments...easier on the pocket book
Lastly I added one of my Creative Paperclay® ghosts (you can see my tutorial on it here)

See, super easy and quick!!!
Now go and create a project using "CIRCLES" and head on over to LTC and enter Amy's challenge.  I believe the challenge is open until November 3rd, but check out her blog for more details, plus she also has some blog candy you could win for entering.

Sunday, July 3, 2011

Simply Sunday "Summer Fun"

Good afternoon friends,


***If you are looking for the Lasting Memories post, please scroll down***

Welcome to another Simply Sunday challenge over at Getting Cricky and it's Summer Fun.  I am so excited about today's challenge because I did something new!!!  I am using the Splashtastic Summer stamp set and really had a ball with this one.  Now remember, for EVERY stamp set you purchase, Kristal is donating $1 to a charity.  Again, that's for EVERY stamp set, not just right now, or last week, but forever as long as she sells them.  So when you are thinking about purchasing a set, think about how you will be helping a charity also.  Isn't that just a great feeling?


I wanted to make an action wobble card.  About 6 or 8 months ago I received a sample package of those action wobbles and put them aside and totally forgot about them.  Ugh, I tend to do that way too much...  I didn't have a seal on any of my carts so I found a clipart of this seal and traced it in SCAL.  I used one peachy keen eye from one of my sets and added a smiling face which I free hand drew.  Straight and curve lines I can draw, but that's about the extent of it.  The background paper was from my stash and I made my own faux baker's twine like I did here, only this time I did three colors and I love it. I had these beach balls in my stash also and they were just perfect for this card.  Now back to the wobbles...I cut my seal and went to add the wobble...and it was too BIG, or my seal was too small.  I was so bummed until a light bulb went off and I made my own action wobble.
Let me show you how I did it but be aware this is a photo heavy tutorial:


and there you have your own action wobble.  Now, mind you, I am not taking away from the Action Wobbles, because they are awesome.  My problem was that I need the wobble to be smaller because my seal was too small for the "real" action wobble.  I just needed to make my own for smaller cuts is all.  Here are a few shots showing my wobble in action...I wish I had the time or patience to make another video.  I just don't know how some of you guys do it, plus I do not have an editing program and believe me, I need a lot of editing help.  LOL


So what do you think?  Cute eh?  I think so.  Now go make something with "Summer Fun" and head on over to Getting Cricky and join our challenge.  If you have the Splashtastic Summer stamp set use it and HAVE A BALL!!!

Sunday, June 26, 2011

Lasting Memories #44 "Scrapbook pages that Recycle"

Good Morning,

So here we are again with another Lasting Memories submission.  This week we are using recycle-able things, or reusing something we can re-purpose.  This challenge wasn't hard for me at all...you should see my craft room.  I keep EVERYTHING that I think can be reused, recycled or re-purposed.  When I was growing up, my mom used to say "when we move, we just need to pack Brenda's room, because if you need it, it's in there".  Ha, well mom, I'm still that way!!!  I guess I've been helping save the earth for at least 37 years...uhum!!!  The other day I was going through some of my son's clothes that don't fit anymore and I donate a lot of stuff to Goodwill and such.  He had these awesome dress shirts, but they had some stains so I took the buttons off.  Yup, recycle them babies.  Then I went through the linen closet and found some table runners that I've had for a hundred years and don't ever use.  As I was packing them up when I thought some of them had some lace on them that I could reuse somehow, so out came the scissors.  I was also cleaning out some of my flower designs that have lost their use.  I tore apart a topiary I made a long time ago and kept the flowers, cuz you just never know.  Well, I combined all these things and this is what I came up with:

Now the flowers on the Title are from the topiary set along with the buttons from Austyn's dress shirt.

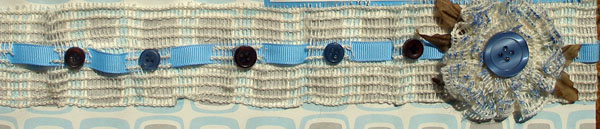
The tan fabric/lace is from the table runner.  I cut about every 9 holes and weaved a piece of blue ribbon through it.

I punched a flower out of blue cardstock and then layered strips of the lacey stuff around the punch with hot glue to make a flower.  Then I inked the fabric and added a button to form the flower and hotglued some leaves to the back of it.

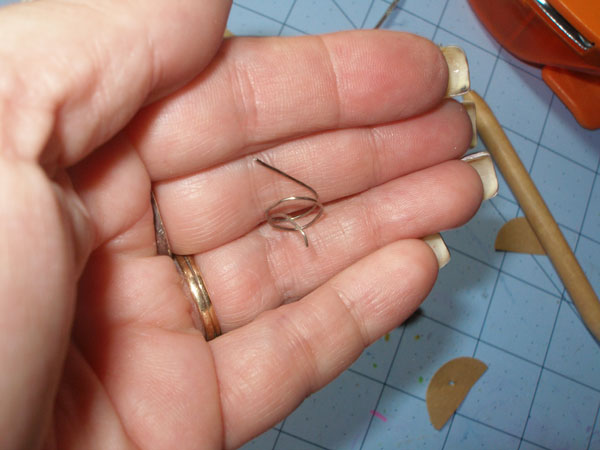
The tags are cut from SCAL's tags shapes and inked around them.  Then I used more of the lacey fabric and cut strips to attach to the tags.  I also used some leftover twine and made my own baker's twine.  If you want to see how I did that you can check it out here.

Now the title/tag I made for myself.  You see, I just underwent some major dental work and I am so excited to be able to really SMILE for a change.  It's been a long time coming and I feel so much better about myself.  I wanted to commemorate this feat for myself, thus the layout is for ME!!!  I used Getting Cricky's stamps set "Positive Thoughts" and "Amazing You".  Now, some say you shouldn't brag about yourself, but I don't think I am bragging, just feeling good about ME!!!  Believe me, it's a new feeling for me to be this happy and confident.  Even my BFF said that I am smiling more and actually laughing out loud.  My mom used to always say, when you feel good about yourself you are a nicer person and it shows.  Well, mom, again you were right!!!

So I hope I've inspired you to create a layout with things you can reuse or recycle.  Remember, every little bit helps.  If you don't recycle on you layouts, remember to recycle through your garbage though.  It doesn't take very long to separate your items and help save the earth one step at a time.