Followers

Showing posts with label Amazing Mold Putty Blog. Show all posts

Wednesday, February 11, 2015

Amazing Remelt to stamps

Good morning friends,

today I want to show you how I came up with a project by accident.

Not too long ago Amazing Crafting Products came out with a new product called Amazing Remelt.  This is such a neat product.  It does however come in this giant container and I didn't like the idea of remelting it each time I wanted to use just a little.  So I decided to melt the entire container and pour it into some ice cube trays so that I could just pull out a bit at a time to melt to create my molds.


Now whenever I want to create a mold I can pull the right amount out to melt.


So while getting ready one morning I pulled the cap off of my deodorant and saw that the inside had a unique shape.  Of course my mind started spinning...could I actually make something from this? 


I pulled my remelt out and poured my "mold"  You can see I also created a cup from my Amazing Mold Putty.  The remelt does get warm and in using the mold putty cup I can just peel it out when I am done.


Loved it


Then I cut the inside out and made another mold.  
Now you are probably wondering what I was going to do with these?
Well ....


I created a stamp and using various other pieces I created some more stamps.  
See #2 and #4 are the stamps I created using the deodorant cap.
#1 and #6 were the pieces from the ice cube trays.
#3 and #5 were created from a breast cancer medallion I had made a while back.

I can't wait to use my "new" created stamps to make up some cards.

I hope you've enjoyed my tutorial today and leave me a comment telling me what unique item you would mold to create a custom made stamp.

As always, have a great day and God Bless.

Sunday, May 25, 2014

Bird of Paradise Tile

Good morning crafters,

Today I am here to show you a tile I made by experimenting.  I've been playing with a few products and created this:

I started out with some Creative Paperclay and a wood tile. 
Cutting around the wooden tile I cut out paperclay and although it's an air dry clay I baked it for about half and hour turning it every 7 minutes of so to get a nice even bake.  I use a small toaster oven to bake all my clay and never use it for anything else. 
I still had a little bit of this gorgeous paper left over from my April Frog Dog Studio kit and decided to "muddy" it up a bit using some alcohol inks. 
I also used some Alumilte Silver Metalic Powder and Alumidust in Orange and created a spray mist.
Here is what the tile looks like after mod podging the paper to it. 
You can still see some of the original paper, but I did want just a hint of the details.  Once I got the color I wanted I modpodged the paper to the tile and sanded around the edges.  Then I took my orange ink pad and ran that around the edges to give it almost a burnt look.
Now, I mixed up the Amazing Clear Cast resin and painted it over my tile.  Then I mixed a bit of the Alumilite Blue Dye into the remaining clear cast resin and puddled it around the top of my tile and "blew" it with my heat gun.  It gave it some interesting detail.  I sprinkled some orange glitter in the blue area just for bling. 
I used up the rest of the clear cast resin with the Alumilite blue dye to cast my bird of paradise also from the April Frog Dog Studio kit and I created a mold of it using my Amazing mold putty.  Actually, if you missed that post, you can see it here.
After she was set up, I demolded her and glued her to my tile 
I added a pop tab to the back of my tile as my hanger and now I have a very unique tile to hand in my bathroom just because that color palette will work there very well. 

Thanks for stopping by today and as always, have a great day and God Bless!

Saturday, April 5, 2014

Frog Dog Day 3 Time to Create Clock

 Good morning crafters and welcome to day 3 of my Frog Dog Studio creations. 
 If you missed any of the posts just keep scrolling down.
All this week I will be featuring parts and pieces from this month's Frog Dog Studio kit.  We partnered up with them this month and as one of the designers over at Amazing Mold Putty I got this month's kit about 2 weeks ago and have been dying to show you what I've made.
Here is the kit
The Frog Dog Studio April Mixed Media Kit includes:
(1) **Alumidust Powder - Red Plum; (1) StazOn Midi Ink pad - Claret; (1) StazOn Midi Ink pad - Blue Hawaii; (1) iZink Pigment Ink bottle - Gold; (1) Stampendous Mica Fragments Jar, Pearlized; (1) Dusty Attic Chipboard set - Birds; (1) Stampendous Mini Clipboard Canvas pack; (1) Set Canvas Mini's - Canvas Corp; (3) Sheets of Decopatch Tissue Paper; and (16) Tim Holtz Clear Fragments (random sizes/shapes). ** Alumidust is one of the many additives from the Alumilite Corporation.

and also the add on kit
The Frog Dog Studio  April Add-On Kit includes:
(1) Amazing Clear Cast Resin – 16 Fluid Oz Box; (1) Amazing Mold Putty – 2/3 lb Box; (25) 1 oz Measuring Cups; and (50) Wooden Stir Sticks. Valued at over $47

 So let's get started with today's project.  I've had this clock in my "need to redo" stash for a long time.  I initially bought it at a thrift store or garage sale because I thought I could do something with it for my granddaughters.  Ultimately when I got it home I realized that the clock mechanism was broke.  That's probably why I got it for .25 cents.  Either way, I put it in my "need to redo" stash and forgot about it until a couple of weeks ago when I was CLEANING my craft room.  It really needed it too.  I had also just gotten my Frog Dog Studio kit and a light bulb went off.  The pink of the clock struck an idea to use the beautiful bird of paradise paper.  I LOVE IT! 
I popped the acrylic lid off and tried prying the paper off.  
Needless to say they used more glue than I have in my craft room, LOL. 
 Unfortunately I had to destroy it. 
I measured the clock and using my cricut I cut a white piece of cardstock to fit inside my clock perfectly. 
I laid the piece of cardstock inside my clock and with a pencil circled the inner circle so I could reattach the clock mechanisms, even though they don't work.
and cut it out.
I cut my paper using the circle as my template and mod podged it to it.
Then I pulled out my Mica fragments that come with the kit.  I have NEVER seen or used these before and had no idea what to do with them.  I had to google them and got a few awesome ideas on how to use them.  I have found a new favorite product for sure.  Being on a design team definitely has enabled me to purchase things I would never have thought of or known what to do with.  I will have to get some more of these as I can see me coloring them in all sorts of beautiful colors as you will see in the next couple of pictures.
I have "dyed" a lot of things with alcohol inks and dying these fragments works fabulous.  I actually keep my little baggie with my alcohol ink because I use it over and over. 
I've dyed pearls, beads and all sorts of small items. 
Just put a few of your fragments into the baggie and add 3-4 drops of the alcohol ink.  Shake it up and within seconds you have colored fragments. 
Look how beautiful they are!  
and here is what I did with them.  I mixed both the "colored" fragments with the silver ones and then ...
...I used my Alene's paperglaze and painted onto the outside of my clock and dabbed a few of these fragments onto it.  I used to do a lot of mosaic work and this kinda reminded me of that. 
Now because the clock mechanism didn't work anymore I decided to take it apart (also because the "purple" hands didn't work with the color palette) and make a mold of the clock arms using my Amazing Mold Putty.  Just mix your putty and press your pieces into it.  If you have not seen how to make a mold click here and you can see a video of how it works.

Then I pulled my Bright Blue Alumidust out and mixed it with Part A of the Amazing Clear Cast Resin.   
Then I mixed Part A with Part B and mixed and poured my mold.
I thought for sure I had taken a picture of that, but when editing my pics it was not there??? 
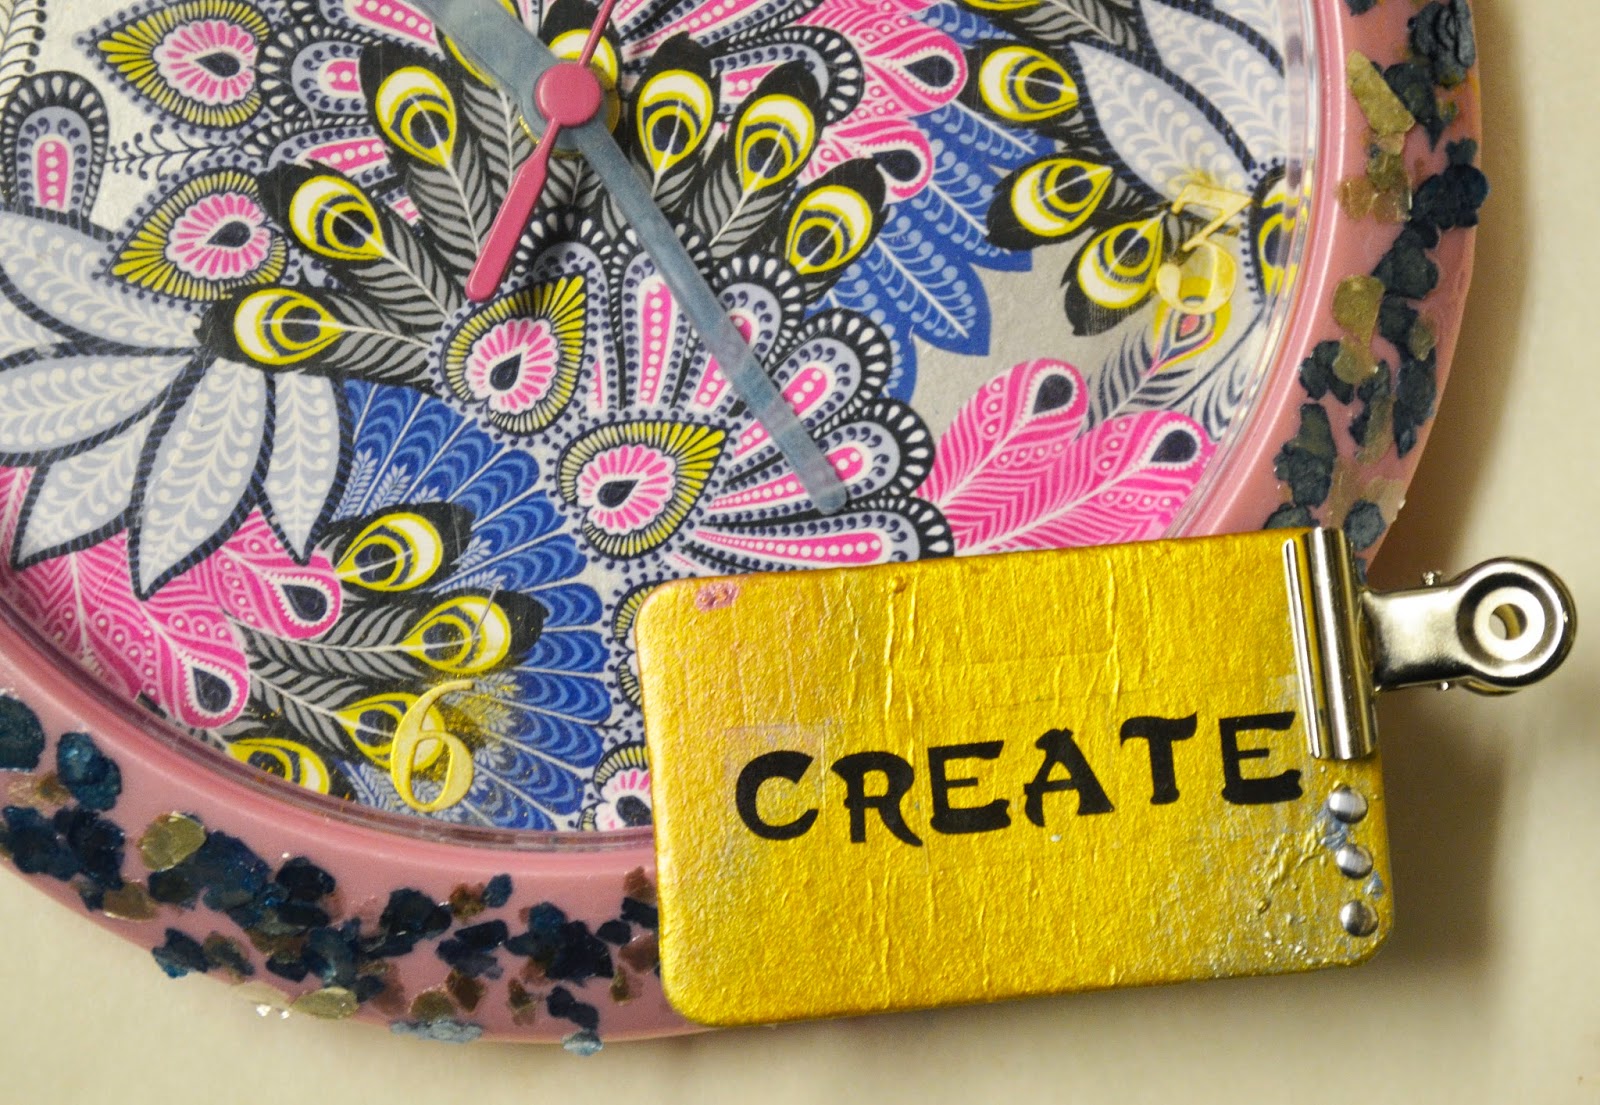
I also used the "little clipboards" that came with the kit (again no pictures???  I am seriously wondering if I lost some pics somehow because I'm pretty good at taking pictures, too many at times) and painted them with the Pigment Izink in gold that comes with your kit and brushed some of the Bright Blue, Silver and a bit Cotton Candy Alumidust in the corners and set it with my heatgun. 
I added some clear/black letters to the clipboards and added a few silver flat backs onto the clipboards and hot glued them to the frame of the clock. 
See my "almost clear" bright blue hands?  They match perfect for this project. 
 I did keep the pink second hand because that did fit the color scheme. 

and now I have a clock that tells me it's "Time to Create"  ALL THE TIME! 

I hope I've inspired you to make something out of your "need to redo" stash if you have one using the products I've talked about today.  You can find everything by following the links above.  I hope you will come back tomorrow for another project I made using more of the Frog Dog Studio pieces from the April kit and of course my Amazing Crafting Products.  Please make sure to check out ALL the posts this month over at the Amazing Mold Putty Blog.  You are in for a treat with all the designers.

As always, have a great day and God Bless. 


Friday, March 28, 2014

CFC130 Oval I Like Your Style

Good morning,

It's Friday and again over at Cas-ual Fridays a new challenge has sprung up.  I love participating in the challenges and today is no exception.  Today's challenge was to use Ovals...

Let me start by telling you since I am on the design team over at Amazing Crafting Products I pour A LOT of molds.  Currently I have one of those paper keepers, you know the ones that hold 12x12 scrapbook paper in them made by Iris?  Yeah, you know the one.  It is FULL of poured embellishments.  I have enough embellishments to start my own store.  Some are half painted, some are blank, some are finished but never applied to anything.  So when I saw the challenge today I decided to find something in my box to create with.  I really need to use what I have made and I found this:

A perfect oval.  I had poured this the other night because as I was making something and I had mixed too much resin and instead of wasting it, I just pour another mold.  That is exactly why I have this FULL box!  This piece was poured with Amazing Casting Resin mixed with Alumidust in Bright Blue.
Here is a picture of the actual mold using my Amazing Mold Putty.  
You can go here to see how you can make your own molds.
I started with dusing some Alumidust in Gold directly onto the mold and then spraying it with water.  Using your heat gun, just slightly heat it up and it's set!
Now, I wanted some bling also...I used my 3d Crystal Lacquer and glued rhinestones onto each of the peaks.

Now the big center peak is not flat so it's impossible to lay a rhinestone on it.  Back to my Alumidust, this time in Bright Blue and following the same procedure as above I created my center.
I kinda craft backwards alot.  Most everyone picks their paper, then their embellishments.  I'm the opposite; I create my embellishment and then I have to hunt for the right paper.  
I found this awesome paper in my stash from DCWV, the RockStar Mat Stack.  I knew it would be perfect for this card.
Again, still working backwards, now I needed a sentiment.  I stamped my sentiment on some bright blue card stock which matched my Alumidusted embellishment perfectly with the saying of...
I like your style.  Love how this all came together.  The stamp set is from Getting Cricky from when I was on her design team.  I still use this particular set allot.
I really do like how this clean and simple card turned out.
Adding that ribbon made it look like a belt buckle.  The perfect addition for any Rock Star.
Now, if you have looked closely I added a new addition to my craft room.
Can you see what I am talking about?
Do you know what the card is resting on?
Ha, it's a hand brush/mirror combination I found at the Dollar Tree.  I've seen so many people have these cute card holders and never knew what they were called or where you would even find one.  When I saw this at the Dollar Tree I immediately thought I could turn this into a card holder.  I might go ahead and spray paint it silver though...what do you think?

So, I hope you've enjoyed my card today and if you haven't participated or are looking for some challenges, Cas-ual Fridays is a great one to start with.

As always, have a great day and God Bless!