Followers

Showing posts with label Crop A Dile. Show all posts

Wednesday, March 12, 2014

Personalized Divot Repair Key Chain


Hi all, it's Wednesday and you know what that means?  I am here to show you another project I made over at Amazing Crafting Products.  Wednesdays have been AMAZING!!!

As some of you know my son is an avid golfer. If he could, he'd be on the golf course every day. It doesn't help that we live in subzero temperatures 6 months out of the year and he can see the golf course from our house. :)

He celebrated his 14th birthday in January, so I thought I'd make him a personalized keychain for his locker at the clubhouse.


I started out with a "divot fixing tool" (I'm sure there is a proper name for it, but I haven't a clue) that he got when he played at a tournament that was sponsored by one of the hospitals here in town.


It's made out of metal and has this cool dome shape with the hospitals logo on it. Instantly I knew this could be personalized. (whenever I make a mold of something and have excess I try to use as much of the Amazing Mold Putty as possible to keep from wasting it, therefore you see other shapes, but they were NOT used for this tutorial.)


I am so in love with the Amazing Clear Cast Resin,
so I decided on a glass looking keychain.


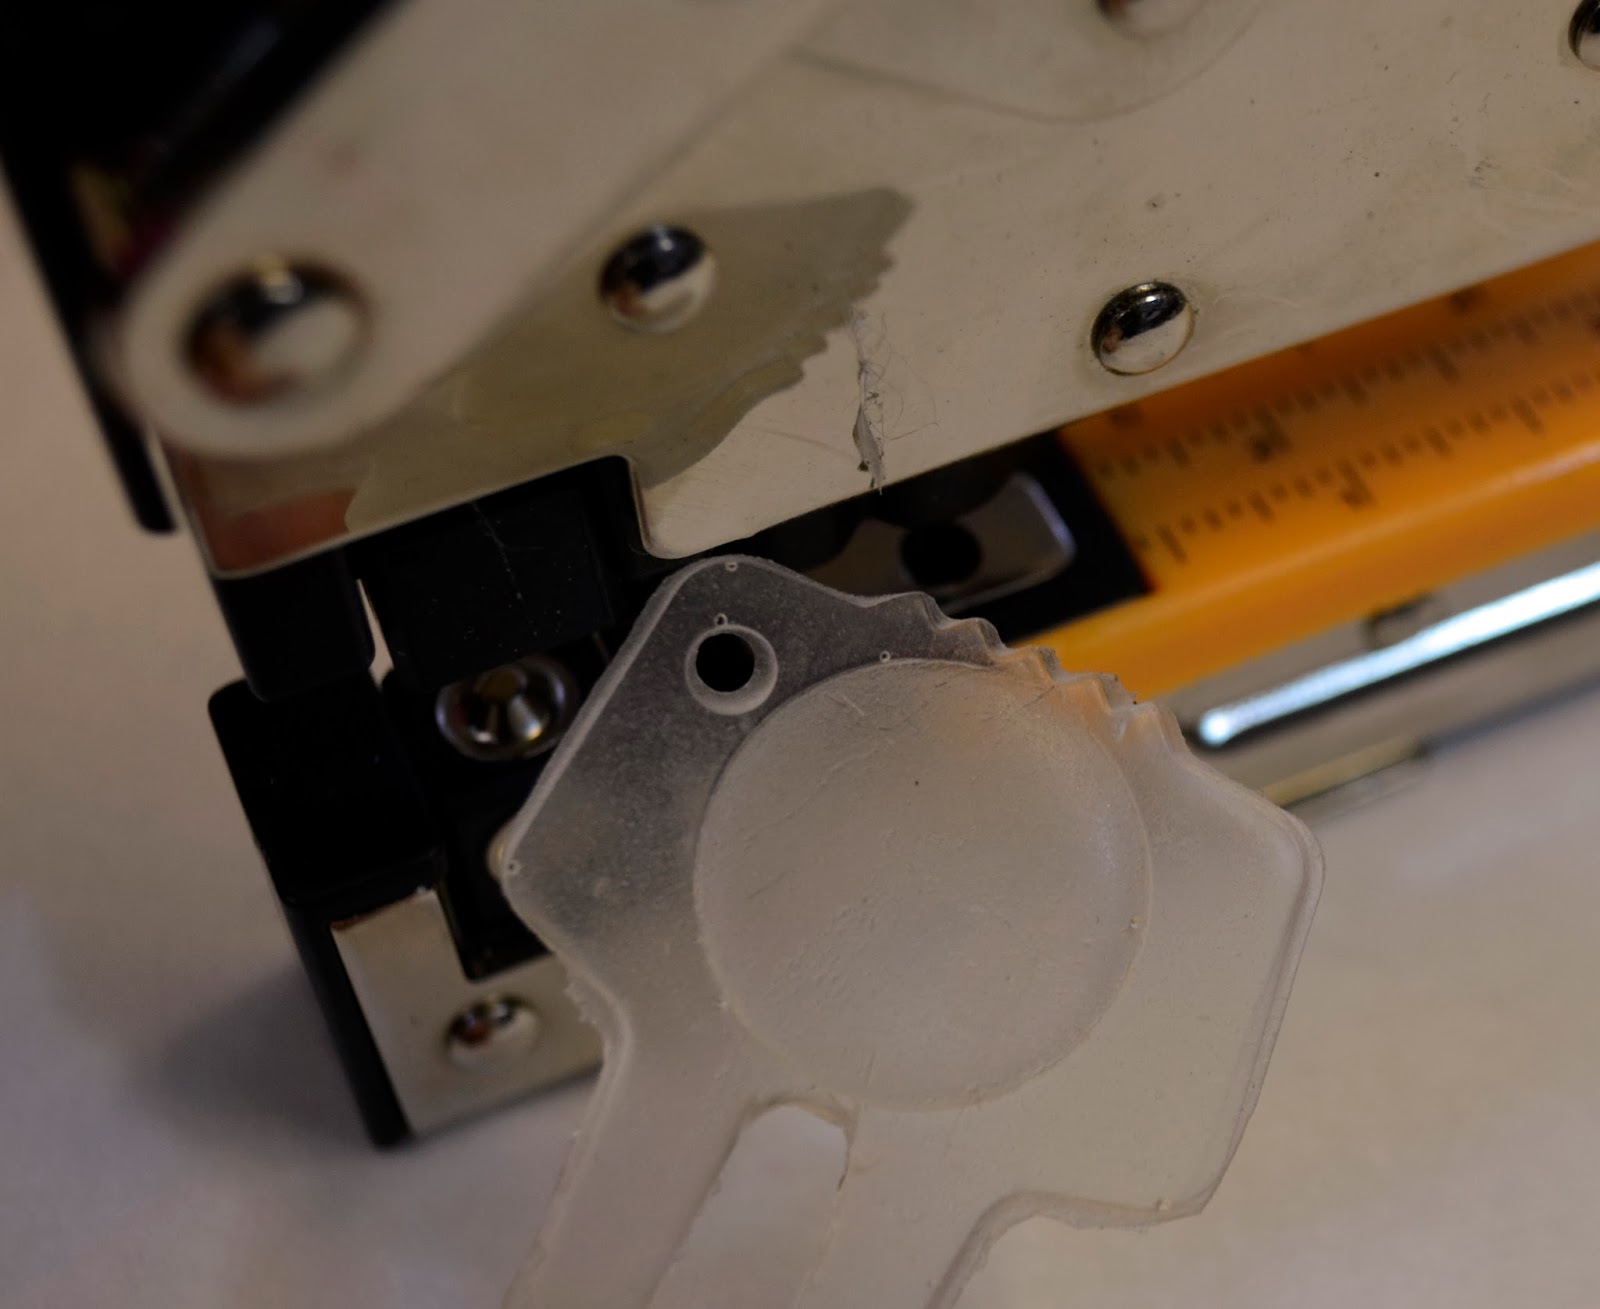
After about 24 hours the Amazing Clear Cast Resin has set up and I used my Crop-A-Dile to punch the hole nice and clean. Do you see how cloudy the "divot fixing tool" looks? Well just wait and watch the magic happen.


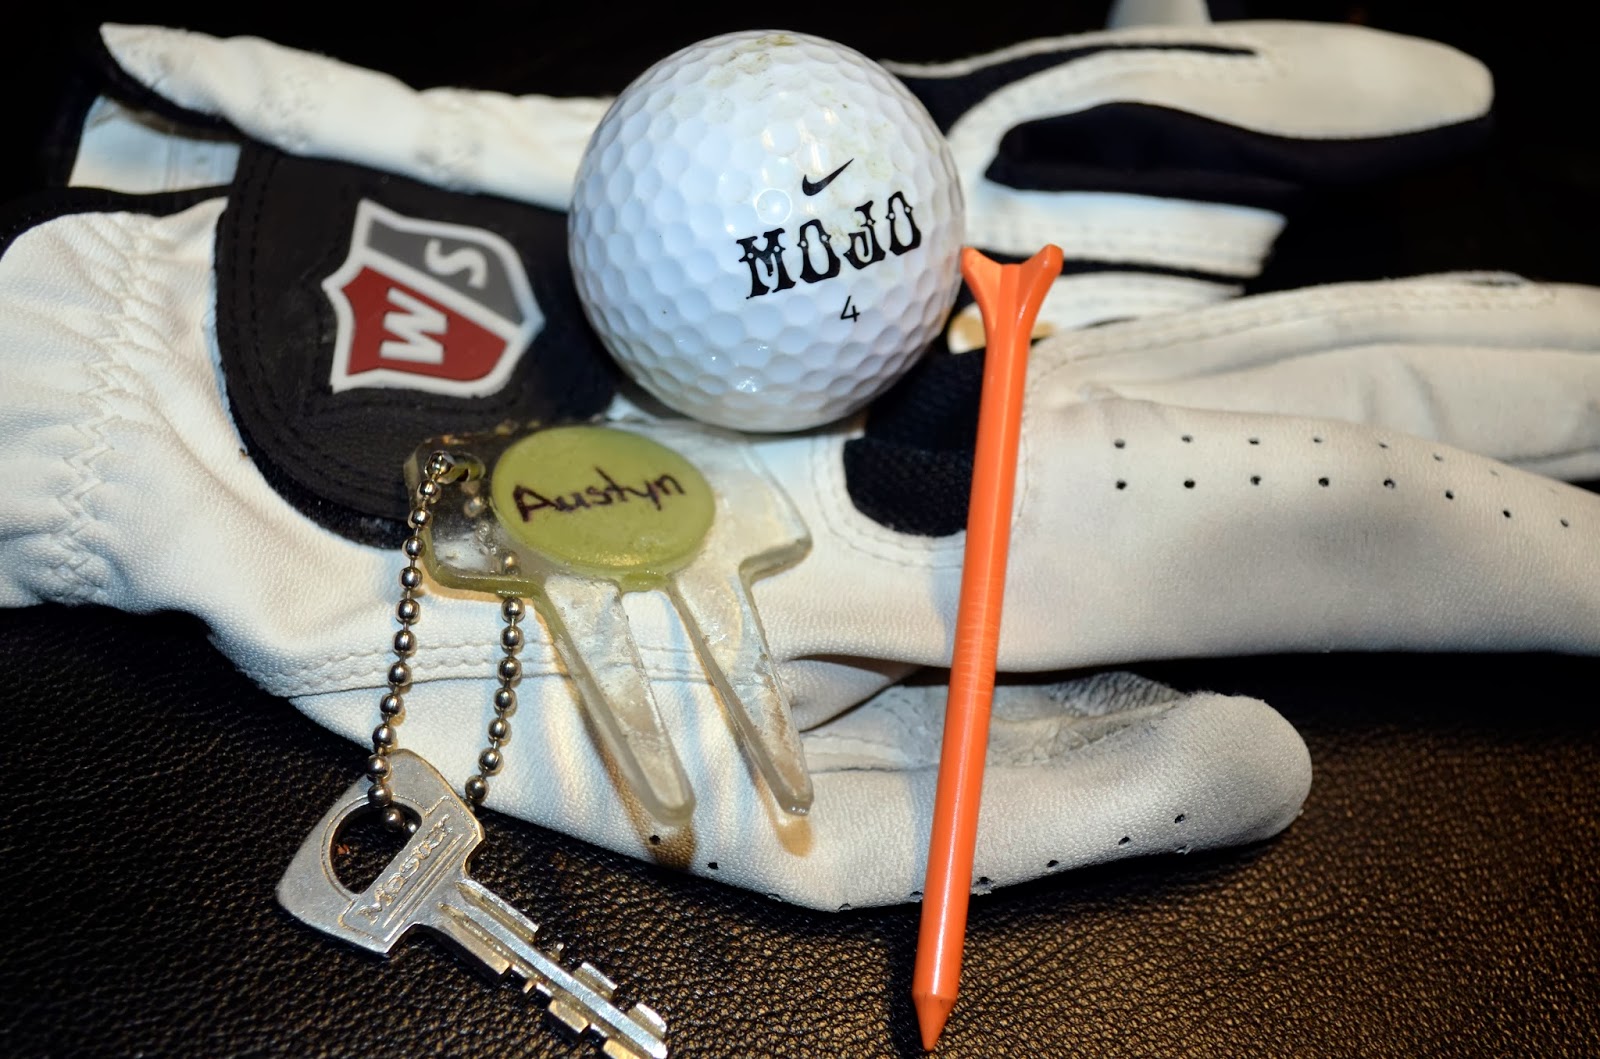
I then punched a piece of scrapbook paper (in his favorite color) and wrote "Austyn's" name on it. All of my kids have unique spelling of their names so it's very hard to find something personalized for them.

Thank goodness I can craft. LOL!


Using more of the clear cast I adhered the punched circle to the BACK of the keychain so the name shows through the front and sealed it. This also helps to make that cloudy look go away. It doesn't take that long to dry when you use moderate amounts of the it.


I added a ball chain to the "divot fixing tool" and his key and he's ready to go to the clubhouse... 
in another couple of months or so...


I hope you've enjoyed my personalized gift for my son.

If you personalized something, what would it be?

As always, have a great day and God Bless.

Wednesday, May 15, 2013

Faux Feather Earrings


Good day! Brenda here and I want thank Susan for inviting me back to show off some projects I've been making since leaving the Amazing Mold Putty Design Team. I was one of the original designers for Amazing Crafting Products and loved every minute of it.


Since leaving the team, I still continued to use Amazing Crafting Products because these products are ultimately the best. I love the fact that I can create almost anything I want. The molding putty is my all time favorite and of course I love using the Amazing Casting Resin and the Amazing Clear Cast Resin to create those embellishments. 

So today I wanted to create some feather earrings that I had seen on Pinterest a while back. I started out with some Creative Paperclay®. I cut the clay in a oval type shape and using a bamboo skewer I added some lines to create those feather like looks. Press your bamboo skewer into the clay to make those veins. It really has great dimension. Once the piece is dry, you can use a nail file to smooth out the edges if you want or need to.

Once the piece dried I then prepared the feather to be encased in Amazing Mold Putty to create the mold. I added some vaseline to the paperclay "feather" as a release to make sure it would not stick to the mold putty. Better safe than sorry I always say.


I took two equal parts of the mold putty and blended them making sure there were no white streaks showing. You have a couple of minutes to get it good and blended. Then I pressed the clay feather piece into the mold putty and let it sit for about 10 minutes. I usually press my fingers slightly into the edge of the mold to make sure it's really good and hard and then I slowly pulled the clay piece out of the mold. Be very careful as the clay piece could break when taking it out of the mold. I will use the clay piece in a scrapbook layout or maybe a card.


I created the earrings with the Amazing Casting Resin and Gold Alumilite Metallic Powder. Add your Alumilite powder to your part "A" and mix well. Then pour your part "B" into your part "A" and mix again. You only have a few minutes before it wants to set up, so make sure you do this quickly.

After the pieces were cast, I added some black rub and buff to tone down the gold. I also sealed the pieces with some Sakura 3-D Crystal Lacquer and placed a few iridescent pearls to the "feathers". Now I have two perfectly matched feathers. I used my Crop-A-Dile to create the holes for the earring wires, it goes through the resin piece very easy. I added a couple of jump rings and the earring wires and now I have a great pair of earrings.


Thank you for stopping by today. I hope you've enjoyed my feather earrings tutorial and I cannot wait to share my next project! You can always find me here to see what else I create.  ~ Brenda Burfeind