Followers

Showing posts with label cuddlebug. Show all posts

Monday, April 20, 2015

Get Creative Challenge #13, Lacy Sunshine Steampunk

It's the 3rd Monday of the month and time for me to show off another card I made for the Get Creative Challenge blog.  I've had so much fun so far being on the design team.  

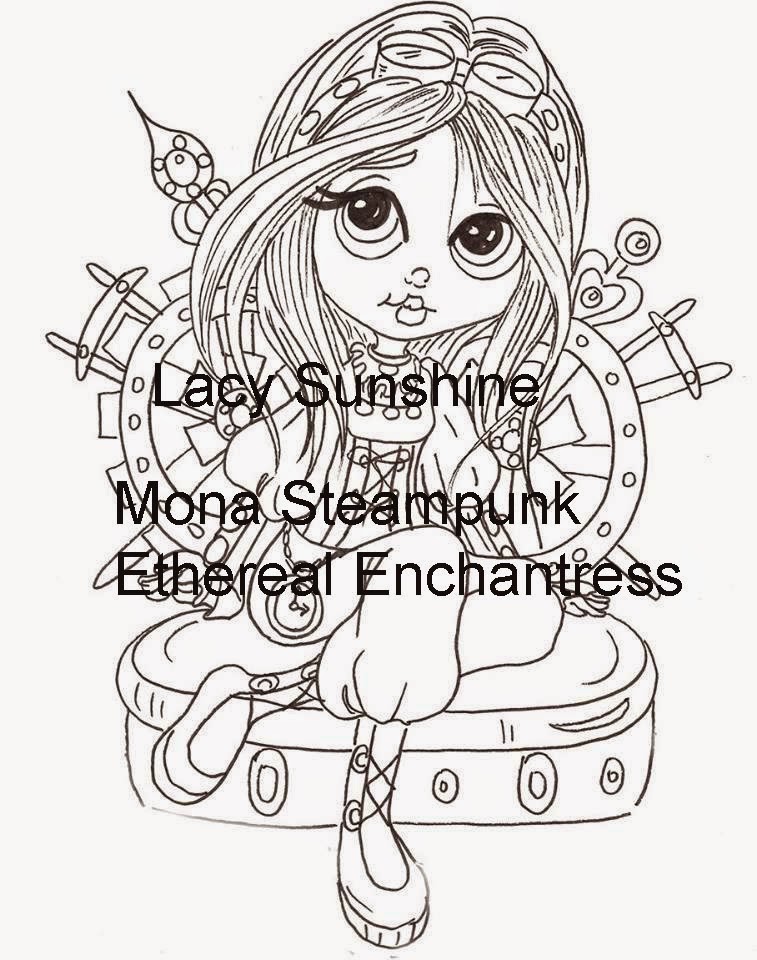
Here is the image I chose for this month's challenge which is using Pink, Purple and Green in your project.  Two of my favorite colors, yeah ME!!!
 And here is my card:

I colored her with various inks, chalks and markers.  (I'm still new to using digi stamps and hope to get some cool markers to play with).  What would you recommend I purchase?  Oh yeah, I also gave her a pink stripe in her hair because if I could, I would!
Of course I also used my Amazing Casting Products to mold my gears and added a bit of bling to them and also colored them with alcohol inks.


Here is a closeup.  I also used the Sizzex folder to create the background that I embossed with my cuddlebug on metal tape and then colored with alcohol inks in pink, purple and green.  I love this technique.  Then I pop dotted Mona Steampunk Ethereal Enchantress to the card base so that she became the focal of the card.  I did not add a sentiment this time because this card could mean anything to anybody.  
I love the grunge look of this card.

I hope you've enjoyed my card and please hop over to Get Creative Challenge blog and join us!  Remember though, you must use the colors Pink, Purple and Green on your project.

As always, have a great day and God Bless.

Thursday, February 27, 2014

Bingo Thank You Card

Good afternoon guys,

I'm back with a quick and I do mean quick card I made for my BFF.  She still works at the Bingo hall where I used to work and gave me these bingo balls for a crafting project I want to do.  (I will be posting this at a later date).  After the balls are used for a month we swap them out for new ones and usually we toss the old ones so I knew this and asked for them.   I wanted to say thank you to her and what better way than with a Bingo Thank You Card!  Right after I started working at the Bingo Hall I came across this Bingo Cuddlebug folder and I HAD to have it.  I used it for a couple of cards for some of my players birthdays and such and now I get to keep using it as a Thank You card.

I am also entering this card over at Simon Says Stamp blog for their Challenge Wednesday.  This week it's all about Pearls.  So, I added some flat back pearls as accent to the work Bingo and as an accent to the "thank you" tag backed with some fake flowers.  I also distressed the "bingo card" itself a bit and highlighted a little with some black ink.  I'm really happy with the 5 minute card.

I hope you like my quicky card.  Not all cards need to take hours to make.

As always, have a great day and God Bless.

Sunday, October 28, 2012

Breast Cancer Awareness Container

Good morning...

Today I'm going to show you a quick project I made for Breast Cancer Awareness Month.

Container from my stash 
Vinyled the word "Hope" with the Fiolex Girls 
font and my SCAL 3  
The ribbon is made from with a cookie cutter and Creative Paperclay®,
cuddlebug folder, and Terri Sproul Mixers
I am very happy with how this came out.  

I am entering this project over at Altered Pages Challenge.


Tuesday, September 6, 2011

Time Heals ... and question answered

Good morning,


Today I have a quick card to share with you.  I've been having a great amount of loss lately with friends and friend's friends.  It's amazing how one day you can be here and the next, your gone.  Remember to take time and tell your family, friends and everyone else you can think of how much you love them.  When you find yourself thinking of someone you haven't talked to in a while, pick up the phone and give a quick call.  Make sure you say "goodbye" as you run out the door and tell them how much you enjoy their company.  It's only takes a second out of your day, for tomorrow they just might not be here....

The sentiment is from Kandrewdesigns.com from her
I pop dotted it to the same color background.

I made the stick pins and love how they turned out.
The ribbon had stitching in the center of it, but when
I attached it to the card it was too yellow...I then used
my red bic marker and colored every other stitch.
A friend of mine recently gave me a bunch of brass
stencils.  I researched and found a way to use them 
with my cuddlebug.  I had to play around with 
come different sandwhiched ideas, but I love the
way it turned out.  Then I also used a bit of
metallic rub ons to highlight the embossing a bit.

The other day I showed you my reorganizing of my craft room and I got a lot of positive comments on it, but I also got asked how I store my scraps???  I am so sorry that I forgot to touch upon that.  This is where I keep them:
The bins next to my cutting station are my scraps,
very handy after I've cut something.
This works well for me.  I've kept them
mostly within one color but I did combine
yellows w oranges and black w silver and gray
I do keep pattern and solid together also.
So far I have had no problem in doing that.
In fact, when I am in the scrap hunt mood its
nice to have pattern and solid together to 
coordinate right then and there together.
Hope this has helped to clarify some things.


Thanks for coming over today and I hope to see you back real soon.


Saturday, August 27, 2011

Wedding Cake

Good morning my dearies,


I'm sorry I haven't been here much this week, but my personal life is a bit crazy at the moment and I've just had a lot going on.  I am hoping I can get out of this stuff soon and get back to normalcy...is that even a word?  I won't bore you with all the details because I really want you to come back to visit...hahaha.  I do think that crafting is my therapy and I needed to dig into something time consuming so that I would be able lose myself in a project and this is what I came up with.


My friend Amy at Love to Crop has a challenge for the Decorate to Celebrate blog.  The theme for this challenge is WEDDINGS, ENGAGEMENTS, and BRIDAL SHOWERS!!  So we want to see all of your decorations and party supplies celebrating everything fantastic about the UNION of two people in LOVE!!   I just couldn't resist in creating this beautiful Wedding Cake.  Now as I said, this was very time consuming, but I just LOVE, LOVE, LOVE how it turned out.  So here we go, (picture heavy):
Here is the cake....
doesn't that just look nummy?
The cake was cut with the Tags, Bags,
Boxes and more cart on my cricut
at almost 7 inches
I inked the edges with a soft 
pastel pink for definition.
If you want to know where I got the idea from the Roses
head over to Penny Duncan's blog.
The rose for the slices were cut on my E-craft from
white copy paper at 1.5 inches.  I misted the flowers with my 
homemade glimmer mist before assembling them. 
 I did not coat each flowers to it's fullest to give it highs and lows shadows.
The roses for the center were cut at 1 inch and the
green leaves were cut from glitter paper also on my E-craft.
The slices open up.
I embossed each piece of cake with my cuddlebug
and the Textile texture folder.  Isn't this just gorgeous?
The lace was from my stash, but I believe it came from
a yard sale or maybe a thrift store.  I have tons of this stuff.
It looks so real.
I used my E6000 glue to glue the plate onto a candlestick
One last look.  I am so happy with how this turned out.

Before adding this to my blog I had shown some of the pictures to a friend the other night.  Her daughter is getting married on 9-10-11 (what a cool wedding date) and she commissioned me to make one for her with teal and brown.  As soon as I've completed it, I will post it on my blog.  
I am also going to etch the last name and the date onto the plate.  
That will be my "gift" to them.

So now hurry on and create something for a Wedding, Engagement or Shower and enter the challenge.

I am also linking this up over at Sew Woodsy.

Friday, August 5, 2011

Brilliant Shaped card

Good Morning


Hopefully I have made it back to civilization, but I still won't have any internet access until tomorrow.  I should be able to use my phone, depending on how close we are to a tower in this beautiful nature town, but I will be back to the real world tomorrow and then I can check my computer and check in with all of my favorite readers.


Here is another quick card that I was inspired by Audrey over at Cute and Some. She definitely has some cute projects and she is such an amazing lady and lately always on the go.  Audrey and I are also in a "Craft it Forward" project, so if you would be interested in receiving a handmade craft go here (I am still looking for 2 participant, but you must comment on the original post) or here (Audrey is also looking for two more) and sign up.  There are a few rules, so head on over and check them out.


So onto my card...again, Audrey had a card on her blog a while back and I just fell in love with it.  You can see hers here and I wanted to "lift" it, but it never fails...I always wind up with something completely different.


Of course, again I used a Getting Cricky stamp from the Food for Thought and the Amazing You sets...mixing and matching is so much fun.  All the paper was from my stash and the ribbon also.  I embossed the bottom with my cuddlebug using the dots folder and added the 3 flat pearls.  The "tag" is the same file as the card itself, just scaled down and then I added a piece of vellum after I embossed it with the cuddlebug Flourished Frame (just the tip of it).  I really didn't care so much for this folder, but I like the way just a little bit of it worked for this card.  I hope I've inspired you to make a shaped card, even if it's just a simple one.


Kristal's  NEWEST Stamp PREORDERS--for a limited time, you can get them at a discount 
and reserve yours before they sell out!!! 


Tuesday, July 26, 2011

Paperclay Book

Good morning friends

Today I want to share a project that I am extremely proud of.  As most of you know, I am also a designer over at Creative Paperclay.  I love working with it for embellishments for my scrapbooking and cardmaking, but recently I experimented a little with it for something brand new to me...bookmaking.  So, now I am not going to start a business in making books , but I might make a few gifts.  This was extremely easy and so much fun to make.
Here are my step by step instructions, kinda picture heavy.
First I rolled out my paperclay and layed my cuddlebug folder
right on top of it and cut around it with my craft knife.
This will be the size of my book.
Then I layed the cuddlebug folder (open) ontop of
the paperclay and gently pressed it into the clay.
Don't press too hard or it will distort the clay.
I let the paperclay dry for about 6 hours so that it was still pliable.
Then I inserted it into my zutter machine and punched the holes.
That worked so slick.  I then painted the cover and back
with some white acrylic paint.
After the white paint was completely dry, I added a green wash
over the top.  I mixed some green paint with alot of water.
I did that to both the front and back cover.
Then I did the same thing with a blue paint and water mix.
Using a paper towel I "dried" off some of the color to give
it more of an antique look.  The pictures really don't do it justice.
Then I cut all my pages 1/4 inch smaller than my book and
put them in my zutter to punch the holes.
They are all punched.
See how perfectly they are aligned.
Pretty proud of myself.
Now I had to bind it together.  Make sure that you
follow the instructions when binding.  You MUST
rotate your back cover over your front cover.
Do not just place the back cover ontop.
Standing tall
And it's finished.  Now it may not be perfect,
paperclay does shrink and warp a bit, but I love it.
I wish you could feel the way it feels.
 It has a leathery feel and look to it.

Isn't it just gorgeous?  Well, I think so anyway.  Every year we go on a trip to Northern Minnesota, near the Canadian border and I take a journal with me so I can keep a detailed diary of our trip and then I make a scrapbook with it.  This will be my journal this year.  It will fit nicely in my day pack and will be handy to keep my every thought in, wait I might need to make a bigger one...just kidding.  I hope you liked my Creative Paperclay project today and I will see you again in about 2 weeks for another project.  I hope I've inspired you to create your own journal using some Creative Paperclay.  You can purchase Creative Paperclay here or you can even get it at Hobby Lobby or Michaels.