Followers

Saturday, October 8, 2011

My Birthday Wishes Blog Hop

Welcome to the Birthday Wishes Blog hop.  Hi every one I want to thank you for joining us today for MY Birthday hop.  Today I turned, 40 something and I have  a lot of wishes right now.  My first and foremost wish is that you all had a great time hopping through and seeing the amazing talent these gals have.   Please make sure you leave some bloggy love at all the stops today.  If you post on all the hops and follow hers and my blog you will be entered to win some blog candy from me!!!  If you've just popped in to visit my blog or are reading this via email and you'd like to join our Birthday Wishes blog hop, then please start here at the beginning with Rhonda. My blog will be the last stop, so make sure you are commenting on everyone’s post before you come back here.

Now, as I said I do have a lot of wishes, but my main wish is to find a job.  It's been a bit crazy here being unemployed and not being able to contribute to the household as much.  I'm not going to whine anymore about this because I do know there is something "Fabulous" waiting for me, but ...  Nope, done ...  Which brings me to my project.  Now, not having a lot of money right now I've been forced to use up what I have.  Scraps, ribbons, odds and ends...you know, the stuff you have lying around and never use because you don't have to...well, right now I do have to and this got me to thinking.  I wanted to give each of the ladies something for joining me on this special day and it had to be inexpensive since there are 13 of them celebrating with me...A few years ago I was doing a lot of craft fairs and I would spend all winter making stuff to get ready to sell in the spring.  I would search all the dollar stores for inexpensive items to add to my "crafting" and started to accumulate a lot of stuff.  The one thing I went way overboard on were these office clips.  

and having worked at the casino, I accumulated
a lot of these types of coasters (unused of course)
and scrapbooking and card making 
I have A LOT of these
So put that all together and you get this
and here are the fronts:
Now I layed them out randomly and I had each of 
the ladies in the hop enter their name randomly in 
a document on facebook and their number will coincide
with each Post It note holder and that is how I chose
which one to send them...because there was just no
way for me to figure out who got what...I hope 
they like the choices they made...hehehehe
Now I also wrote them each a personal note
thanking them for attending my Birthday Hop and I
hope you left them all a bit of bloggy love.  They
did a fantastic job!!!
I adhered my pattern paper to the front of the coaster,
plain paper to the backside.  Then I added a piece of
paper to the office clip and clipped the post it note
to the coaster and added a ribbon...DONE!!!
Just think how quickly you can deplete some
of your scraps and odds and ends.
Now I will be giving away a set of 4 of each coasters (unused), office clips and post it notes for you to embellish your own post it note holders.  Now the only way you can win, is if you left bloggy love and became followers of ALL of the ladies.  I will be picking a winner and checking with them to make sure you left a comment on their blog...


NOw Since I was the last stop, if you came here first remember to start with Rhonda and then the rest of the lineup is here:

Rhonda http://scraphappenswithrhonda.blogspot.com/

Kari - http://purplefuntastickcreations.blogspot.com/ 
Amy - http://www.lovetocrop.com/
Lisa - http://indymermaid.blogspot.com 
Lynne - http://slasewcraftiness.blogspot.com/ 
Kathy - http://the3esblog.blogspot.com/ 
Audrey – http://cuteandsome.blogspot.com 
Tami - http://tamiscraftconnection.blogspot.com 
Kathy - http://www.scrappingfelkatz.blogspot.com/ 
Susan - http://susanascorner.blogspot.com/ 
Kacee - http://www.youhadmeatscrap.blogspot.com/ 
Christy -  http://christybladehandmade.blogspot.com/ 
Erika - http://www.craftysprouts.com/ 
Brenda - http://createbyburffrau.blogspot.com  
 

Friday, October 7, 2011

Amazing Molding Putty is in the HOUSE

Good morning


 (if you are here for my Creative paperclay submission project, please scroll down)


I am so excited to share a new product with you today.  As you know I've been involved with Creative Paperclay and now we have teamed up with a company called Amazing Molding Putty to give you even more uses for your clay projects.  I've been playing for a couple of days now and I can tell you this is so much fun.  I haven't touched much of anything else, my bad!!!  Ok, so here we go:


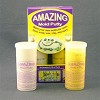
First this is what you need:
Here are my containers
now Terri  has an awesome video showing 
exactly how to make your mold, but since my
flip doesn't seem to be working right now, I can't
show you exactly how it's done.  :(
So I started out with this pin
when adding two equal parts of the putty and 
blending it together you create the beginning of a mold
I inserted my pin into the putty and let it cure for about 5 minutes.  
Here is your mold
Now you are ready to cast your mold.  Adding
two equal parts of the Amazing Resin cast and 
a drop of cranberry alcohol ink
pour the mixture into your mold slowly
and let that cure for about 10 minutes
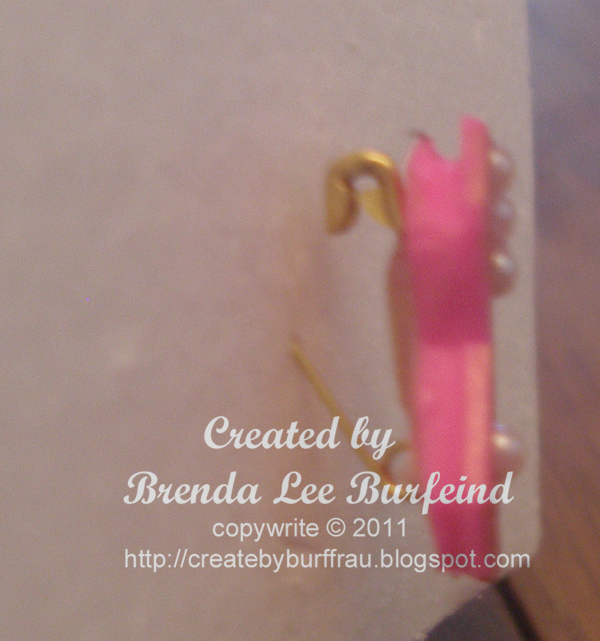
now I added a safety pin to the backside of the
pin using some E6000 blue
see how nicely that holds?
and then I added some flat back pearls to the pin
I then attached the pin 
to a flower I made 
for this card.
The sentiment is from the Getting Cricky
"Positive Thoughts" stamp set
in honor of National Breast Cancer Awareness Month
Isn't it beautiful.  The possibilities are ENDLESS
If you can mold it, you can cast it, you can pin it.

Now, for the start up of this new DT I am giving one lucky commentator one of these pins.  Would you like one?  Leave me a comment and tell me if you have ever created your own mold or cased anything.
2.  Like AMP on FB and tell them I sent you and come back here and tell me you did that
3.  Follow AMP here on their blog and tell me you did that.
4.  Post this giveaway on your blog and come back here and tell me you did that.
This gives you up to 4 chances to enter.  I will choose a winner on Tuesday, October 18th for the pink ribbon pin.  I will be back on that day with another post

I am also entering this over at JustYolie for the First Annual Link up for PINK.  It's a great cause and there are so many prizes to be had.

Wednesday, October 5, 2011

Late Breaking News

Good afternoon,


I just wanted to quickly share some late breaking news.  As most of you know I've been a guest designer over at Decorate to Celebrate for the last month.  DTC is a blog where we showcase decorations for lots of theme parties.  This have been fun to do and I thank Amy and Rhonda for asking me to help them out by spreading the word about it and also making some party decorations.  The blog consists of decorations for a themed party.  Other than invitations or place cards, no cards are allowed!!!  Well this morning I had another guest design spot and you find the post here.  Well, the late breaking news is I am now officially a Designer over there and now I will be for sure posting every two weeks...yeah!!!  So now I ask you to please hop on over to DTC and link up a party themed decoration.  
Creative Paperclay DT call

 Good morning crafters...wow can you believe it's October already?  I know I can't...but I can tell by looking out my window and watching the leaves turn right before my eyes.  I love fall with all the color changes and such, but I'm just not ready for that dreaded you know what...but here I am today showing you how to use your Creative Paperclay to make some snowflake ornaments...hehehe.  I've been on the Creative Paperclay DT for 6 months already and today I am reapplying for next term...so here goes: 

First I started out with my clay and again using a cookie cutter, I cut the Creative Paperclay out and embossed the snowflake using my cuddlebug folder and just lightly pressed in into the clay as to not distort the shape. 
Isn't the detail just wonderful?
I hot glued some beads around one of the snowflakes
after I used an ink pad direct to the snowflake
to give it a pretty purple hue
Then I used some Dimensional ModPodge and added
it to all three snowflakes
See how milky it is right now?
and see how beautiful it is after it dries 
While the dimensional Modpodge is still wet
I added some glitter right ontop of the dimensional
and this is the affect you get
Very sparkly
then I also added a few drops of Slade alcohol ink
right onto the dimenstional Modpodge and it
gave this snowflakes this crazy cool affect.
I love experimenting and this was another
one of my favorite projects.

Now remember last week I gave a tutorial on using Creative Paperclay and I also had a giveaway...Well the winner was:

Amanda said...


New follower 2 the Paper Clay blog via GFC! Thanx~prhmangel at gmail dot com

DTC #10 Tweens N Teens Party

Good morning and Happy Wednesday, everyone! I am so excited to be a guest designer over at  Decorate to Celebrate again!  Decorate to Celebrate is a super-fun challenge blog dedicated to showing off decorations for every celebration.  This is my third guest design spot over there and I am hoping for many more to come.
The theme for today's challenge is: Tweens and Teens Party (anything having to do with a party for them).  I decided on a movie night theme.  My kids loved to entertain at my house all the time.  I always had kids over for one reason or another...I miss those days.  Austyn doesn't entertain much at home yet, but I'm hoping that will change soon.
So, to begin with you have to have an invitation right?
So I took an old cd, lots of them laying around
and adhered paper to the front of the cd.  Then 
I stamped You're invited and all the pertinent information
directly on the paper, hand wrote the exact details
and put it in a plain cd case.
Next I cut the "popcorn" boxes from an SVG file
from Scrapping Table in different colors.
 I absolutely love her All Wrapped Up file
I then downloaded a clipart of a director's clapboard
and imported into my SCAL and traced it.  I cut it
out in white and then again in black and added their
names with a white gel pen.
I also downloaded a "film reel" and did the same thing
as I did with the director's clapboard and cut it out in 
matching colors to the popcorn container as a straw marker.
Now everyone knows whose straw belongs to whom.
Now the next time you want to have a party, think of adding a theme 
to it and create your own decorations.
Thanks so much for stopping by today and thanks again Amy and Rhonda for letting me be part of your fabulous blog as a guest designer! Don't forget to make your own decorations for a Tween or Teen Party and link up at Decorate to Celebrate  I can't wait to see what you create!

Tuesday, October 4, 2011

Paper Secrets 21


Good morning
Wow, can you believe it's October already?  This is crazyness how times has flown by...plus I've been scrapbooking WEEKLY for a challenge over at PaperSecrets.  Each week we are given an assignment for a layout. I really don't care if I win the contest, it's just helping me to do more layouts that I should have done a long time ago (or some new ones in this case). If you participate and follow the guidelines you advance to the next week. We started with 27 and 10 moved on again last week, these ladies are serious about their scrapping.  I can't believe I am still in the running...again, it's not about winning, it's about scrapping and I am so proud of myself.  I will keep updating you as I go along. Who knows, I might not be able to participate one week and then I am out, but until then, I am scrapping my butt off, (they used a different word, but my blog is family friendly...hehehe.  Here is the sketch:
and of course I rotated it.  I never take pictures 
uprightly so it's hard for me to always follow a
sketch perfectly, but rotating works
(in my book anyway)
So then:
Here it is...I had all the paper in my stash and love how
well and quick this came together.  
I used left overs from the pictures after cutting them
down to 2x2 size to make the "picture" circles.
I added the sticker numbers for the date
(I haven't used stickers for ages)  LOVE IT
I cut the jet from the Stand and Salute cart, embossed
it using the stars cuttlebug folder, and faux stitched 
around it after adding the title.  I also used an
American Flag button as an added embellishment
Austyn took most of the photos
and did an amazing job capturing
all the maneuvers.  It was great
being able to cut them down to 2 x 2
This is what we could use and in red is what I did use:
stamped image
embossing folder (Jet with stars cuttlebug folder)
flowers/leaves
bling (red, white and blue stars on ribbon)
fabric/felt
rubons
number(s) (found in an alphabet set) (date on circle photos)
hand or machine stitching (Faux stitched around Jet)
3+ buttons
ribbon/lace (red, white and blue ribbon)


SO I hope I've inspired you to get out there and scrap some pictures...try something different, use something you haven't touched in a while.  JUST HAVE FUN!!!


Monday, October 3, 2011

September Giveaways

Good morning friends


I'm so sorry I didn't get to the winners this morning like I had promised, but it's been a bit crazy over here.  I will have an announcement tomorrow or Wednesday and with that a giveaway to start out October.  Yeah, so exciting...


So without further ado here we go:
For the Fashion Blog Hop the winner is:  


Carla said...
You did a good job on your project. It's cool that your daughter thought it was cool. Thanks for sharing.

http://racincrafts.blogspot.com/ or
racincrafts at aim dot com
Rhonda Emery said...
wow how pretty thanks for sharing

Miranda said...


I became a follower of MyMemories Blog!

Amanda said...

New follower 2 the Paper Clay blog via GFC! Thanx~prhmangel at gmail dot com

Winner announcement delay

Hi all,
I'm sorry I haven't been around today, but I've been real busy with some projects and just haven't had time to visit any blogs or do any blogging myself.


I want to let you all know I am also behind on picking some winners, but I am hoping to get to that tonight.  Look for the winners to be posted tomorrow morning.


I hope you all had a great weekend and look for some exciting projects coming this week.

Sunday, October 2, 2011

Lasting Memories #58 Recipe with a Twist"

Good morning again for another challenge at Lasting Memories.
It's all about a Recipe with a little "Twist"
Now Karen challenged us with this recipe:
1 Photo
2 embellishments
3 colors
and the twist:  A song for the title
and this is what I came up with using my NEW
MyMemories digital software.
I used:
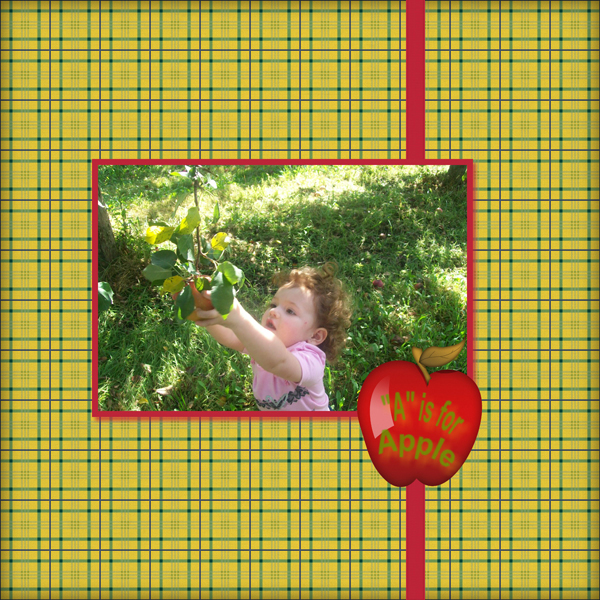
1 photo of Bella at the Apple Orchard from last weekend
2 embellishments - the Apple (added word art from software) and the ribbon
3 colors and I chose yellow, green and red to adapt to the photo
and the song: "A is for Apple" seemed to fit
All this comes in the software package.  I didn't purchase anything.
I wanted to see if I could truly use the software as is, or if I 
had to purchase anything and it's a dream come true.  I love how I can add titles directly on an embellishment, pick just the right color combo and make it as simple or complex as I want.  I am in the process of learning how to add music to my layouts also...so excited!!!
Now I hope you've enjoyed my digital pages this week and now onto the winner:

Miranda said...

I became a follower of MyMemories Blog!

Congratulations Miranda.  Email me your email address at burffrau @ aol dot com as soon as you can so I can send your information to MyMemories and they will send you the codes for the software.


Now if you didn't win and are still interested in purchasing the software, remember I have this code that allows you $10 off the price of the software and $10 worth of free downloads.  Copy this code STMMMS28873 and enter it here

Saturday, October 1, 2011

Digital Layout and giveaway

Good morning,

I just wanted to remind you of the giveaway for the MyMemories digital software.  If you don't remember, or didn't see the post, they approached me a couple of weeks ago and asked if I would be interested in using it and then blog about it.  I had been thinking of trying digital because I wanted to make a Christmas present of a project.  Well here is another layout I created and it was so easy.  In fact, I am really liking how easy it is to put together.  You have so many choices but it isn't overwhelming.  I was a bit intimidated at first learning the software and all, but it isn't bad at all.
These pictures were taken when we went on a family trip to Steve's parents.  They had a bald eagle's nest in the back 40 as I call it.  I wanted the pictures to really be the focus in this layout and I think I achieved that very well.  Clean and simple...now the other reason I really like going digital is my journaling.  I hate my own handwriting, but I do know it's important to journal.  Now I can say as much or as little and it looks great.  I also know that preserving your own handwriting is important, but going digital will allow for me to really keep up my journaling and not "hide" it or not do it at all, which I have tended to do.  SO let me know what you think of my layout and:

Do you want to try Digital Scrapbooking?  If so, I am going to give away 1 subscription to this software.
YEAH,!!! RIGHT?
so there are a few rules though
1.  You need to go to MyMemories and check out their fun layouts and 
digital paper packs and then GO here and COMMENT which one you liked the best.  
DOING this will get you 1 entry.  Now for extra chances you can:
2.  Go to their Blog and become a follower
3.  Like them on Facebook
4.  Follow on Twitter
Now you do NOT have to do all of these things, but the more you do and comment telling me you've done each thing separately, the better the chances are for you to win it. 4 chances per person...
BUT if you post my giveaway on your blog, fb, twitter or any place you can think of and you GO here and comment telling me what you did, I will give you that MANY more entries, so it is completely up to you on how many chances you want

I will be announcing the winner OCTOBER 2nd during my Lasting Memories challenge because I have the cutest layout ready for that day using...of course, the MyMemories Suite.

Now, if you DO not want to try to win the software and want it NOW I am giving you a the ability to save $20 if you wanna purchase it NOW here  and enter this coupon code: STMMMS28873

YOU DO NEED TO GO HERE TO COMMENT THOUGH TO BE ELIGIBLE TO WIN THE SOFTWARE