Followers

Showing posts with label acrylic paint. Show all posts

Thursday, April 20, 2017

Elephant Mosaic

Welcome to our Stencil Girl's Bloghop.  I'm super excited to share a fun project with you today, but first a little backstory about myself before we get into the tutorial.  My name is Brenda and I've been with Amazing Casting Products since the beginning and I've enjoyed every minute of it.  My blog is Creativity is a State of Mind because I believe each one of us has a different view on artistic talent.  I've definitely come a long way since working with this Amazing team.  Also working with these products has taught me so much and I've enjoyed learning new techniques.  Therefore, whenever we can partner up with another designer or design team, I look forward to expanding my horizons.  

Since I've been on the design team for so long, I've accumulated ALOT of pieces.


Anytime I'm making a project I wind up with more and more resin pieces.  Some finished, some not.  And this is how my project was born ...

I started out with a foam core piece that I cut to 10 x 10 and I painted green with acrylic paint.  Next I took my Stencil Girl Elephant Parade (which by the way is my obsession)
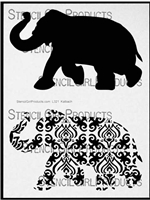
 Elephant Parade Stencil by Nathalie Kalbach

and traced the elephant with a pencil after the paint was dry.


It doesn't have to be perfect because I'm only using it as a guide.

Next I got out my box of resin pieces and began laying them inside the elephant outline.  It was kinda like putting a puzzle together.  Absolutely every one of these pieces has a story for me.


Here are a few pictures of some of the pieces I used with their molds.  (I've made ALOT of molds :)  The Amazing Mold Putty is still by far my favorite product.  I love duplicating little charms and such that I find while antiquing or junking because I don't want to use the original piece.  Especially in a project like this one.

Some butterfly charms

A Fleur De Lis I found in a box I bought at an antique shop.

The Fleur de Lis that I embedded into an 
Amazing Clear Cast Resin bezel.

Some leaves that were molded from a broach that I got
in a jewelry lot at an auction.

Branches that were hair barrettes to start out.

I just have tons and tons of molds...

After I had all my pieces laid out the way I like it, I glued them down.  After they were all securely adhered I took the piece outside and spray painted it black.


I didn't let it dry completely though.  
In fact, I took a hairdryer and gave it a 3 minute blast on the cool setting.

Stencil Girl's Ornamental Compass Screen was my next addition to this piece.  
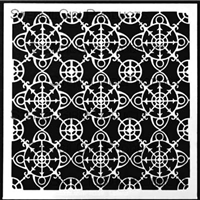
Ornamental Compass Screen Stencil by Gwen Lafleur

I dry-brushed it with purple metallic acrylic paint around the edges of the corners.


While that was drying I also used the same acrylic paint and dry-brushed the 
elephant mosaic-ed pieces to give them some dimension also.

In my box of pieces I also found some roses I made a long time ago with the Amazing Clear Cast Resin.  I absolutely love how they looked like glass, but I did  want to give them a bit of dimension also.  I dry-brushed a bit of black and the purple metallic around the edges.  Just enough so that you can still see their clearness, but also some definition.  


After everything dried a little, I  saturated the entire piece with the Amazing Clear Cast Resin.  Not only does this give it a nice GLASS touch when it's cured, but it will also keep everything  in place.  But now here comes the magic.

I took a toothpick and ran it around the edges of the elephant outline while the clear cast resin was still wet and also within the stenciled area to "scrape off" some of the black and purple to expose some of the green base.  It gave is just enough color to make it pop.


After letting it cure for 24 hours I was able to display it in my elephant collection.  Now, the best part of this is it's weight.  If you would have used this many heavy trinkets, your piece would have been very heavy.  The Amazing Casting Resin is so super lightweight. 
This by far is one of my favorite projects up til now.


I totally love how this turned out and I hope you have found my tutorial useful.

Now for the bonus fun stuff.  There is a giveaway involved...


One lucky winner will receive both a $25 Gift Certificate to StencilGirl Products

AND a $25 Gift Certificate to Amazing Casting Products!
Visit the fabulous designers from both teams and comment for your
chance to win!
The more blogs you comment on, the more chances you have to WIN!
(One comment per blog please.)
You have until Sunday, April 23rd at 11:59PM Central Time to leave your comments.
Winner will be announced on
StencilGirl's Facebook page and Amazing Casting Products’s Facebook page
on Monday, April 24th.

So thank you for coming and hopping along with us today and be sure to leave a comment so you get entered in the giveaway.  Until next time, happy crafting.

Friday, April 1, 2016

Toes in the water, A$$ in the sand reclaimed wood

Good morning friends,

I'm here today to show you a board I made for a friend.  I've posted a lot of my signs on facebook and now I have friends constantly asking me to make them something.  But of course I will try anything for a couple of bucks.  I've gone onto Etsy and other sites to see how much reclaimed barnwood signs are and oh my, I'm way undercharging.  With that being said, I do this for fun and have a blast making my friends happy!

So let's get started:

I started with a 12 x 12 board that my husband so nicely cut for me.  If you saw last weeks post about my wineglass holder you read that my daughter's boyfriend gave me a couple stack of reclaimed barnwood.  Yeah me!  This barnwood is over 100 years old.

I sanded and cleaned the wood very well.  You really need to do this to make sure it's safe for in your house.  I did not stain this board as I wanted the natural wood look.   Then I spray painted some black kinda in the middle of the board.  While that was drying ...


... with my cricut I cut out the saying with some dollar store sticky back shelf liner
and burnished it down very very good.  This is a must so that the paint doesn't bleed
and that will give you nice crisp lines.


Then I took some acrylic paint in a sea green
(oops, picture is upside down)


and spunged all over the board.

\

After it was completely dry I peeled the vinyl letters up
sanded the edges and all around the board
and viola ...


I think this turned out amazing and my friend absolutely loves it.

I hope you've enjoyed my sign and would love to hear some comments.

As always, have a great day and God Bless!

Thursday, December 24, 2015

Reclaimed wood #cre8time Photo sign

Merry Christmas

 I've been making signs out of reclaimed or scrap wood for awhile and I was asked to make a photo sign as a custom order.  This will be a Christmas gift of his beloved dog that passed away recently.  I wasn't sure if this was something I could do, but I'll try anything!  So after doing a bit of research I attempted it.

I had some scrap wood laying around.  Hard to imagine right?   I had a friend's husband cut it for me.  I wanted to build a slatted board.  The pieces measured 5.5 x 17.  Then I nailed 2 pieces to the back.  The entire piece now measures 17 x 17.

Next I went to Kinkos and had them blow up the picture to 12 x 12.  I actually wanted it a bit bigger but this was the best they could do??? 

I gessoed the boards with black acrylic paint and a tiny hint of brown.  I love playing with color.  It turned grayish and I love it.

I then cut the blown up picture into 3 pieces and used Mod Podge to adhere it to the boards.  

After it was completely dry, I sponged black, gray and brown acrylic paint around the outsides of the picture to soften it a bit.  I also stippled some more black around the edges!

I then sealed it with a spray varnish!


After it was completely dry I added a picture hanger to the back.

I am usually a harsh critic when it comes to my own work but I am extremely happy with this piece.   
The customer is also very pleased.  That is most important!

Thanks for looking and as always have a great day and God Bless!

Friday, August 14, 2015

#cre8time - Faux Geli Plate Printing with Amazing Mold Rubber

Good day friends,

today I wanted to introduce you to my very first faux geli plate printing.  I've been watching one of my creative friends make some amazing backgrounds lately.  She is a wonderful card maker and such an inspiration.  You can find Annette on instagram  @paper_pajamas or at her blog paperpajama.blogspot.com.

So anyway, she has inspired me to try this geli printing thingy without her knowledge!  Teehee.  Well, I could not see myself spending money on a geli plate because who knows if I'd like it all that much.  Believe me, I have enough crafty things to keep my busy.  However, as you also know, I belong to the Amazing Casting Products design team and our fearless leader had posted making  non geli plate a while back so I thought I'd give it a try.


Frisbee


Here is my faux geli plate using my Amazing Mold Rubber.  I just used a regular Frisbee I had in my stash as my "mold" and poured my mold rubber mixture directly into it after mixing it up (you can see a video tutorial HERE) and let it set for about 2 1/2 hours.

I really had no idea where I was going with this, but oh my, I've had a grand old time.  I just used scraps of paper from my stash and started to play.

I used texture plate, cut outs, rubber stamps and even a fork.  LOVED playing today.
Here are some examples of some of the papers I made:


my texture plates


I forget that if you use a rubber stamp it will be backwards, so I used the paint from the rubber stamp and stamped that on some paper and viola, another awesome image!


I love the texture that this piece gave!


This was some paper I had run through my cuddlebug and is textured.  Really love how this came out.
I just with the picture were better!  You can really see some awesome detail in there!


See the Pink ribbon in the above photo?  

Here is the result:


Love how these came out!


Here I started with the pink and blue paint again 
and dipped a styrofoam ball into some black paint and rolled it around
in the pink and blue paint.
I got messy, but wait till you see the outcome!


LOVE,LOVE,LOVE these papers!

Now I can't wait to sit down and make some cards with all my lovelies!

I hope you've enjoyed reading my post today and would love for you to leave me a comment!

As always, have a great day and God Bless!


Saturday, July 4, 2015

"American" Fries

Happy 4th of July!!!


Today is my favorite day of the year!  It's better than Christmas and my Birthday rolled into one!  Today is America's birthday and my husband's birthday also.  I've always been very patriotic and today I am here to inspire you with my American "Fries" earrings.  You will totally understand in a minute.

My grandkids have recently come to live with us and therefore we have all sorts of toys laying around the house.  The crafter in me is always looking at their toys wondering what I could mold or create with/for Amazing Casting Products.  Today is no exception ...

Recently we were playing kitchen and I saw these amazing French Fries in their mixture of play food.  
Oh how the wheels started to spin!

Here is my mold that I made with those cute play fries.  I poured them with some Amazing Casting Resin after making a mold with the Amazing Mold Putty and let them cure for about 5 minutes.


Using regular acrylic paints, I painted some red stripes and a small section in blue on top of the white Amazing Casting Resin.  E6000 and some rhinestones for some bling and drilling a hole to attach some jump rings and earring wires I now I have the perfect earrings for the 4th of July!


I totally thought how the shape of those French fries reminded me 
of a waving flag and I brought that vision to life!


I hope I've inspired you to use something out of your kids' or grandkids' stash and create something fun!

As always, have a great day and God Bless AMERICA!

Sunday, April 19, 2015

"Fools Gold" at Anything but a Card Challenge 46

Good morning and happy Sunday to you all.

It's Week 3 at Anything But a Card and I'm so excited to share my project.  This month's challenge is "Fools Gold" and I've been wanting to frame a picture of my daughter and my grandbabies that we took at Easter but I just haven't found a picture frame that I really liked until ....

Well, this is what I used and created.  Please follow my tutorial

I had on hand a lightweight wooden picture frame I got at Michaels.  Some silver duct tape from the hardware store that is never ending.  Some scrap pieces of card stock left over from another project and a ruler.  You will also need acrylic paint, alcohol inks and double sided tape.

First I painted the edges of my picture frame in black.  No need to paint the entire thing as it will be covered.  While that was drying ...

... I taped the silver duct tape to my card stock and ran it through my cuddlebug.  I used 2 different folders and because the pieces are larger than my cuddle bug folders I ran it through in one direction and flipped it and ran it through again.  With the folders I used there is no need for precision.

I glued the pieces onto my picture frame with double sided tape.  (sorry for the glare)

See the awesome detail

Then I went over the top with Gold Alcohol ink.

I wanted to make it look somewhat antiquey so I painted black acrylic paint over the top and wiped it off with a dry rag.

Here is a closeup 

You can find these kind of frames using real metal but 
I prefer the faux metal look and it so LIGHT WEIGHT.  
My frame is ready for my picture to get printed

Aren't they just so sweet?

I hope I've inspired you to create a faux metal frame and please join us over at Anything but a Card with your "Fools Gold" challenge.  Remember, there are only 3 rules.

1.  Make ANYTHING BUT A CARD
2.  Use the theme "FOOLS GOLD"
3.  Most important HAVE FUN!

Until next time, have a great day and God Bless.