Followers

Showing posts with label Filekutz. Show all posts

Friday, October 28, 2011

Festive Fridays 10-28

Good morning and welcome to another edition of Festive Fridays. If you are new to us, sit back, grab a cup of coffee, relax and enjoy some wonderful Christmas Cards. Yes, I did say Christmas...Festive Fridays will be every other Friday with samples of Christmas cards. This way, you can be making your cards all year long and you will avoid the mad rush when you could be enjoying the Christmas Season. You should have just come from Amanda. If you stumbled upon this post you can go back to Terri and start at the beginning. There is also a complete list of the Festive Friday hop on the left sidebar under the Festive Fridays blinkie in case you get lost along the way.

Wow, what a busy last 2 weeks I've had.  As most of you know I got a job, yeah, but it sure is breaking into my crafting time.  I think in total I've seen the inside of my craft room for maybe 4 hours in the last couple of weeks...it misses me.  Better yet, I miss it!!!  Since I do not have any regular hours at work meaning like an 8 to 5 it's hard for me to try to get on some kind of schedule.  I work any days of the week and times between 11 a.m. to 2 a.m. ugh.  Not fun I tell you, but at least I have a job again.  So with that being said I apologize for not being here so much, but I will continue my DT submissions and of course my " I want to do this" projects...LOL and here is my Christmas card for this week's Festive Friday.

Isn't she cute?  The cut is from Filekutz and you can find it here.  LisaJane's files are so easy to put together and since I also love bears (almost as much as elephants) I cannot wait to get the whole set for the holidays.  Since I am on the Design Team at filekutz I get to show you lots of things and using LisaJane's files is a treat in itself for me.  I've had a few ideas running through my head and hopefully I can have this idea transfer to a project for you soon.  I added a peachykeen face to the bear and then some bling to her shoes and her Christmas hat.  I cut out the package that was on the background paper and popdotted to her.  A simple tag to complete the card and you can have it done in a matter of minutes.  
Now also, don't forget that Filekutz has a new bi-monthly program starting and you can find all the details here and while you are there, sign up for her newsletter so you will be sure not to miss a thing she has coming up:

I hope you liked my Festive Friday card and hope to see you back in two weeks for another Christmas card.  November will be our last month of doing this and I can't believe we are almost done, but I know I have a great variety of cards this year to give a way.  Now head on over to Angela and check out what she has for you.

Thursday, October 20, 2011

Filekutz Test Pansy

Good Morning Everyone! FileKutz is releasing a new file called "Flower Petal Blossoms".  LisaJane asked me to do a tutorial and this is one of the flowers I made for her.  Hope on over to the shop and purchase your file here and it's on $1.99
You will need a circle approximately 1 inch
3 large hearts cut at 1.2 x 1.27
2 small heart cut at 1.07 x 1.003
this totally depends on your finished flower
I inked all the edges and a bit in the
bottom center with blue
This just needs to be done to the front
as these will be glued to a card front
or a scrapbook  page and you 
will not see the backside
Then I inked the bottom center again with purple
I snipped just a tiny bit off of the bottom of
every petal (heart)
Using my zig glue pen I added a few "streakes"
to 2 of the petals
and added some glitter.  This totally depends
on how fancy you want to get. 
I manipulated ONLY the top of the petals
using my exacto knife rounded top
going in a circular motion
Then I shaped the petals in an outward motion
with my paper piercer
this is what the petals will look like.  The glittered petals
not do need to be manipulated as much.
Then I added a bit of score tape to the backside
of each petal towards the bottom.
This is what you will have
and started placing the glittered 
flowers first side by side
add your 2 smaller heart on each side of them
and then the last larger petal in the middle of them
I used my fine point black sharpie to add some
 lines inside the middle of each petal
and topped it off with a rhinestone
Here they are
really like the way these turned out
Now head on over to the Filekutz Designs blog and you can see more tutorials on how some of these flowers were made.  The ladies over there are wonderful and LisaJane really outdoes herself creating these wonderful files.

Tuesday, October 18, 2011

Filekutz Color Challenge

Good day,

+++if you are looking for my Amazing Mold Putty post, please scroll down.+++

Welcome to another quick post for the Filekutz Designs Challenge blog.  Now I am a designer for LisaJane and I like to participate whenever she has something going on and right now she is hosting a color challenge...and the rules are easy: 


1. to use the specified color(s)! This is just a fun do it on your own challenge! You do NOT have to use a filekutz design, but you can if you'd like 


2. It has to be a CRAFTY project you created.. scrapbooking layout, home decor craft, card ect 


3. Follow the blog, post the project on your blog or email a picture to her with the subject line "October Color Challenge" and leave a comment there with your blog address or that you emailed her, so she knows you have entered a project.
The Colors Are: Orange(s), Brown(s), Yellow(s) and Red(s)
Fall/Halloween :)

There will be 1 winner choosen for every 5 entries! The winners will receive 1 free file of their choice from FileKutz Designs.  You can choose SVG, AI, PDF, KNK, WPC, GSD, MTC, SCAL2, DFX or PNG for digital.

So here is my submission:


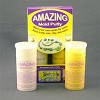
I created the candy corn ontop of the rosette using the Amazing Molding Putty.  
First this is what you need:
Here are my containers
This eraser also came in the pack of cutsie halloween erasers that I had from
last year yet (see post below if you don't know what I am talking about).  
So I created my mold
here it is and it takes less than 5 minutes to set up
Then I used my Creative Paperclay® in the mold

I painted them the traditional yellow, white and orange
and attached one to a rosette that I made by cutting two 12 inch strips 
at 1.5 inches out of halloween candy corn paper.
Then I cut the words from the "What's Your Poison" file but there is so much more than just the words in the file from Filekutz and you can get that here, .
I just attached everything to a lid of a nesting box that I've had laying around forever.  My idea is to fill it with Candy Corn and hubby will take it to work and set it on his desk for his employees.  Cute huh?
So what do you think of my idea?  I hope you get a chance to head on over to the Amazing Molding Putty blog and check out all the fun creations over there.  

Saturday, October 15, 2011

Filekutz October Challenge

Good morning
It's challenge time again over at Filekutz challenge blog.  LisaJane has a super collection of svg files ready to purchase in her shop and I hope I will inspire you to create a fun Halloween card.  Being a member of the DT really gets me into the Halloween spirit and her files are super cute.
In this selection you get the batty border
and the girl, kitty and pumpkin.
I chose to faux stitch around the batty border
and then I cut the girl file in 2 layers
I also cut the pumpkin out again in orange and 
added the Peachy Keen Everyday face.  I outlined the
entire cut with my gelly roll silver pens to give it sparkle
and added an orange bow to her bat hair.
The Happy Halloween was a sticker that I faux stitched
I love using silhouettes because they are so versatile

Now there are 2 different files on the challenge blog, so head on over there and choose which one you'd like to use and create a Halloween card and enter our challenge.

Wednesday, October 12, 2011

Filekutz Test Rose

Good Morning Everyone! FileKutz is releasing a new file called "Flower Petal Blossoms".  LisaJane asked me to do a tutorial and this is one of the flowers I made for her.  Hope on over to the shop and purchase your file here
You will need 12 large pears cut at 1 x 1.375
and 10 small pears cut at .7 x 1
a snowflake 2 x 1.7
and two leaves 2.25 x 2.45
Ink all the edges front and back
the snowflake doesn't matter too
 much since you will not see it
cut the largest petal from the leaves off
I used the round top from my exacto knife to 
manipulate the petals and soften the paper.
Rub the paper in a circular motion
use your paper piercer to fold around in the middle
and then fold each side backwards
gives you this
Use your exacto knife again to manipulate the paper
of the snowflake also in a circular motion
You will end up with a cup of sort
again, manipulate the leaves
I use my embossing roller to create stems
and veins 
I use hot glue (my preference) but you can use
any quick dry glue to attach the petals to 
the snowflake cup
add to each of the 6 points of the snowflake
in a layered pattern
1st layer completed
now start with the 2nd layer and offset the 
petals using the rest of the 6 large pear petals
finished 2nd layer
now start with the next 8 small pears and layer
them on top of the larger pears
keep going around until they are all used up
you should have 2 small pears left
wrap them around your paper piercer
pretty tightly
gives you this
insert one petal into the other one
snip a bit off the end depending how deep you
want your middle to be...
hot glue into the center of the flower
squish...don't be shy, the hot glue holds
it together firmly, but you need to manipulate
the flower to your liking
I squished from both sides
then cup the flower in your hand
and squish again until you like
the fullness
add a bit of hot glue to the stem of the leaves
and here is your 3d rose
side view
top side

Now head on over to the Filekutz Designs blog and you can see more tutorials on how some of these flowers were made.  I just love being on this DT.