Followers

Showing posts with label Flo Green Dye. Show all posts

Friday, March 11, 2016

Simply Create Too Challenge #104 - Green Only


Good day friends and crafters.  Today is another challenge over at Simply Create Too and I'm so excited to show you a project I made that came about from a fail. This week's challenge is ALL GREEN.  I love to experiment and sometimes it works and sometimes it doesn't.


It all started with a butterfly cutout I had. I really wanted to turn this beautiful butterfly into a stamp. I mixed up some Amazing Mold Putty and you can see mixing instructions HERE. I pressed my butterfly cutout into the mold putty and waited for about 10 minutes.


When I pulled the butterfly out I realized it didn't look perfect, so I cut around it anyway using regular scissors. There were definitely some imperfections and when I stamped it, it didn't give me a clean look (sorry no picture of the stamped image). I really didn't want to waste all that mold putty and so I thought and thought about what I could do with it.


I remembered a tutorial I made for this Valentine's day pendant.
You can go and view it HERE!


I used the same concept again. This time however, since the Amazing Mold Putty had already set up, I couldn't get my heart clay cutter to go through the putty. I could get a bit of an indentation of the shape and then I just used my scissors to cut the hearts out. Since the putty was so thin, it was very easy.


Here are my hearts and I even used an edge of the butterfly to create the stem for my shamrock. You can see that it had even been stained with the ink.


Now, the hoarder I am... I had these cute little ceramic
coasters that I purchased eons ago at a thrift store.


I tried hot gluing the putty pieces down, but they just popped right off. I sprayed some Krylon Spray Adhesive to the pieces and glued them onto the ceramic coaster. That worked like a charm!


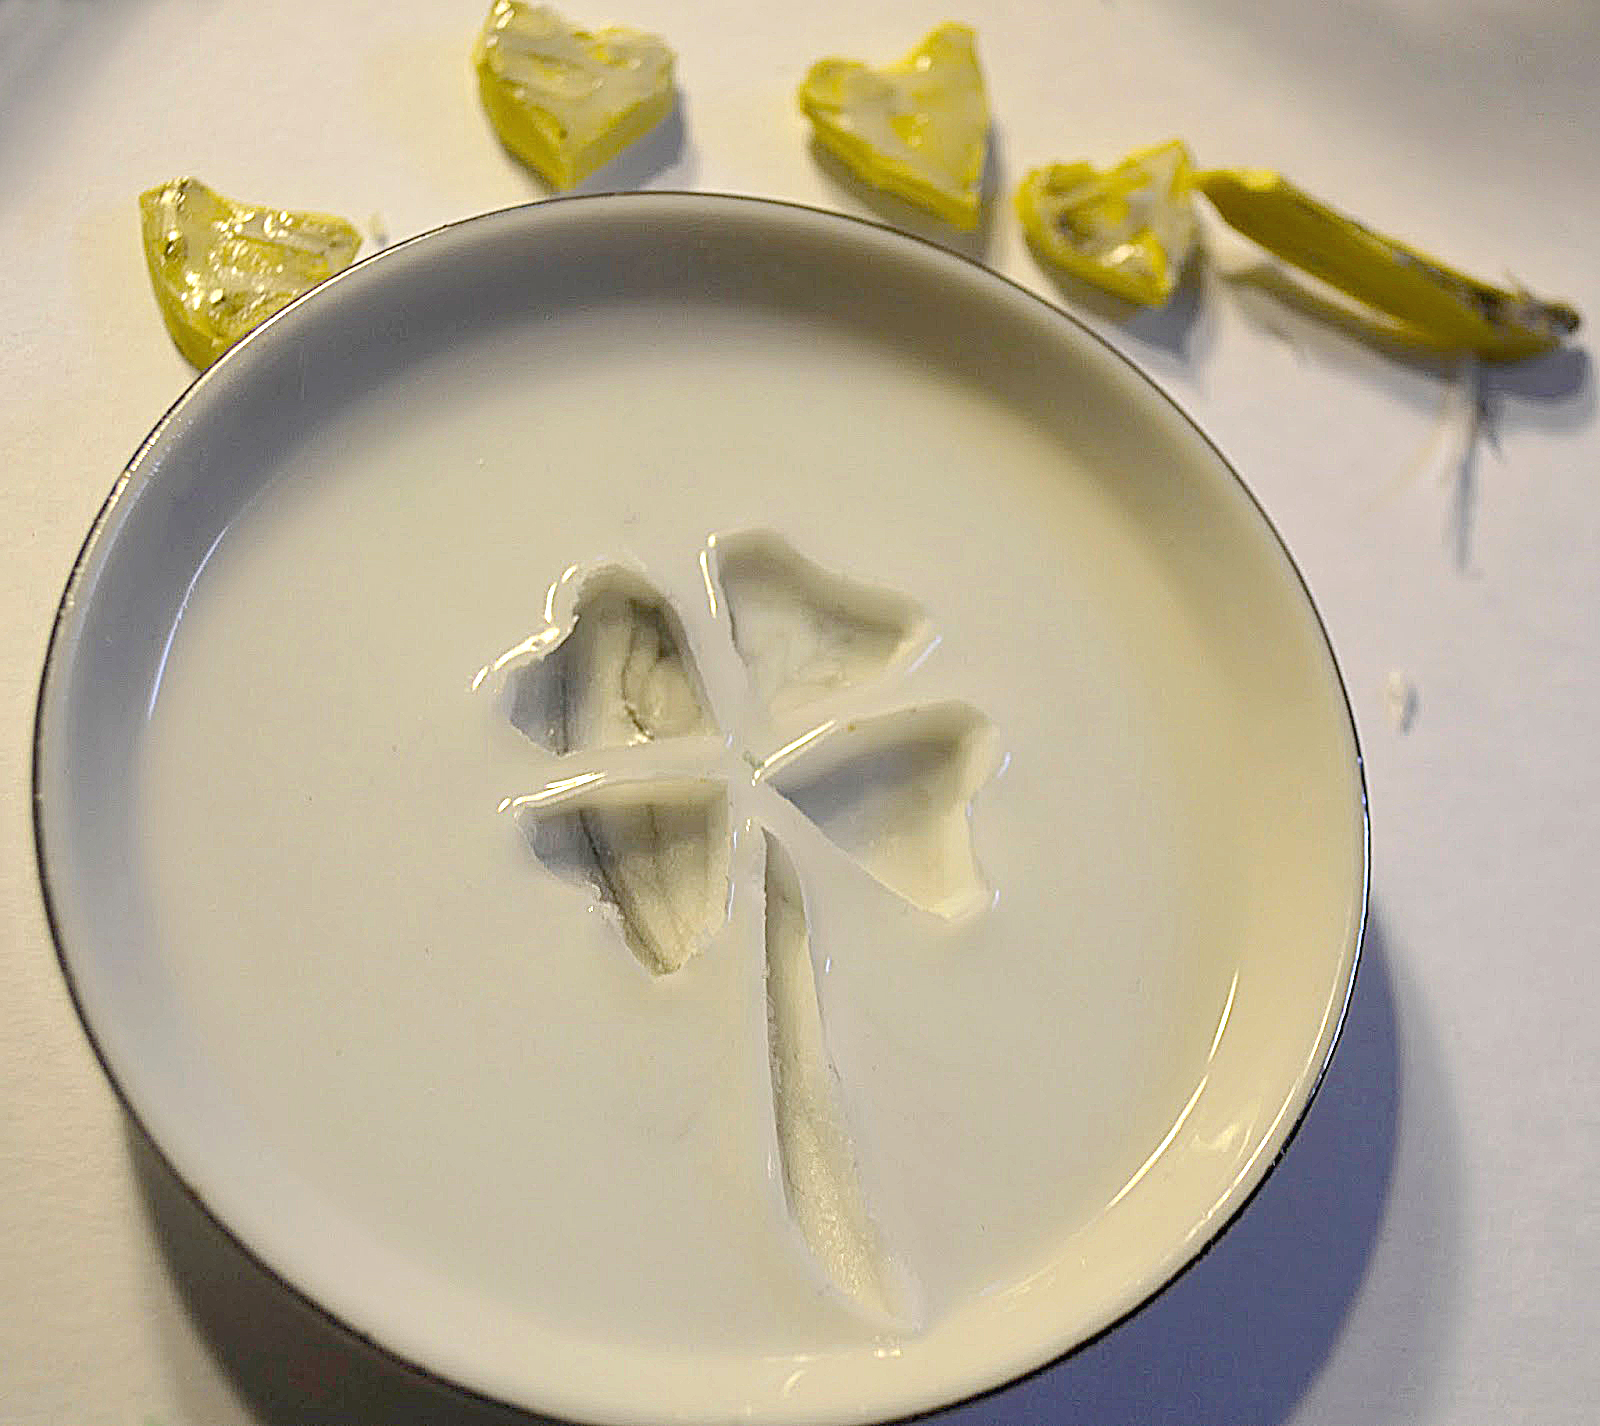
Then I mixed up some Amazing Casting Resin and poured it into the dish, just enough to fill around the shamrock shape. There is a video HERE you can view on mixing instructions.


That set up to cure for about 10 minutes and then I gently pulled the pieces out.
Pretty cool huh?


Then I mixed up some more Amazing Casting Resin with the Fluorescent "FLO" Green Dye and filled in the open areas. That also set up in a matter of minutes.


And here you have an Amazing Shamrock ring dish!
You can view more projects by the design team over at Amazing Casting Products HERE


I am so excited about my (failed) fabulous Shamrock ring dish!

Have you had a failed project
that you turned into a masterpiece?

I hope you will head over to Simply Create Too and join our challenge.

Until next time, have a Lucky Day!


Sunday, June 21, 2015

Anything But a Card challenge #48 Faux Glass leaf bracelet

Welcome to another post for Anything but a Card.  This month's challenge #48 is all about the OUTDOORS.  I so love creating for this blog, but sometimes time gets away from me.  I am here today to show you something I created a LONG time ago for another design team I am on.  I've been with Amazing Casting Products for 3 years now and love using all the products they have.  If you haven't heard about it, go HERE and see all the great things this group of designers have made.  I love creating jewelry and today's post is all about taking Out and About with you!


First start by mixing your Alumilite Violet Dye to part "A" of the Amazing Clear Cast Resin. Make sure to mix it up well and then mix that with your part "B" of the Amazing Clear Cast Resin again, stirring well to get it all mixed together well.


Then I used a piece of packing foam (recycled) as my sponge and "painted" it onto the ribbon coating both sides on top of a garbage bag. Leave your ribbon on the garbage bag to dry and it will just lift right off when it has dried. Once it's dry it becomes hard but yet still pliable. 


I made a leaf using the Amazing Clear Cast Resin with Alumilite (Flo) Green Dye. Doesn't it look like glass? I used a brown sharpie to add the veins on the leaf and then "painted" another coat of Amazing Clear Cast Resin over the top of that to shine up the "sharpie".


I attached the leaf with some E6000® and there I have an amazing fall bracelet. 


I also used my Crop-A-Dile™ to attach some eyelets to the "ribbon" and added a clasp.


I hope I've inspired you to make something for Anything but a Card and can't wait to see what you come up with.  There are only 3 simple rules to participate in this challenge.

1.  Use the Outdoors as your inspiration.
2.  Make ANYTHING BUT A CARD
3.  Have Fun

Thanks for looking and see you soon!

Sunday, November 16, 2014

Buttons to Charm bracelet ABAC Challenge 41, OPEN

Good day Friends

I am here to show you another idea that I came up with for making a charm bracelet for Week 3 over at Anything But a Card Challenge 41 OPEN.  So, now we will take a quick walk through of my bracelet...

It all started with my daughter giving my some buttons to make something for her.  She wants to be a mermaid for Halloween (she never did get to be a mermaid) and bought these cute sea inspired buttons.  "Mom, I want something, anything!", is the only direction she gave me.  Instead I made something for myself.  Hehehe.  I figure if she likes the bracelet, she can wear it also.

So I created my mold using the Amazing Mold Putty and you can go here to see how to prepare it...

Then I painted my mold with the Alumidusts.  I just love the rich color they bring to a piece.

I mixed my Amazing Casting Resin with a drop of Alumilite Flo Green Dye and poured my molds and you can see mixing instructions here.

This is the bracelet kit I was going to use.  Thrift shopping I came across a bag of these leather straps of about 50 of them for $1.  Nope, couldn't pass it up but didn't know what I was going to do with it either.  Now I do...

Using ordinary scrapbook snaps.  Make sure you use the kind that do 
NOT have the hole in the center though.

I placed them in the resin right before it was almost completely cured, 
which in turn becomes one piece. 

And here is my finished bracelet.  Since I craft either late at night or during the day when no one is home it's hard for me to take pictures of some of the things I do, but you actually use your brad setter and just hammer your snaps into the holes provided and it holds very well.

I added a clasp and now I can let my daughter "use" the bracelet if she so chooses.

Now I hope I've inspired you to create something for this week's challenge at Anything But a Card and remember it's an OPEN theme, so seriously, ANYTHING goes.  Also please mention us in your post and link back to our page.  I can't wait to see your projects.

As always, have a great day and God Bless.

Saturday, March 8, 2014

Make Your Own Luck


Good Morning crafties,
I've been playing along over at Simon Says Stamp Blog for a little while now and this last week their Wednesday Challenge was about making tags.  I'm so excited about playing with paper again and I think my tag might be a lucky one  :)

This was super simple to create.
I used glossy photo paper as my tag and "stamped" the background with 
Butterscotch and Lemon Alcohol Inks.
Then I cut out a four leaf clover using my cricket three times and embossed it with tiny circles embossing folder and distressed the clover.  I added some green stickles to the top layer and added a celtic brad to the center.  
The horseshoe I made using my Amazing Clear Cast with Flo Green Dye and lightly stamped it with the same colors of the alcohol ink.  I also added two brads to the top.
I printed the "Make Your Own Luck" and then cut it out as a banner with my cricut and added some stickles to it also.  
Adding some tinsel and four leaf clover wire to the tag completes it. 
I hope you like my lucky tag.

As always, have a great day and God Bless.

Saturday, September 21, 2013

Purple and Lime the new Black and Orange

Good day all. I am here again to share a quick and simple pendant. With Halloween fast approaching, I thought I would create a simple pendant using the Amazing Mold Putty, the Amazing Clear Cast Resin, Amazing Casting Resin and of course the brand new Alumilite dyes. I just love, love, love the colors. Purple and green go very well together!


I have an existing domino mold in Amazing Mold Putty from my Patriotic 4th of July pin I made {CLICK HERE to jump to this project}. My domino mold has come in handy for this festive jewelry project, too! The domino was made using the Amazing Clear Cast Resin with the Fluorescent {Flo} Green Dye.

I love the neon effect!

I also used a sharpie to add a bit of doodling to the domino, just because. The skull was cast from one of those Halloween rings and I molded it using the Alumilite Violet Dye. I added some rhinestones in for the skulls eyes. I just love how the colors pick up so well. I still think the purple is my favorite, but I love the neon green with the Amazing Clear Cast Resin. Say goodbye to the traditional orange and black... vibrant PURPLE and LIME are IN!


I had some of the purple resin left over and I never let anything go to waste, so I dripped "drops" onto wax paper and made some tiny circles. I added rhinestones to them for the "dots" of the domino and then I sealed the entire piece with some more of the clear cast resin and viola... a Halloween pendant is born!


Please make sure you hop on over to the Amazing Mold Putty blog to see all of those wonderful things you can make with the Amazing Crafting Products.  I'm sure once you get your hands on it you will be hooked forever.  Who doesn't like making their own embellishments and the possibilities are endless?  I've added a coupon code to the bottom of this post so that you can get your hands of this amazing product but you better hurry because the coupon is only good through September 30th.  Until next time, have a great day and God Bless.
...........................................

Here's your chance to get 20% discount
including the new Fluorescent Dyes!!!
Use coupon code { celebrate } at

Coupon Expires September 30, 2013.