Followers

Showing posts with label SCAL. Show all posts

Monday, March 23, 2015

Get Creative Challenge #11, Oddball Art Miss You Card


Good morning friends,

I'm so excited to announce that I am the newest member over at Get Creative Challenges.  Now this is completing outside of my comfort zone but I am thrilled to step outside of it!  I accepted to be a SUB on the challenge team about a month ago and was ready to show my first card two weeks ago, but fate held up it's hand and said, "wait just a moment"!  A couple days later Angie told us that someone had to step down and would any of the subs be interested in becoming a full designer?  I dove right in, so here we go!  The reason this is outside of my comfort zone is that I have never done digi stamps before.  I've always been a regular stamper when I was making cards.  I have a boatload of stamps but hardly ever use them.  Maybe I should sell them, NAH!  Anyway, let's get to the challenge.

This is the image I chose from Oddball Art 
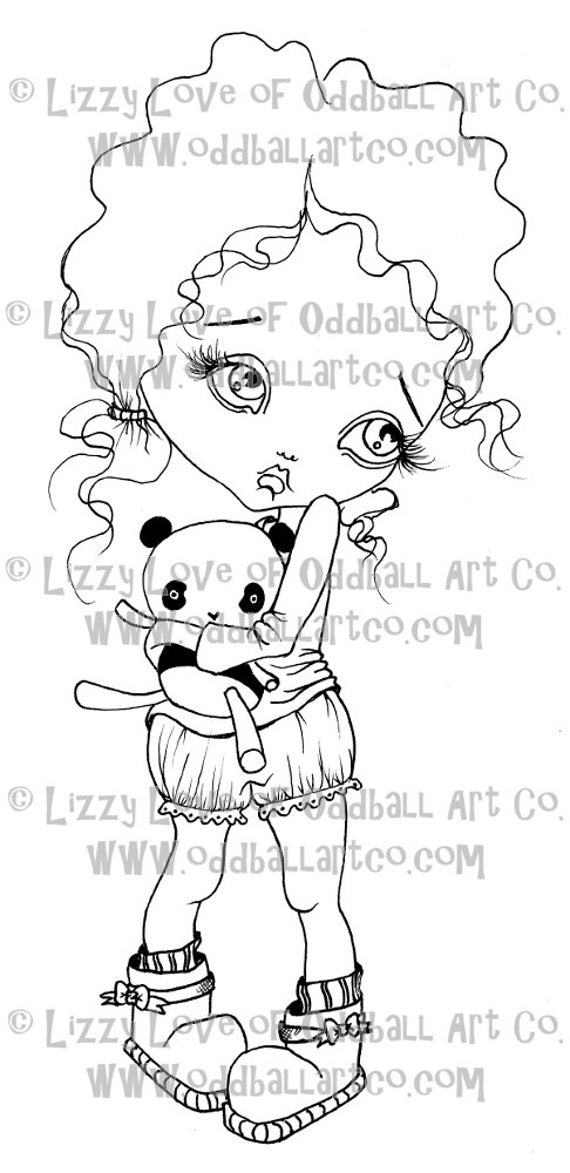
Digi Stamp Digital Instant Download Big Eye Bedtime Pajamas Girl Image No. 11 by Lizzy Love
and you can find her HERE.  

Big Eye Bedtime Pajamas Girl Image No. 11 by Lizzy Love

She is so cute but to me she looked sad and lonely and from that I created a "Miss You" card.  I know that's not what she stands for, but that was the inspiration I went with.  
Also for this challenge you MUST use a die cut of some sort.  


I used up papers, a velum quote and ribbons from my stash (again, trying to use up my hoarding supplies).  
I added some flowers that I cut with my Cricut and SCAL2 as my diecut to match the paper I went with.


I colored her using various pencils, chalks and even some pastel crayons.  
I think for my first card I did ok!


I also popdotted her to make her more of the focal of my card.  
As always, I have to use bling so I added some 
rhinestones to the flowers and the edge of the card.  
I am very pleased with the outcome and hope you come over and join us at Get Creative Challenges.  
Just link up with us and we will choose 3 winners!  


Saturday, January 24, 2015

Evolution

Good Day Friends,

today is a special day as it is my youngest son's 15th birthday.  I cannot believe how fast time goes by.  He has grown into such a special young man.

Many of you guys know he's an avid golfer.  He's come so far in the last couple of years.  As a freshman he qualified for the Varsity golf team.  He did quite well in a lot of the tournaments last summer!  Because of where we live he's taking indoor lessons over the winter months to keep his game sharp.  It's kinda hard to golf in 20 degree snowy weather.  His coach praises him quite a bit!  He's gained a lot of strength and that should help his swing even more this summer.  I couldn't be prouder of him.

Anyway, I wanted to make him something for his birthday golf related...I know, I do that quite a bit.  I get enjoyment out of creating for him and he actually seems to love what I do!

I had seen a plaque a while ago and put it into my "to do" file.  I actually had forgotten all about it until I was going through some pictures looking for something in a particular.  Needless to say, I didn't find what I was originally looking for, but I did find a picture of the plaque that I wanted to recreate.  This is the picture of the plaque I saw, but I did want to change it up a bit and
here is how I made it:
I searched "evolution" in google and found this image
and added it to my SCAL2 program.

I searched "golfer" in google and found this image
and added it to the first image in my SCAL2 program.

I wrote out the word Evolution ... and added that to my image
 in SCAL2 and grouped everything together.


I searched "fairway" in google and found this image
and printed it out at home.

so from this

to this 

Cutting everything with my cricut and SCAL2 in black vinyl all at once
I added it to the front of the glass of a simple picture frame and together I created this.


I just love how this turned out.  

I hope you've enjoyed my quick and easy peasy birthday gift for my son.

As always, have a great day and God Bless!

Saturday, September 6, 2014

Rider Golf Plague

Good morning crafters,

Just wanted to show you a quickie post.  I crafted ALL day yesterday and will be showing you a few things in the next couple of days/weeks to come.  Some posts are scheduled way out but my crafting time is so limited right now since I am also babysitting my grandchildren a couple days a week/weekends and working.  I am trying to fit in as much crafting as possible, but I was also without a computer for 2 weeks and that put me way behind on blogging.  I tell you, blogging takes more time than the crafting itself.

Anywho, here is another Golf Plague I made.  Some of you may know my son loves to golf and just started his freshman year in high school.  He tried out for the golf team and made Varsity!!!  I'm so over the top about this.  They have played a few tournaments already and he is doing very well.  They've taken 3rd twice (honestly, his high school's golf team is the worse out of all 4 high schools in our town) and have had a few  scrambles also.  He will be going to an out of town tournament next Friday and he's a bit nervous about it.  Anyway, we are having out Golf Pot Luck this coming Monday and I thought I would make Coach a medal plague like I did for Austyn last summer.  You can see the original post here.

The high school is the Rough Riders and they are Rider Golf, so this is what it looks like.  Coach now has a place to hang all those medals they will be getting (wink, wink).

These are so easy to make with my Amazing Crafting Products, SCAL, vinyl, a few cup hooks, nails and reclaimed drawer fronts.  Maybe I will make one for each of the Varsity kids???  
I might need to redo my kitchen cabinets again, lol.  
(You'll understand if you read the original posting of this plague)

As always, have a great day and God Bless.

Sunday, March 30, 2014

Fit for a Princess ABAC challenge #34 "5"

Good morning crafters,

I'm so excited to share today because I am the newest member over at Anything But a Card.  I applied to participate in this challenge blog because my main goal is to start scrapbooking more.  I'm SOOOO far behind as baby Steven is almost 8 months old and I don't have a single page for him and Alexis just turned 2 and I hardly have her album started.  I'm such a bad Oma!

With that said, I did NOT create a page for my first challenge post...still such a bad Oma!  This week's challenge is "5".  You could use the number 5, 5 things, 5 colors, whatever 5 represented your idea.  Sadly there just wasn't anything I could do for that challenge that pertained to either of them for a layout, instead it did pertain to my other granddaughter, Miss Bella.  Bella will be 5 years old this year and will have started kindergarden.  I'm assuming that she will probably have made a few friends and will probably want to invite a few to her birthday party.  Now her birthday isn't until December, but I say it's never too early to start planning.  Especially if I am going to be making her party decorations and such as I always do!  So with that said, let's get started...

I had a crown svg pattern in my overloaded SCUT file that I really need to organize.  I have no idea where this file came from, so if it's yours, please let me know and I will give you kudos.  This is why I also need to organize them.

I opened the file in SCAL and manipulated it bit.  I created two crowns and cut the first one at 5 by 2 in pink and the second one at shadow blackout round in purple paper.  The crown even has 5 points to it :)
although the crown was fine it lacked a little personality.  

Then I hot glued a bamboo skewer to the larger crown 
Because the skewer will be laid between the two layers I pop dotted it and layered the pink crown on top 
I also cut out the number 5 for her age and pop dotted it also 
and added some glitter glue for sparkle!  
Miss Bella loves glitter as much as I do.
Of course, no crown would be complete without some bling and
 that was accomplished by gluing on some flat backed rhinestones.  
Miss Bella loves coming and playing in my craft room because I have sparklies as she calls my bling!
Now sometimes there is a mistake and you cannot fix it.  
Can you see my mistake?  
When I layered the pink crown on top of the purple one, my skewer 
showed through the pink triangle hole.  Ugh...trial and error!  
So I cut out two triangles using my cricut 
(I do keep all my cut files named with the project that I created them for, 
that's about as organized as I get for my cut files) 
a bit larger than the holes and glued them on and added a bit of bling. 
 I also wrapped the bamboo skewer with some pinkish ribbon and 
hot glued it to the top and tied another piece onto it.  
Now she will have a beautiful hand held crown for her party.  My plan is to cut more of these (depending on how many little girls will be at the party) 
and let them decorate them with glitter and stickers before adding the skewer. 
 I think these will make a great party favor and something
 they can take home to remember Bella's birthday party.

I hope I've inspired you to create something and join us over at Anything But a Card for the challenge "5". Remember, it can be Anything But a Card!

As always, have a great day and God Bless!


Tuesday, June 25, 2013

I Love Golf vinyl decal

Good day all,

I just wanted to put up a quick post of something I did late last night.  I've had such a crazy schedule again and don't see it slowing down any time soon.  I wish I could spend as much time in my craft room as I do at my 3 jobs.  CRAZY!

Anyway, hubby found something on facebook yesterday (he just got a smart phone and now he finds all kinds of fun stuff and of course wants me to either look at it, or make it, or comment on it (lol)) and tagged me on it.  I so knew I needed to make it immediately!

So without further ado...I dusted off my cricut and pulled out some scrap vinyl (because you know I NEVER throw anything away and  here is my new vinyl decal for the back window of the van.

It's really a pretty orange color, but I am not sure why my camera did this??? 


I downloaded the image and brought it into my SCAL program.  Using the trace image portion of the program I made a few adjustments and brought that onto my mat.  Then I broke the image apart and took out the "extras" (it had a double line) and cut.  Simple as that.  Then I used transfer paper and put it on my window.  Make sure you clean the area good before applying your decal.  I'm no expert on using SCAL but I do try things here and there.   In fact, Penny Duncan is heading up a SCAL and ECAL group again.  You can find it here at Yahoo Groups or here at Google+ Community.  She has some wonderful ideas and lots of step by steps.  I know she is planning a hangout soon and that would be a lot of fun also.

Here is the complete back of the window...

I did this vinyl 3 years ago and it still looks great.  So don't be afraid to try vinyling your window.  I know I love making my own and it's SOOOO much cheaper, :)


I hope you liked my quick post and as always, Have a Great Day and God Bless!

Thursday, December 22, 2011

Vinyled mugs with Snowman Soup

Good morning all,


I just wanted to share a very quick and easy gift I made for some very special people in my life.  You know the kind...The kind that are there for you whenever you need something, even if it's just an ear.  The kind that do NOT judge you no matter what.  The kind that call you just to chat.  The kind that invite you over for coffee just because.  The kind that ask for nothing and give you everything.  These two people are like parents to me at times.  I am so far away from my own family that it feels great to have someone to take that roll sometimes.  They are both very, very special to me.  So here is a quick and simple, but from the heart, present for them.


I bought a pair of mugs and vinyled "His'" and "Her's" on them.  I used my cricut and my SCAL 2 and my favorite font, Fiolex Girls (minus the hearts).  
Then I made up two baggies with SNOWMAN soup.  1 package of hot cocoa mix, a few mini marshmallows, two kisses and a candy cane.  
I downloaded the tag from here and it reads:
Was told you've been real good this year
Always glad to hear
With freezing weather drawing near
You'll need to warm the spirit
So here's a little snowman soup
Complete with stirring stick
Add hot water - sip it slow
It's sure to do the trick
 Now I know it might not be much for such generous people, but again, it came from the "heart".  Now whenever they have their morning coffee or tea they will think of me and know that I am ALWAYS thinking of them.

Sunday, July 3, 2011

Simply Sunday "Summer Fun"

Good afternoon friends,


***If you are looking for the Lasting Memories post, please scroll down***

Welcome to another Simply Sunday challenge over at Getting Cricky and it's Summer Fun.  I am so excited about today's challenge because I did something new!!!  I am using the Splashtastic Summer stamp set and really had a ball with this one.  Now remember, for EVERY stamp set you purchase, Kristal is donating $1 to a charity.  Again, that's for EVERY stamp set, not just right now, or last week, but forever as long as she sells them.  So when you are thinking about purchasing a set, think about how you will be helping a charity also.  Isn't that just a great feeling?


I wanted to make an action wobble card.  About 6 or 8 months ago I received a sample package of those action wobbles and put them aside and totally forgot about them.  Ugh, I tend to do that way too much...  I didn't have a seal on any of my carts so I found a clipart of this seal and traced it in SCAL.  I used one peachy keen eye from one of my sets and added a smiling face which I free hand drew.  Straight and curve lines I can draw, but that's about the extent of it.  The background paper was from my stash and I made my own faux baker's twine like I did here, only this time I did three colors and I love it. I had these beach balls in my stash also and they were just perfect for this card.  Now back to the wobbles...I cut my seal and went to add the wobble...and it was too BIG, or my seal was too small.  I was so bummed until a light bulb went off and I made my own action wobble.
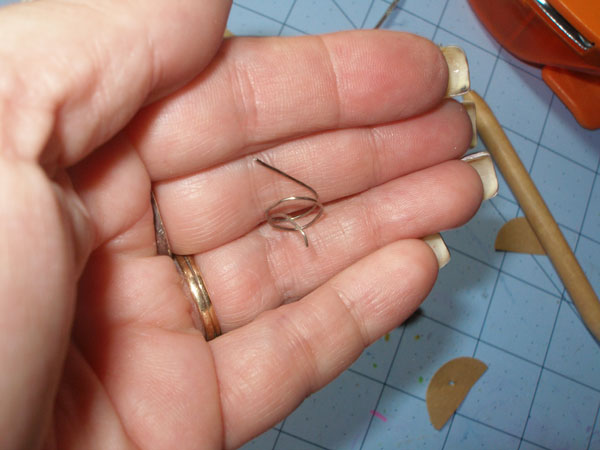
Let me show you how I did it but be aware this is a photo heavy tutorial:


and there you have your own action wobble.  Now, mind you, I am not taking away from the Action Wobbles, because they are awesome.  My problem was that I need the wobble to be smaller because my seal was too small for the "real" action wobble.  I just needed to make my own for smaller cuts is all.  Here are a few shots showing my wobble in action...I wish I had the time or patience to make another video.  I just don't know how some of you guys do it, plus I do not have an editing program and believe me, I need a lot of editing help.  LOL


So what do you think?  Cute eh?  I think so.  Now go make something with "Summer Fun" and head on over to Getting Cricky and join our challenge.  If you have the Splashtastic Summer stamp set use it and HAVE A BALL!!!