Followers

Sunday, April 22, 2012

Birthday Hop


Hello and welcome to My-O's 32 Birthday Blog Hop! Shannon is turning 32 and what better thing to do then have a hop with us crafty people to celebrate!! If you stumbled upon this hop by chance, excellent!! Just make sure you start back at the beginning to give Shannon, the birthday girl, some warm wishes and for a chance to win some awesome yummy candy!! If you came here from 

Sylvia you are on the right track.
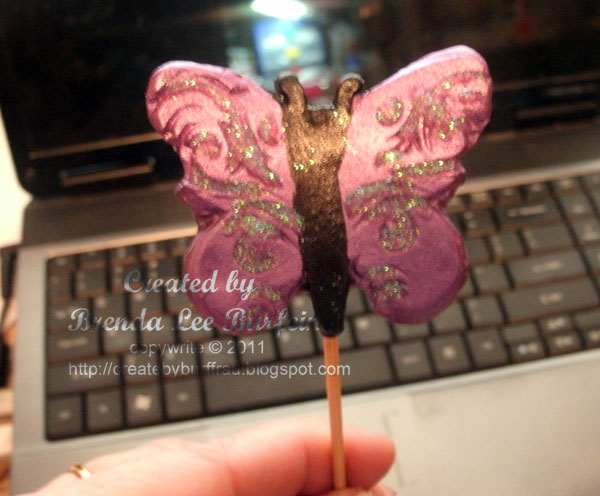
Now I wanted to try something I hadn't done before. Remember how I used to be on the design team for Amazing Mold Putty? Well, since I love this stuff so much I created a mold using a Happy Birthday rubber stamp. It's a square foam one and it worked like a charm, (hehehe). You will understand the pun in a minute. Once the mold set up I then paint brushed some green pearl ex into the lettering
 and poured the clear cast resin. It did need to set up for about 29 hours, but it was well worth the wait.
 I also added a green rhinestone to it. It submerged into the clear cast resin and looks awesome. My picture taking ability is just not that good. Do you see how the pearl ex highlights the wording? Isn't that just awesome? I then drilled a hole into the side of the casted piece with my dremel and added a keychain to it.
 Here is the backside of the keychain. See the words are protruding out from the back. Very unique looking.
 Well no birthday is complete without a card. I created this card especially with Shannon in mind. She loves the color green so I did the background with green inkpad, added some cardstock out of my scrap bin. The flowers were in my "to be used some day" bin and I added some homemade stick pins. I also used the same stamp that I created the keychain from for the sentiment.


So I want to thank Shannon for inviting me to her birthday hop and I hope you have found my project interesting.
Thanks for hopping along today. Your next stop in the festivites is Diane
Shannon- http://my-o-scrappin.blogspot.com

Friday, April 20, 2012

Easter layout

Good day all,


yes, I am really here posting for real.  I have been very busy with some personal things and work keeps getting in the way also.  I recently got a promotion at work and I have been very busy working all kinds of different shifts.  It's a good thing, but I miss crafting.  Also we are doing a bit remodeling in our home so I've been without a "real" craft room for awhile.  When I have been crafting I've taken over the dining room, living room and even the bathroom at times.  LOL  My "new" craft room is almost finished.  It's nothing spectacular but its bigger than the "closet" I was in.  I would share pictures but again it's nothing spectacular and it's still not what I really want but beggers can't be choosers.
So, since rearranging I started to really get the crafting bug and I also realized I hadn't shared any pictures of my newest granddaughter.  Infact, I haven't even done any layouts of her and she just turned 5 weeks.  Bad Oma...so I decided to do a layout of the girls at Easter.  I hope you like it...
At my daughter's baby shower, my soon to be sister-in-law bought the girls matching outfits.  I do not like the color yellow much but I have to honestly say these outfits are adorable.  Since they were so springy we decided they would be perfect for their Easter picture.  Tell me what you think:
I really like it
I added some silk flowers, a basket and bunny I cut with my SCAL2 and cricut.  I made some floral picks with the girls names and added some bees and some glitz.
Here is a close up of the girls' picture.  Bella didn't like the Easter bunny last year, but she was the "big sister" this year and she did wonderful.  I reflected all of that on the journaling tag.

Here is the banner I made.  I cut egg shapes from some glitzy paper I have with my SCAL2 and cricut and glued the letters from the Best Occasions Scrap Pack.  I love this paper because it's so springy and girly.  I also added a few birdies to the "clothesline".  Now onto the unique embellishment...the clothes pins.
I made a mold of those tiny wooden clothespins with my Amazing Mold Putty.  If you remember I was on the design team for them and I still have a little bit left over.  I tell you, when I run out I know I will be using my Michaels 40% coupons religiously on this stuff.  I can make any embellishment I want and will never have to buy another.  It's so much fun making my own embellishments.
Then I mixed the Amazing Casting Resin with some flesh colored dye and poured the molds.  I can make my clothespins any color I desire...yeah!!!
Aren't they just cute?  I didn't paint the "wire" part.  Actually I didn't think of it until I had already adhered them to the layout, but its not that big of a deal.  I don't think anyway...

So, now I better get some of those pictures off my camera and printed so I can create some more layouts of Miss Alexis.  I hope she will forgive me for not having any layouts done until now.

Thanks for stopping by and make sure you come back on Monday the 23rd for a hop I am participating in.  There will be some fabulous talent like always.

Saturday, April 7, 2012

Lock and Key Pendant

Good morning and welcome to my last post for Creative Paperclay®.  I am so sad to be leaving the design team, but room needs to be made for some fresh talent.  Believe me though, this is not the last you've seen of me using the paper clay.  Since I have been on the team I have found a new love and this week I am also showing another new love...

First I started with a mold I had received from Articus Studios.  Being on this design team has given me LOTS of fabulous opportunities to try different things.

I have a passion about keys.  Especially skeleton keys and this mold had just a great variety.

I pressed my clay into the mold and let it set overnight.  The next day I pulled my keys and locks out and let them air dry the rest of the way.  I always leave my clay pieces in the mold overnight so as I do not distort them trying to get them out of the mold before they are at least 3/4 of the way dry.

Then I used an emery board and sanded the keys and locks.  I even have used my dremel to get inside those little openings.  Love this tool.

Here is my key and lock all dried and sanded.  Now came the other portion of my new found passion.  Our very own Terri Sproul has come out with a new product called Mixers.  It's so awesome...you just "mix" it into some crystal lacquer and it creates a paint like product.  As soon as Terri released them I bought some and told hubby how much I loved them.  For valentine's day he surprised me with the entire product line.  I was so excited and now I have so many colors to play with.  It will also last a very long time because you don't need very much of the "mixer" at all.  Anyway...I chose the "bronze" color and a dabble of 3d crystal lacquer and this is how my new necklace looks.
Now, again I did say this is my last post for Creative Paperclay®, but if you are so inclined to see more of my creations, keep checking back here.  I have a huge project in the works and it involves my "new" craft room.  That is one of the reasons you haven't seen a lot of projects from me, but I should be back on track in a couple of weeks and joining in a few new DT teams also.

Wednesday, March 7, 2012

Shamrock pick

Good morning friends and fellow crafters,

I am here to show you a quick (not quite done) project that I am making for work.  I've been commissioned by work to create some giveaways for St. Patty's Day and I am so excited about it.  I made something similar for Valentine's day and was asked to do it again for St. Patty's Day.  I love creating projects, especially for a purpose.  Now the opening sentence said "not quite done", but in fact the project is done, but I cannot show it all right now because there are going to be a few different posts for this project.  Which in turn means, you will have to keep checking back to see the entire finished project.

I started with rolling my Creative Paperclay® out between two skewers for an even thickness.  Then I cut the shamrocks out with a cookie cutter I got at Michael's for 99 cents.  I love a bargain.
Then I placed the skewers on the clay and pressed them into the clay and used white glue to attach them
and let them dry for 24 hours.
After all the shamrocks were dried, I cut the little stems out of the clay
and covered the skewers.
and sanded it after that dried completely.
Then I painted them green and used my stickles to outline them.
Now remember, there is more to this project, so please keep checking back.

CHA

I know CHA was in January, but I wanted to show you what I made for the Amazing Mold Putty design team I am on.  We were all asked to submit a project for CHA and I was pretty intimidated at first.  I wanted to make something that screamed wow...  My son's girlfriend had been over for dinner and she always wears the cutest jewelry.  She had on a long necklace with a fairly large pendant and that's when it hit me...I could recreate something like that.  Hers was a bit heavy and that made my idea even better.  I used Amazing Mold Putty, Amazing Casting Resin (liquid to solid in 5 minutes), Alumilite's Silver and Gold Powder, Gold acrylic paint and Silver paint marker to complete this project. 
First  I made a mold of one of my favorite belt buckles
and a Fleur De Liz button
I casted the belt buckle with the Resin and Silver Metalic Powder
and the Fleur de Lis button with Gold Metalic Powder
I highlighted various spots of the pendant with the
gold metallic paint and highlighted the tops of the 
Fleur De Lis with a silver painters pen
I added gold and silver chains to the pendants to create this beautiful necklace
I was pretty happy with the outcome and my son's GF was amazed.  I sent my pendant off to CHA and got a lot of positive feedback from it.  Even though I couldn't be there, at least a part of me was...LOL

Sunday, March 4, 2012

A is for Alexis

Good day all


Today I have a quick tutorial on how to create a fabulous way to create a monogram plus name to your project. A loooonnnngggg time ago I had purchased a "candy mold" alphabet but never used it.  When I became addicted to Creative Paperclay® and Amazing Mold Putty I remembered this mold and wanted to use it.  It was so old that I was afraid that it would hold up with the Amazing Mold Resin so first I made each letter using the paperclay.
 Then I molded the paperclay into the Amazing Mold Putty.
 Then I combined the Amazing Casting Resin "Liquid to Solid in 5 minutes" with some pink alcohol ink to make the letters and I also made a butterfly mold with some plum alcohol ink.
 After the letters casted I glued them to a painted wooden A and added the butterfly also.
 I really like how I can personalize almost anything using the Amazing Mold Putty with the casting resin.

Friday, February 10, 2012

FF Door Card

Good day all -


Welcome to Festive Fridays blog hop.  Today I am revisting a card I made last year for our Festive Friday card because it has been a very hectic week for me and this was one of my favorites.   Every other Friday we are showing different cards for the Christmas season and since it's an every other week affair there isn't a mad dash at the end of the year to get them done.  So if you just happened upon my blog or you are reading this in an email, please start here with Terri (our hostess with the mostess), but if you came from Angela you are in the right place, so sit back and relax and I hope you enjoy what you are abou to see.
Recipe:
White cardstock 4 1/4 by 5 1 /2, Light Brown cardstock (layer), Red cardstock (door),
Maroon cardstock (trim), Green cardstock (wreath),
Gold chalk for edging, Red glitter glue, Green glitter glue
Gold brad - cut off pokies, Red ribbon for bow


Cuddle bug with wood texture plate
Popdots and ATG gun


Door Open
 
I wish the woodgrain showed up.

Here is the video taking you step by step.


I hope you enjoyed my video and please leave a comment.  I thrive for feedback.
Here is the complete listing for the Festive Fridays bloghop.  I hope to see you again in two weeks and now head on over to Now head on over to Cynthia's blog and check out what she has in store for you.  Remember there is a link on the left side bar with all the stops for you also.  See you in two weeks
As always, have a great day and god bless.


Tuesday, February 7, 2012

Butterfly pick

Good morning fellow crafters,


I know I haven't been the best blogger lately but I am trying to keep up with a busy work schedule and manage some family time and now I am getting ready for my daughter's baby shower...yup my daughter is expecting her second child in a little more than I month and I am so excited for that event.  I am in charge of her baby shower and I wanted to make it special and use my own creations instead of buying them.  Today I am going to show you the first of a few things I am making.  Her theme for baby Alexis (isn't that a pretty name?) is butterflies and fairies and today I am showing you what I did for the butterflies.


I had a stamp of a butterfly that I absolutely love and decided I wanted to see if I could make a mold of it and make it as beautiful as the stamp is.  Of course using the Amazing Mold putty I pressed the stamp into it and let it cure for about 5 minutes.  Then pressing my Creative Paperclay® into the mold and since I tend to let my clay stay in the mold and dry overnight the underside was still a bit wet when I took it out of the mold.  I took it out of the mold gently and just let it dry to it's fullest.  The reason I leave my clay in the molds to dry is so I won't distort the clay before it has had time to dry at least a bit.  After it has completely dried I took my dremel tool with a sanding bit and shaped all the rough edges and try to get as much detail as possible.  You can use sandpaper or even an emery board as I used to until hubby bought the dremel for me.  This cuts down on time for me.
Then I painted the piece.  I used plum acrylic paint and I filled the crevices
with dimension medium and sprinkled pink glitter on top of that for glitz.
(I wish the picture were better because
it really is gorgeous in real life)

Using my dremel again I bored a hole into the back of the
butterfly and hot glued a bamboo skewer into it.
This was so easy to make and I can decorate them
in any color to match any decor.
I hope you can get a chance to get yourself some Creative Paperclay® and make your own decorations.  There are so many things you can make with it and you can purchase it at Hobby Lobby, Michaels and online here.  

Wednesday, February 1, 2012

Love Cast in Clay Blog Hop


Welcome all to our Love Cast in Clay blog hop.  If you just arrived here or are reading this in an email, please start at the beginning at Creative Paperclay.  If you arrived here from Gini then you are in the right place.  Also if you get lost I have the entire blog hop posted on my right sidebar.  


As most of you know I am a designer at Creative Paperclay® and I soooo love it.  The best part of being on the design team is that I can make my own embellishments for a fraction of the cost.  Plus, how many times have you needed a certain embellishment and when you go to buy it you have to either buy 10 of them because that's how they are packaged or you need more than one and then you must buy two because they aren't packaged in multiples?  Well, I've run into that a lot...now making my own embellishments with paperclay allows me to make as many as I want or need.  Also being on this design team I get a chance to try products I probably wouldn't have thought of purchasing, as in this case, this fabulous mold from Articus Studios.
Each of the designers were allowed to order a mold from them and create something for this blog hop.  I have always been intrigued with locks and keys and when I saw this mold there was no question on what I wanted.   
First I pressed my paperclay into the mold and let it sit overnight.  Depending on the thickness of your pieces it may take just a couple of hours to dry or sometimes overnight.  Really depends on how much clay you use...I do let mine sit in the molds until completely dry and I have never had a problem with that.
Once I took the pieces out of the mold I used my exacto knife and "cut" away the excess.  I also use an emery board to smooth out any rough edges.  The paperclay is very easy to work with when it's dry.  Look at all these cute locks and keys I made and the detail is fabulous also.  Love, love, love this mold.  I wanted to use the heart shaped lock and small key for this project, so I painted the lock with red acrylic paint and sprinkled some glitter while it was still wet.  I did the same with the key except I painted it black.  Then I highlighted the edges with my silver paint marker to give it some depth.  I attached the two with a jump ring and used a glue dot to adhere it to a heart shaped piece of cardstock on top of the mulberry paper.  The other reason I LOVE using the paperclay is that the embellishment is so lightweight and doesn't get heavy on my card like some other embellishments can get.
I hope you've enjoyed my creation for this blog hop and remember I made one of each of these keys and locks so stay tuned to my blog for another idea shortly.
Now head on over to Jennifer's blog and see what she made for our hop and don't forget to leave a comment on everyone's blog because Terri (our fabulous team leader) will be giving away 16 oz package of Creative Paperclay® and package of Amazing Mold Putty so that you can also create your own embellishments too.
I can't wait to give hubby my valentine's card.

Now I also wanted to cast some of the keys and locks with the Amazing Resin but I didn't want to ruin the molds as they aren't as flexible as the Amazing Mold Putty that you can make yourself so I created my own molds and here is how I did it.
First I took the paperclay keys and locks and pressed them into my
worked Amazing Mold Putty.
and poured them with the Liquid to Solid in 5 minutes
Amazing Resin
Here is a comparison of the clay pieces (don't know why these pictures turned out so blurry)
versus the resin pieces.  The resin pieces are also very lightweight and can be used for cards and scrapbooking as well, but I think I am going to make something in jewelry with these pieces so stay tuned to see what I make.