Good Morning all -
Today is my first day over at
Creative Paperclay and I am so excited to share my rose tutorial with you. I am mostly going to be featuring my clay projects for my cards and or scrapbook pages, but today I wanted to see if I could actually make a 3D rose. I've been making these roses out of scrap paper and love the way they turn out, so I thought I'd probably be able to make them out of the paper clay also. I am using this rose for a project for my mom, it was supposed to be for Mother's day but I was running a bit behind and somethings were taking longer than others so I will be at least sharing the tutorial with you. Once the project is complete I will share it also. So let's start:
First I rolled out my paper clay with my acrylic roller. I purchased a package of plastic mats (2 per pack) at the Dollar Tree to use for my paperclay. Depending on how big or thick you want your rose is what determines the thickness of your clay. I rolled it to 1/4" thick and used a 6 petal flower cookie cutter and cut 3 flowers.
Then you cut 1 petal out of one of the flowers, then 2 petals out of another flower and then cut the next flower in half.
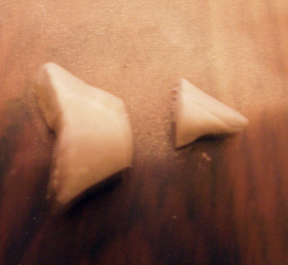
Take the 5 petal flower and mold the seems together, careful as not to distort the petals though. Next take your 4 petal flower and do the same, the 3 petal flower the same, 2 petal the same and cut most of the tip off the end;
and the single petal kinda just squish it and form a ball with a center hole. The second 3 piece petal is discarded, and I used it to form the leaves freehand. Just roll a bit between your fingers forming a teardrop. I then used a toothpick and added some veins in it.
Then layer the pieces together. I did use a bit of white glue to attach them, but if your clay is pretty moist yet it will adhere together nicely by itself by smooshing it a bit, but I just always use a bit of white glue as an extra precaution. Then adhere the petals to the side of the flower, also using a bit of white glue and smoothing out the back.
It really doesn't need to be perfect, especially if you will be adhering it to another project (like I will be doing in the near future).
I then set the paperclay aside and let it dry. My clay actually needed a couple of days and that might be because of all the moisture in the air right now. You do really want it to be perfectly dry though before you paint it.
I painted the rose with Rose Bouquet Acrylic and the leaves with Leaf Green Acrylic by Anita's All Purpose. The highlights of the rose were made with Bronze 3D Paint and the leaves were highlighted with Metalic Green 3D Paint, but sponged on.
You can really see how it shimmers.
I am very happy with my first real 3D project with paperclay and can't wait to show you how I used this fabulous flower on a project coming soon.


Oh Brenda! That looks fab! I love it!
ReplyDeleteBrenda your rose is just beautiful and you did a great job on the instructions!
ReplyDeleteHugs XX
Barbara
Hi there from your newest follower! Thanks for visiting my blog - yours is so nice! This project is so beautiful, l love the detail in the rose and the way you decorated it :)
ReplyDeleteScrapping Sarah
www.scrappingsarah.blogspot.com