Welcome to our Stencil Girl's Bloghop. I'm super excited to share a fun project with you today, but first a little backstory about myself before we get into the tutorial. My name is Brenda and I've been with Amazing Casting Products since the beginning and I've enjoyed every minute of it. My blog is Creativity is a State of Mind because I believe each one of us has a different view on artistic talent. I've definitely come a long way since working with this Amazing team. Also working with these products has taught me so much and I've enjoyed learning new techniques. Therefore, whenever we can partner up with another designer or design team, I look forward to expanding my horizons.
Since I've been on the design team for so long, I've accumulated ALOT of pieces.
Anytime I'm making a project I wind up with more and more resin pieces. Some finished, some not. And this is how my project was born ...
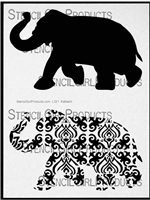
I started out with a foam core piece that I cut to 10 x 10 and I painted green with acrylic paint. Next I took my Stencil Girl Elephant Parade (which by the way is my obsession)
and traced the elephant with a pencil after the paint was dry.
It doesn't have to be perfect because I'm only using it as a guide.
Next I got out my box of resin pieces and began laying them inside the elephant outline. It was kinda like putting a puzzle together. Absolutely every one of these pieces has a story for me.
Here are a few pictures of some of the pieces I used with their molds. (I've made ALOT of molds :) The Amazing Mold Putty is still by far my favorite product. I love duplicating little charms and such that I find while antiquing or junking because I don't want to use the original piece. Especially in a project like this one.
Some butterfly charms
A Fleur De Lis I found in a box I bought at an antique shop.
The Fleur de Lis that I embedded into an
Amazing Clear Cast Resin bezel.
Some leaves that were molded from a broach that I got
in a jewelry lot at an auction.
Branches that were hair barrettes to start out.
I just have tons and tons of molds...
After I had all my pieces laid out the way I like it, I glued them down. After they were all securely adhered I took the piece outside and spray painted it black.
I didn't let it dry completely though.
In fact, I took a hairdryer and gave it a 3 minute blast on the cool setting.
I dry-brushed it with purple metallic acrylic paint around the edges of the corners.
While that was drying I also used the same acrylic paint and dry-brushed the
elephant mosaic-ed pieces to give them some dimension also.
In my box of pieces I also found some roses I made a long time ago with the Amazing Clear Cast Resin. I absolutely love how they looked like glass, but I did want to give them a bit of dimension also. I dry-brushed a bit of black and the purple metallic around the edges. Just enough so that you can still see their clearness, but also some definition.
After everything dried a little, I saturated the entire piece with the Amazing Clear Cast Resin. Not only does this give it a nice GLASS touch when it's cured, but it will also keep everything in place. But now here comes the magic.
I took a toothpick and ran it around the edges of the elephant outline while the clear cast resin was still wet and also within the stenciled area to "scrape off" some of the black and purple to expose some of the green base. It gave is just enough color to make it pop.

After letting it cure for 24 hours I was able to display it in my elephant collection. Now, the best part of this is it's weight. If you would have used this many heavy trinkets, your piece would have been very heavy. The Amazing Casting Resin is so super lightweight.
This by far is one of my favorite projects up til now.
I totally love how this turned out and I hope you have found my tutorial useful.
Now for the bonus fun stuff. There is a giveaway involved...
One lucky winner will receive both a $25 Gift Certificate to StencilGirl Products
AND a $25 Gift Certificate to Amazing Casting Products!
Visit the fabulous designers from both teams and comment for your
chance to win!
The more blogs you comment on, the more chances you have to WIN!
(One comment per blog please.)
You have until Sunday, April 23rd at 11:59PM Central Time to leave your comments.
Winner will be announced on
StencilGirl's Facebook page and Amazing Casting Products’s Facebook page
on Monday, April 24th.
So thank you for coming and hopping along with us today and be sure to leave a comment so you get entered in the giveaway. Until next time, happy crafting.