Followers

Monday, July 27, 2015

Here comes my Mommy

Good day

Just wanted to share a quick post on a sign I made for my soon to be DIL's SIL.  Wow, now how was that for an introduction?

Mandy's (my soon to be DIL) brother was getting married and his soon to be wife had a child from a previous relationship and he was going to be in the wedding.  They wanted him to carry a sign as he walked down the aisle.  So Mandy got this wooden sign at Michaels and painted it a light gray with yellow trim.  Their wedding colors were gray, yellow and silver.


She then brought it over to me to have my vinyl a saying.  


Her soon to be SIL loved it!

Not all projects need to be complicated and sometimes it just feels good to make something simple.

As always, have a great day and God Bless!


Thursday, July 23, 2015

Hope bottle

Good morning friends,

today I want to show you a project I made for a special friend of mine.  Pam was diagnosed with breast cancer 2 months ago.  I created this for her and here is what I did:


I wanted to give a little "Hope" in her life.


While garage saling this summer I found a baggie of these type setter tiles.  LOVE the price even more!


I used my Amazing Mold Rubber from the Amazing Casting Products line and recreated the entire alphabet.
You can view a video HERE to see how to use this Amazing product.


Then I used my Alumidust also by Amazing Casting Products and 
a fine paintbrush and highlighted the letters and the edging.


Then I mixed some of the Caucasian Dye with the Amazing Casting resin and poured my molds.
You can view a video HERE on this mixing preparation.


Here are my tiles!  Beautiful!


I had these wonderful glittery pink ribbons in my stash and glued one onto a chopstick.
Then I used my E6000 and glued my tiles onto the ribbon from top to bottom.


Love the look.


I added some flowers after I wrapped the bottle with a gray and pink variegated yarn.

She says she has it on her nightstand and when she wakes in the morning she says it gives her "HOPE"!

I hope you've enjoyed my project for today and as always have a great day and God Bless!

Wednesday, July 22, 2015

Get Creative Challange #19 "Fishing in the dark"

Hi all,

I am so sorry if you came last Monday to view my card for the Get Creative Challenge blog.  I was on vacation and forgot my charger to my computer and then when I got home I forgot all about blogging my card.  I FAILED!  My car was up on the challenge blog though so I hope you had a chance to view it.

This is the image I chose for this month's challenge from Cute as a Button.

Our theme was you had to add stars.  I immediately knew 
I wanted my card to represent "Fishing in the Dark" 
and this is how it turned out:


I hope you will head over to the challenge blog HERE and join in the fun!  There are prizes to be given away also, just make sure you are following the theme "Stars" for this challenge.

Thanks for stopping by and I hope to see you again real soon.

As always, have a great day and God Bless!


Sunday, July 19, 2015

Anything But a Card Challenge #49 - Armour etching book mark

Good morning friends,

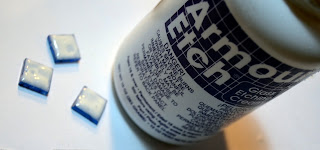
welcome to another challenge at Anything But a Card #49 Open Theme.  Today I am showing you the simplest of ideas.  I used to do a lot of mosaic work and have accumulated plenty of these glass tiles.  I may use them again sometime for mosaic work, but I have plenty and could use a couple for this project.  I decided I wanted to make myself a bookmark.  I also wanted to personalize it!  So let's get started:


I took some regular stickers from my stash with my initials and placed them onto my glass tiles.


Using my Armour Etch I applied it all over the entire tile.


Let it set up for about 5  minutes and wipe it off.  See the difference of the etched tile vs the original?  Then just peel the stickers off the tiles.  I did make all 3 of my letters, but only needed the Bs.  


Then I used some No-Sew fabric glue and glued the edges of some ribbon after I measured it against a book and leaving a couple inches longer.


I used some E6000 to glue my tiles to the ribbon and let it set up for 24 hours just to make sure.


And here is my ribbon bookmark.

Hope you've enjoyed my easy peasy tutorial for making a bookmark.  Hopefully you will hop on over to Anything But a Card and join in the fun!  There are only 3 simple rules:

1.  It's an OPEN THEME, so let your imagination run wild.
2.  Create ANYTHING BUT A CARD.
3.  Have FUN!

Have a great day and God Bless.

Saturday, July 4, 2015

"American" Fries

Happy 4th of July!!!


Today is my favorite day of the year!  It's better than Christmas and my Birthday rolled into one!  Today is America's birthday and my husband's birthday also.  I've always been very patriotic and today I am here to inspire you with my American "Fries" earrings.  You will totally understand in a minute.

My grandkids have recently come to live with us and therefore we have all sorts of toys laying around the house.  The crafter in me is always looking at their toys wondering what I could mold or create with/for Amazing Casting Products.  Today is no exception ...

Recently we were playing kitchen and I saw these amazing French Fries in their mixture of play food.  
Oh how the wheels started to spin!

Here is my mold that I made with those cute play fries.  I poured them with some Amazing Casting Resin after making a mold with the Amazing Mold Putty and let them cure for about 5 minutes.


Using regular acrylic paints, I painted some red stripes and a small section in blue on top of the white Amazing Casting Resin.  E6000 and some rhinestones for some bling and drilling a hole to attach some jump rings and earring wires I now I have the perfect earrings for the 4th of July!


I totally thought how the shape of those French fries reminded me 
of a waving flag and I brought that vision to life!


I hope I've inspired you to use something out of your kids' or grandkids' stash and create something fun!

As always, have a great day and God Bless AMERICA!