In your kit you would receive this:
The Frog Dog Studio April Mixed Media Kit includes:
(1) **Alumidust Powder - Red Plum; (1) StazOn Midi Ink pad - Claret; (1) StazOn Midi Ink pad - Blue Hawaii; (1) iZink Pigment Ink bottle - Gold; (1) Stampendous Mica Fragments Jar, Pearlized; (1) Dusty Attic Chipboard set - Birds; (1) Stampendous Mini Clipboard Canvas pack; (1) Set Canvas Mini's - Canvas Corp; (3) Sheets of Decopatch Tissue Paper; and (16) Tim Holtz Clear Fragments (random sizes/shapes). ** Alumidust is one of the many additives from the Alumilite Corporation.
And of course you would want to purchase the add-on kit!
(1) Amazing Clear Cast Resin – 16 Fluid Oz Box; (1) Amazing Mold Putty – 2/3 lb Box; (25) 1 oz Measuring Cups; and (50) Wooden Stir Sticks. Valued at over $47
and today I am showing you to how to domb your pictures with Amazing Clear Cast and how to display them.
When you purchase the add on kit you will receive the Amazing Clear Cast. It takes a bit longer to set up (24 hours or so), but it gives you a clean clear coating. Depending how thick or thin you apply it the glass look is amazing. I did not have a dome board, but I have made my own. You can go HERE and see how I made it and see the instructions for the tutorial.
Just mix part A to part B of the clear cast and stir gently. If I am doming something I actually let it set up a bit to get most of the air bubbles out before applying it to my item I am doming.
Gently pour it over the items you want domed and then I use my heat gun to "pop" all the air bubbles. This will set up in about 24 hours. Make sure you place something over your dome board so that no dust particles attach themselves to the resin.
ALSO, very IMPORTANT, make sure you set you dome board somewhere completely flat.
The resin will level itself out and if it is not level it will pool to one side.
here is what the backside of your piece will look like
and here is the front. It's hard to photograph, but there is a raised glass like look to it.
Now I quickly painted the edges of a piece of wood I had laying around
and mod podged it to lay my paper onto.
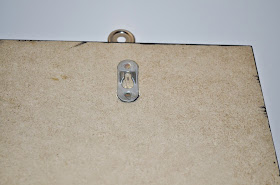
I also glued a picture hanger onto the backside.
I used the same paper for the larger clipboard that comes with the kit and using black/clear stickers I added the kids' names. See these tiny tags? Yup you guessed it, I got a variety of these acrylic tags in the kit but I had to reproduce them and poured 2 with clear cast and 1 with casting resin. I love the black and white look. I also tied a ribbon and bow to the top of the clipboard.
Now, in the kit there were these 3 canvas circles. Perfect since I have three grandkids. I hot glued the domed pictures of the kids onto the canvas circles and hot glued them onto the "frame". Now the nice things about displaying pictures like this is you do NOT need a glass over the frame. Your pictures are protected with the resin and you can just wipe them off if they get dusty.
and here is my finished board. I tried to take the picture with a bit of glare on them so you can tell that it has that domed look to it. LOVE IT! But unfortunately I did NOT make this for myself. This will be going to a special person soon!
I hope I've inspired you to make your own photo/memory board using the products I've talked about today. You can find everything by following the links above. I hope you will come back tomorrow for another project I made using more of the Frog Dog Studio pieces from the April kit and of course my Amazing Crafting Products. Please make sure to check out ALL the posts this month over at the Amazing Mold Putty Blog. You are in for a treat with all the designers.
As always, have a great day and God Bless.


No comments:
Post a Comment
My favorites have this to say