Pages

Sunday, December 21, 2014

Celestial Challenge #42 Week 3, Anything But a Card

Good morning and happy Sunday to you all.  It's that time again when I am showing you something I created for Anything But a Card.  If you haven't heard of us, you guessed it ... it's a challenge blog and we make ANYTHING but a CARD.  So come follow me through my tutorial for this month's theme "Celestial"  There were so many different ideas I kept coming up with until one evening while Christmas shopping with hubby I came across this.  We were at Target and I found this Luminary in the "Dollar" section.  Well, it wasn't $1, but $3 wasn't bad either.


but it was rather plain ... so ...
to the trusty Cricut we go and cut a Star Border out from the Scrapping Table.  You can find her here on Facebook.  I have been a loyal fan of Michelle's for a very long time and I do believe I own every one of her Svg files.  She went off the grid for awhile but I do see she is back and has even re-released some of her older files.  They are all FREE!  If you are looking for any svg files, she has plenty and make sure to tell her I sent you.  I do believe she will also be putting out some NEW files in 2015.
So anyway, I cut that out on some silver vinyl and attached it to my luminary.
I needed some bling, so in shopping my stash I found ALL of these awesome stars.  Huh, who knew?  I make my own glue dots, because I'm very frugal that way.  Just purchase some Alene's Tack It Over and Over glue, use some backing from used up vinyl projects or in this case, my backing from my ATG tape.  You need to let the glue dots set up for a couple of hours for sure.  I usually make about 5 sheets at a time.  Press your stars onto the glue dots and press them on your project ... that simple! 
And now I have a Starry Night Light sitting on my headboard.  
Love it!

I hope I've inspired you to create something for our challenge over at Anything But a Card and hope to see you link up with us.  Please leave me a comment and let me know what you think of my Starry Night Light and hope to see you again soon.

As always, have a great day and God Bless!


Friday, December 19, 2014

Noone Fights Alone, Cancer Ribbon Christmas Ornament Fundraiser.

Good morning crafters.

I am so excited to share my version of the remelt process with you today.  We were given a chance to use the Amazing Remelt and if you hop on over to the Amazing Mold Putty blog  you can see how I created this beauty.


I love the way the light shines right through the ornament.

As always, have a great day and God Bless!

Thursday, December 18, 2014

Hot Cocoa Mugs and keychains for Christmas


Good afternoon friends,

Just wanted to bring you a quick project I made this afternoon for my dart team.  Every year I like to give the girls on my team something handmade by me.  I've done ornaments, cards, key chains, etc.  This year I decided to do some glass etching and also another key chain.

I started out with some mugs I got at the dollar tree.  I love shopping there, there are so many possibilities with a little imagination!

A couple of years ago I made some hot cocoa bottles and you can see how the etching process works here.  This is what it looks like on my mugs
Photographing etched glass is somewhat tricky, therefore I placed a piece of paper in the mug so you can get the idea of the etched snowflake. 
I added some carmels, a hot cocoa packet and a candy cane to the mug.

It still wasn't enough for me, so I decided to make them each a keychain also. 
I started out with a mold that I made using the Amazing Mold Putty.  
I bought this stamp from Viva Las Vegas YEARS ago and still use it quite frequently.  
Some Stazon black ink and some flatback rhinestones should do the trick! 
Using the Amazing Casting Resin I made the tags, stamped my dartboard image directly onto the resin piece.  I redrilled the holes and added a keychain.  I also added the flatback rhinestone in the center where the bullseye should be with each girls' favorite color.  Now I hope they get the hint to hit that bullseye!  LOL  I'm just kidding.  We have a lot of fun throwing darts together! 
The dollar tree celophane bags come in very handy as a simple gift wrapping.  This way they can see what they got and not have to open it up at the bar.  Unless they really want to dig their keychains out!!! 

I'll be giving them their presents tonight and I'm pretty sure they will love them!

I hope you've found my quick project inspirational and I love reading comments, so please leave one.

As always, have a great day and 

Sunday, November 16, 2014

Buttons to Charm bracelet ABAC Challenge 41, OPEN

Good day Friends

I am here to show you another idea that I came up with for making a charm bracelet for Week 3 over at Anything But a Card Challenge 41 OPEN.  So, now we will take a quick walk through of my bracelet...

It all started with my daughter giving my some buttons to make something for her.  She wants to be a mermaid for Halloween (she never did get to be a mermaid) and bought these cute sea inspired buttons.  "Mom, I want something, anything!", is the only direction she gave me.  Instead I made something for myself.  Hehehe.  I figure if she likes the bracelet, she can wear it also.

So I created my mold using the Amazing Mold Putty and you can go here to see how to prepare it...

Then I painted my mold with the Alumidusts.  I just love the rich color they bring to a piece.

I mixed my Amazing Casting Resin with a drop of Alumilite Flo Green Dye and poured my molds and you can see mixing instructions here.

This is the bracelet kit I was going to use.  Thrift shopping I came across a bag of these leather straps of about 50 of them for $1.  Nope, couldn't pass it up but didn't know what I was going to do with it either.  Now I do...

Using ordinary scrapbook snaps.  Make sure you use the kind that do 
NOT have the hole in the center though.

I placed them in the resin right before it was almost completely cured, 
which in turn becomes one piece. 

And here is my finished bracelet.  Since I craft either late at night or during the day when no one is home it's hard for me to take pictures of some of the things I do, but you actually use your brad setter and just hammer your snaps into the holes provided and it holds very well.

I added a clasp and now I can let my daughter "use" the bracelet if she so chooses.

Now I hope I've inspired you to create something for this week's challenge at Anything But a Card and remember it's an OPEN theme, so seriously, ANYTHING goes.  Also please mention us in your post and link back to our page.  I can't wait to see your projects.

As always, have a great day and God Bless.

Sunday, October 19, 2014

Anything But a Card Week 3 Autumn Magic/Spring Wonder Challenge 40


Good morning

My Post is late because I wasn't feeling well the last couple of days, but I assure you I forced myself up this morning to finish editing my pictures and blog my post.  Over at Anything But a Card we are at Week 3 of our "Autumn Magic/Spring Wonder" Challenge No. 40. 


My best friend's favorite holiday is Halloween and every year I make something for her house.  I think she still likes me making stuff for her???  Maybe I should ask her, but then again, whenever I go over to her house she still has my "creations" on display!

This year I've seen so many bottle and yarn creations it's addicting.  I've pinned a gazillion things and knew I wanted to create a few.  Working for a bar really helps get unique shaped bottles also.  My boss gets a kick out of me coming in and putting my name on the bottle.  She knows that when they are empty to keep them for me.  

This is the bottle I had my eyes on for awhile.  


and with some orange yarn I bought at my local thrift store, some fake leaves, pipecleaners, google eyes, and black scrapbook paper I created her a fabulous pumpkin vase.  


I think he even looks good sitting in my living room.


I hope you will jump over to the blog and link up with us.  Please do us the favor and include this link in your post! Anything But a Card Challenges No. 40 "Autumn Magic/Spring Wonder"
http://anythingbutacard.blogspot.com/2014/10/welcome-to-week-3-of-autumn-magicspring.html

As always, have a great day and God Bless!


Thursday, October 2, 2014

Halloween Card Swap

Good morning card makers

I recently asked to join a Halloween card swap.  I haven't make any cards for so long and thought this would be a way for me to get into some paper crafting again.  I've been shopping my stash lately and decided to use ONLY what I have on hand.  I really, really need to do some purging.

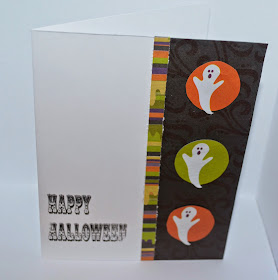
I have a huge array of Halloween stuff and this is what I came up with.

1.
 2.
 3.
 4.
 5.
 6.
 7.
 8.
 9.

None of these took me very long to make, but I love each one in it's own way.

Which one is your favorite?  Leave me a comment and tell me which number you like the best.

As always, have a great day and God Bless.

Wednesday, October 1, 2014

Flat bone failure to Amazing Plate

Good morning friends

Remember my post from a couple of weeks back over at Amazing Mold Putty of my bone necklace.  You can view it HERE if you missed it.  Remember also how I said that the necklace was a failure because they didn't lay right since they had a flat surface?  Well, I fixed that by rebuilding.

 I started out with a skull that I purchased last year after Halloween.  It was on clearance (as if I ever pay full price for anything) because it didn't work.  But I knew I would be using these skulls for something.  Of course my Amazing Mold Putty comes in handy for this project.
I molded the skull with the mold putty
I drew a line in the mold with a a sharpie so all of my skulls would be the same height
And poured some with Amazing Casting Resin with Black Alumilite Dye
and some just white 
I glued all my cured pieces onto a charger with E6000 and I wanted to make the center of the plate a chalkboard 
I also rubbed some vaseline here and there which will allow my to rub off the paint in certain areas easily 
After the pieces were all glued down and cured I proceeded to paint the charger with the chalkboard paint.
Believe it or not, I added at LEAST 8 coats of the chalkboard paint and it still wouldn't take the chalk on.  I'm not sure what went wrong or why it happened, but I could not get my chalk to write on the charger.  I got pretty disgusted and was about to throw in the towel, when I came up with another solution...VINYL!  Duh!!! 

Since I was giving this as a gift to my tattoo artist, I pulled up his business card, 
imported it into my SCAL and had an exact match of lettering
I love how the red strikes onto that black charger.
You can also see where the vaseline rubbed the paint off nicely.  
I even "scratched" some areas, just to rough it up a bit more!
My tattoo artist LOVES it!  In fact, even his boss liked it and took the plate from him and displayed 
it in the front of the store on a shelf and said Jason could "visit" it anytime he wanted.

So, see, even if something doesn't work out there is always a solution to recreate an idea.

I hope you liked my post today and hope to see you again real soon.

As always, have a great day and God Bless!

Tuesday, September 30, 2014

flashback princess hooks

Good day all - I'm here today to take you back to 1 year ago with an AMAZING inspiration post for my little princesses.

I was given one of those party favor rings, you know the ones you get on cupcakes? Well, it was a princess crown and I kept thinking about what I could make from it for my granddaughters because they are my little princesses. Since I have two granddaughters – I couldn't just make one thing, but I did only get one ring... so Amazing Mold Rubber to the rescue! This is a brand new product that Amazing Crafting Products has come out with and it really is amazing. When you have a 3D project in mind the Amazing Mold Putty doesn't always do the trick, but this new product is the bomb!!! 

When you have only one of this...


you create this!


Which become these...


Now both of my granddaughters will have their own hooks to hang their coats on. 

  I hope  you enjoyed my flash to the back post!  As always,  have a great day and God Bless.