Followers

Wednesday, March 30, 2011

Door Hanging Storage

Good Evening -

I have a very tiny scraproom and it seems that I have way too much stuff.  LOL  Just ask my DH!!!  Anyway, I have accumulated a bunch of cling stamp sets from here and there and have watched a lot of youtube videos on how to store them.  My problem is that I am a very visual person.  If I put it away, I don't know what I have and I forget about it.  Maybe that has something to do with having too much stuff.  I have a dear friend who recently told me that discluttering has really saved her sanity.  She has gone from a HUGE space to a very SMALL space and she is loving it.  All I can say is I wish I had her will power.  Anyway, I needed more storage space and this is what I came up with and it cost me approximatley $20 give or take.  So this is what you need.
Zip strips and paper clips
3 Over the Door hangers
Wire cubes (taken apart) minus Bella (isn't she just cute)
I use to store my paper in these until I
started storing them in the paperboxes
for shipping (free)
The over the door hangers are from the Dollar Tree.  I added one of the wire frame to 2 hooks and then another one overlaping to the other 2 hooks.  I used the zip ties to attach them together. 
Using the paperclips (100 for $1) I made hooks and attached them to the wire frames
 and added my stamps.  
Here are just a few because I wanted to get this post up yet tonight.
Storing my ribbon I used this method.  I took clothespins from the Dollar Tree (20 for $1) and wrapped my ribbon around them and attached a piece of tape to it.  Then I just hung the clothespins from the wire frame.
Now I can see exactly what I have and how much of it.  I used to store my ribbon in a box with holes so the ribbon slipped through, but it never failed I'd have tiny pieces left over or not enough to cover what I needed.  I really like this method and again, just a few spools because I wanted to get this post up tonight yet.
and here is my over the door wire hanger.

As always, have a great day and god bless.

Tuesday, March 29, 2011

Flower (pen) Holder

Hi all -

So today I am going to post some pictures of a pen holder I made.  Remember how I love to recycle?  You know the containers you get frosting in? 
Wrap one with paper and add leaves around the top with hot glue.
Everyone knows how to add fake flowers to tops of pens.  I used floral tape and wrapped around the stem and the pen.  Put the pens into the "container" and you have a bouquet.  LOL 
I made this for the casino I work at because my pens would walk off all the time.  This has been sitting on the ledge now for over a month and noone has stolen them.  They are being used, but either they don't like my flowers or they feel guilty for taking them.  Hahahaha.

Thanks for stopping by and as always, have a great day and god bless.

Monday, March 28, 2011

Easter Basket

Good evening fellow crafters,

Are you at all sick of my "vases" yet?  If you follow my blog then you know I love to recycle.  I "hoard" and "recycle" way too much.  I think I need to simplify my life a bit.  I just have such a hard time getting rid of things.  My problem is every time I do get rid of something, within days, I could use it.  Does that ever happen to anyone else?  I know I don't need all the crafting things I have, but I like to collect.  I found this challenge over at Scrapbookaholic by Abby and I thought I make this one.  The challenge #2 is to create anything to do with Spring.  Here is an "easter basket/vase" I made out of the giant tp rolls, a cd, craft foam, tooth picks, pipe cleaner, fake Dollar Tree grass and of course my scraps. 

I cut the bunny from the gypsy wandering at 3 inches in brown and also the shadow feature in the same brown cardstock.  I added pink glitter glue to his ear and the flourish that was cut out.  I added a pink ribbon and bow around his neck.  I cut the eggs at 2.5 inches and glued a toothpick inbetween them. 

To make the basket I again covered a giant tp with brown paper and added a strip of brown paper with brads for a handle.  I covered the cd with the same brown paper and hot glued the roll to the cd.  I hot glued the floral foam inside the tp roll and hot glued fake grass inside. I inserted the eggs with toothpicks into the floral foam and added more eggs and the bunny on the outside of the basket.

At least I am saving the planet of some of these giant tp roll and wrecked cds.  LOL  I hope you enjoyed my "easter basket/vase" and hope to see you all again real soon.


As always, have a great day and god bless.

Lasting Memories Challenge #31

Good morning,

Here is my LO for the challenge over at Lasting Memories.  I know, I didn't do one last week, and I just couldn't get it going.  This last weekend I spent almost every free moment in my craft room as you can see by all the projects I've posted.  I am trying to do a little every day, but that just doesn't always happen. 

This week's challenge was a sketch.  I really like doing them because I have to rethink my scrapping.  Here is the sketch
and here is my LO

I got a huge pad of scrapping paper for christmas from my DS.  He got it at Sam's club and I've thrown the wrapper away, so I can't even tell you who made it.  I think each pattern paper had either 4 or 6 of the same design.  It's gonna take me forever to get through this stack.  I cut the background paper for matting the picture from Pooh and Friends cart. 
I added some picture tags with bling to make it look like that's how the picture is held onto the frame. 

The flowers are a punch from Marvy Uchida.  It's a pretty big punch. 
Yes, I know, I could have cut the flowers from a cart I have, but I am also trying to use some of my older stuff.  I then cut simple circles from the George cart to lay behind the flowers after I inked and crumbled them.  I faux stitched around the flowers and the blue mat and added the kids' names and the date on the mat also.  I added a pink ribbon from my stash and the 3 circle brads under it.

Again, super simple.  This LO would have taken me about  minutes total, but Miss Bella wanted to play with my gypsy and anything else she could get her hands on.  She has now mastered getting the gypsy to light up and thinks that's just funny.  Chasing a 15 month out of your scraproom takes a lot of time away from scrapping itself.  Hahahaha.  But I love her dearly.

As always, have a great day and god bless.

Sunday, March 27, 2011

Liebster Blog Award

Good Morning all,


Wow, it's really cool when you go to your blog comments and someone not only has left nice comments about your blog creations, but then passes an award to you.  I got the Liebster Award from Victoria over at Victoria's Junk.  If you haven't seen her blog, please go visit it.  She has some beautiful cards over there.  Thank you so very much Victoria.


This award was created for bloggers who have fewer than 300 followers, but put a lot of love and heart into their wok. It is given to bring light to new blogs and its a great way to share blogs that might not otherwise
be seen or ones you want to share with others.

As a recipient you must share the love and pay it forward by.

1- Creating apost where you blog about the Liebster award and reveal you 3 to 5 blog picks.

2- Let them know you have chosen them by leaving a comment on their blog about the award.

3- Copy and paste the award on your blog.

4- Have the faith that your followers will rally and show their crafty love back out to those you award this to.

5- Have fun!!!

Well that's easy.  I follow a lot of blogs and most of these I have met through challenges, following through others, or linkitz. 

So here are my 5 choices in no particular order.


As always, have a great day and god bless.


Guest Design Sunday "For the "Birds""

Good morning all -

So this week I am guest designing again over at Getting Cricky. I am so thrilled that I get to do this every week. Sometimes it's a bit challenging, (haha, get it, it's a challenge, wow, I'm probably the only one laughing about this), but for the most part once I think about it for awhile it comes together.


Well this week I made a whimsical card. Not sure if whimsical is the right word, but that's all I could come up with. If you follow my blog you know I am a pretty straight forward card maker. I stick to a certain theme and pretty clean. I don't really do "cutsie" stuff. In that I mean, I don't play with colors too often. Everything is pretty real. I just don't know how to explain what I mean, but here is something I made that was totally out of the box for me.


This is a 5.5 by 5 card. Not my usual size, but it worked. I love using my SCAL so this time I used both a SCAL file and a cricut cartridge. The "bird" is from Scrapped Lives. She has some really cool files over there. I cut him at 3.25 inches in a white layer and inked the edges in red and then cut it again in this funny colored paper out of my scrap bin, so I don't know where the paper came from. I cut his tail feathers, crown and belly out of some red cardstock and cut his beak freehand in yellow. I gave him a googlie eye. I love googlie eyes...The grass was cut from the Pooh and Friends cartridge. It was cut at 5 inches in two layers and then I inked around the edges and a little ontop to give it more depth. I popdotted the grass over the little birdie and added these plastic flowers. I also have no idea where they came from since they were in my stash. I do know I have a lot of these plastic embellishments...numbers, letters and flowers. OH MY!!! The sun is a punch from Marvy Uchida and I added the button. I didn't have a yellow button so again, with my BIC markers I just colored the button and used a bit of green twine. The "Thanks ever so much" tag was on a sheet of stickers in my sticker section on my clip it up and I just backed it with some white cardstock and inked the edges in green. I added a green ribbon and there you have it. Pretty whimsical if you ask me.

I hope you've enjoyed your stay with me today and hope to see you next Sunday.

As always, have a great day and god bless.

Friday, March 25, 2011

Festive Fridays 3-25

Good morning and welcome to Festive Fridays,

Welcome all to another Festive Fridays. If you are new to us, sit back, grab a cup of coffee, relax and enjoy some wonderful Christmas Cards. Yes, I did say Christmas. Festive Fridays will be every other Friday with samples of Christmas cards. This way, you can be making your cards all year long and you will avoid the mad rush when you could be enjoying the Christmas Season. You should have just come from Debbie. If you stumbled upon this post you can go back to Terri and start at the beginning. I will also have a complete list of the Festive Friday hop at the end of this post in case you get lost along the way.
This was a super simple card to make.  All of the items were from my stash so I can't tell you what the paper was since it was in my scrap bin.  I cut the two different cats from the "A Child's Year" cart and then embossed them with the "Paisly" cuddlebug folder.  I added a bow to each of their necks.  The smaller cat was popdotted and placed a bit ontop of the other cat.  I stamped the Merry Christmas and just tore the paper around the sentiment and then inked the edges.  I also backed it with black.  Adding 3 red buttons just for some bling. 

I hope you enjoyed my festive friday card and hope you join us again in 2 weeks for another great hop and now onto your next stop... Angela 

Here is a complete lineup for all the next stops in case you get lost along the way:
Brenda Lee Burfeind (That's me)
Angela Bodas
Yolonda
 
As always, have a great day and god bless

Wednesday, March 23, 2011

Happy Birthday Manly

Good day all -

It's been a crazy week here for me.  I've been working non-stop and trying to craft at the same time...really not working well.  I have all these ideas and know that I will do this or that when I get home and then when it gets time to put it all together...nothing.  I do finally have an entire weekend off, but somehow I don't think I will get much crafting done then either.  DH wants to spend some quality time together since I've been working so much.  Don't get me wrong, I love spending time with him, but I want to craft too!!!  Maybe there will be a golf tournament on and he'll want to watch it.  Hahahaha  One can only hope. 

I had to make a birthday card for a lady at work for her son.  Well, I didn't HAVE to, like my DD always says, but I wanted to.  She is always telling me that I take on too much and never say "no".  That is quite true, but I love to create and I love it when people ask me to make something for them.  So anyway, back to my card.  I don't like making "manly" cards, because I just can't do it.  I find them rather dull because I can't add any bling or cutsie stuff...but maybe I can.
I again used everything out of my stash.  I have no idea where the paper came from because it was in my scrap bin.  The ribbon slide is a pop tab that I alcohol inked with mustard to compliment the snaps.  The "Happy Birthday" was a vellum title and I used two gold snaps to attach it to the card base.  I then added some "bling" on the bottom of the card and again used my bic markers to color them yellow.  I know it's not much, but I think it turned out well.  I hope you enjoyed your visit today.

More Than Favors is having a "Manly" challenge so I will be submitting this card there for Wacky Wednesday.  Birthday Sundaes is also having it's first challenge and it can be anything as long as it has some "birthday" greeting on the front of the card.

As always, have a great day and god bless.

Sunday, March 20, 2011

Butterfly Vase Winner (s)

Good Afternoon

it's time to reveal the winners from last week's guest design challenge.  Yup, you read correctly.  I am giving the items to two winners because only two people left comments and I couldn't choose only one.  So...Jennyplace 2 and Just this...Alice, please send me an email with your addresses and favorite color and your package will be on its way to you.  Please put winner in the subject line so it doesn't accidently get deleted.  I get a bit of spam at times.  

As always, have a great day and god bless.

Pack Your Bags Guest Design

Good morning -

It's another Simply Sunday Challenge over at Getting Cricky with Kandrew and this week's theme is "Pack Your Bags".  I wish I were packing my bags to go on a trip.  LOL  Seriously!!!  Anywho so here I am again Guest Designing for her and loving every minute of it.  You are all so sweet to leave such incouraging comments.  So this week I actually made a card.  I love making cards and this week I used my Design Studio and an actual cartridge.  LOL  I just love my SCAL but I am challenging myself to use some of my carts.  I really forget how many nice images I do have in them.  I do not own the Pack Your Bags cart, so I used Cricutsearch.com and typed in suitcase.  It then gave me all the carts that have a suitcase.  What I absolutely love about Cricut Search is that it shows you exactly where the image on the cart is and gives you the page number and all.  So much easier than searching through all my books to find an image.  The Stand and Salute cart came up and I own that one.  Yeah, me!!! On page 47 is the suitcase and it also has a layer to go with it.  I used my DS to weld two suitcases together making a 4.75 x 5 card.  I also cut one layer using this cute paper that was in my stash (my personal challenge to use up my stash) called "On the Road Luggage Labels" and it's by K&Company.  I then cut the layer and the handle from some brownish card stock that was in my scraps bin and inked around them in black.  I then cut a strip of the same brownish paper and used my ribbon punch to punch a slit in that and backed it with black cardstock for a key hole. 

 I had some keys in my stash and found the ball and chain and attached it to the handle. 
I added the brads to the layer in copper.

I didn't have a Bon Voyage stamp so I used my Microsoft word and typed it out using the Brush Script font at 36 and printed it on the same brownish cardstock and inked around that also.  Now for the fun part, this card is actually a gift card.  When you open the suitcase, inside I added some more of that brownish cardstock (which is now gone, yeah I used up something in my stash) and placed a gift card inside.

Wouldn't this be a cool gift for someone maybe heading off to college or studying abroad?  I hope you like my "suitcase" as much as I do.  Please leave me a comment telling me where you would like to travel if you could go anywhere in the world.  I will be giving this card (minus the gift card) away to one lucky winner on next Sunday.  Please come back here to see if you won at that time. 

As always, have a great day and god bless.

Tuesday, March 15, 2011

Thanks Snow Much

Good afternoon again -

Remember my Festive Friday card I made last week?  I really liked the way the card turned out and I needed a card to go with the candle/holder that I am giving my friend (see post below).  Well, I reproduced it in a way.  I usually don't like making the same card twice, but I did...sorta.  I used the same concept and here it is.
I used a piece of red scrap paper and embossed it using the snowflake cuddlebug folder.  Then I ran a white ink pad over the embossing very lightly.  I backed that piece with black and cut the boot out in black again.  This time I turned the boot facing the other way.  I used the bigger dots cuddlebug folder to emboss the boot also.  I used my white gel pen to create the stitching, I guess it's the laces.  I also added a white bow to the top of this boot.  I used the same sentiment "Thanks Snow Much" from the MPS set on white paper and backed that with black also.  Again, adding rhinestones, in red this time, to the boot for the eyelets and on the snowflakes also.  I really do like this card very much.  See how you can use the same idea, different papers and colors and come up with a different card.  LOVE it.

As always, have a great day and god bless.

Candle - May

Good day all -

Just a quick post of a candle I made for a dear friend. Her last name is May and she loves red and black. I bought a red candle and candle holder at my favorite Dollar Tree. I cut her last name out in black vinyl and adhered it to the candle holder. It seemed kind of plain so I added three rhinestones with my I-Rock. I really think she's going to like it. How about you?

As always, have a great day and god bless.

Monday, March 14, 2011

Lasting Memories Challenge #29

Good day all,

As you know I have been playing over at Lasting Memories for their weekly challenge and adding my personal challenge to use up my stash.  This week's challenge over there is Green and White.  Here is my take on the challenge.

Every year we go on a canoe and hiking trip to Northern Minnesota.  It's an area called Boundary Waters Canoe Area, BWCA for short  You rough it there and when I say "rough it" that doesn't even come close to explaining it.  No motorized vehicles are allowed.  The only way into the camping areas is by canoe.  We stay for a minimum of 4 days and really enjoy the peace and quiet.  No cell phones, no tv, no work.  Well, it's work but not the kind you hate doing.  We have to trek in all of our gear, cookware, eating utensils, food, tents, sleeping bags, fishing gear, clothes, etc.  Whatever you need to survive for a minimum of four days of uncivilized camping.  We walk portages of anywhere from two yards upto one mile, canoeing anywhere from one mile to 13 miles to locate a campsite.  You don't always get the one you planned on because it  depends on where we want to set up camp and if someone is already there.  Of course you plan it out very carefully, but it doesn't always pan out the way you want it to.  We didn't get to go last year because our DD got married in June and that took our family vaction to Colorado, instead, for the wedding.  This year we will be entering Boundary Waters on the 1st of August and we plan on staying until at least the 5th of August.  Always weather depending.  We've had some doozies, let me tell you.  We've had everything from major hail storms with dime sized hail to scorching hot heat, but never once regretted going.  I am so excited about going after making this layout but I know that once BWCA is over, so is summer, so let's let that get here first.  LOL  So anyway, here is my layout.  The last day of BWCA of 2009 we went out once more in the morning for some last day fishing.  I caught this Northern.  It took me about 15 minutes to get him into the canoe.  If you have ever fished from a canoe, you know you can't land it all by yourself.  My oldest son had to use the net to try to get him into the canoe.  The Northern was so big and strong that he ripped right through the net and back into the water he went.  We finally got him in the canoe and Carl had to try to unhook him.  We were able to measure him using the handle of the net before letting him go.  That was probably the funnest (is that a word) time I've had catching and releasing a fish.  Enjoy the layout.

I backed each picture with white paper and inked the edges with green.  The top of the page has a piece of metal embossed using my cricut with the letters BW for my title.
The canoe I cut out with my cricut using SCAL.  The image was from Scrapping Table that came in the Outdoors theme.  I used my white gel pen to write out BWCA 2009.  I used walnut ink to distress the canoe and paddle a bit

The netting is the actual net that the Northern tore through.  I kept it because I knew I was going to use it someday for a layout.  The fish is also cut in SCAL from the same theme from Scrapping Table.  I used it as my journaling tag.  I used brown chalk ink to edge the fish and give it some color ontop and then I also used my white gel pen to put dots all over the fish simulating the spots on a Northern.  The lure and sinker are just added embellishments but they are the real thing.

I hope you've enjoyed taking a trip to BWCA with me and hope to see you all again soon.

As always, have a great day and god bless.

Sunday, March 13, 2011

Winner from Guest Design #1

Evening all -

I almost forgot to post the winner from my first guest design spot over at Getting Cricky.  I don't use random org but I do put all the enteries in a hat.  I took all the entries from my site and from Kristals.  Thank you for all your sweet comments and to those of you that posted to both sites and posted the giveaway that gave you more chances to win. So without further ado...the lucky comment is....

Cindy-Up in Northern Michigan said:
Great baby!  Congrats on being a "Guest Designer".

Thanks Cindy and congratulations to you.  Please send me your mailing addy so I can get your candy to you.

As always, have a great day and god bless.

Sunday Guest Design

Good day all,

Most of you know that I won a guest design spot over at Kandrew for a challenge that she had done awhile ago.  What you may not know is that I get to keep guest designing for her weekly challenges.  Woot woot!!!  She contacted me last night and told me what the challenge was, so most of my night was laying in bed and wondering what I could "whip" up.  She told me what the challenge was at about 10 pm, at least that's when I got the email...LOL  So, does this ever happen to you...you get an idea in your head and it's all well and dandy up there, but when it comes to putting it together it just doesn't look at all like what you had planned?  Well, that's kinda what happened today, but here is my project.  I do think it turned out pretty cute though.

She said we were to use butterflies.  I LOVE butterflies.  When my DD was a baby each night I would give her butterfly kisses and she would just giggle.  Since spring is upon us I thought I'd make a cute springy centerpiece.  Kinda following the idea of my "St. Patty's Day Vase".  Here is the link in case you missed that post.

Here is a picture of the items used to making this "vase"
I had gotten this awesome green corrugated cardboard at Tuesday Mornings a long time ago in a pack of 4 colors.  Pink, Green, Black and Red.  I've used most of the other colors up, but still had this in my stash.  
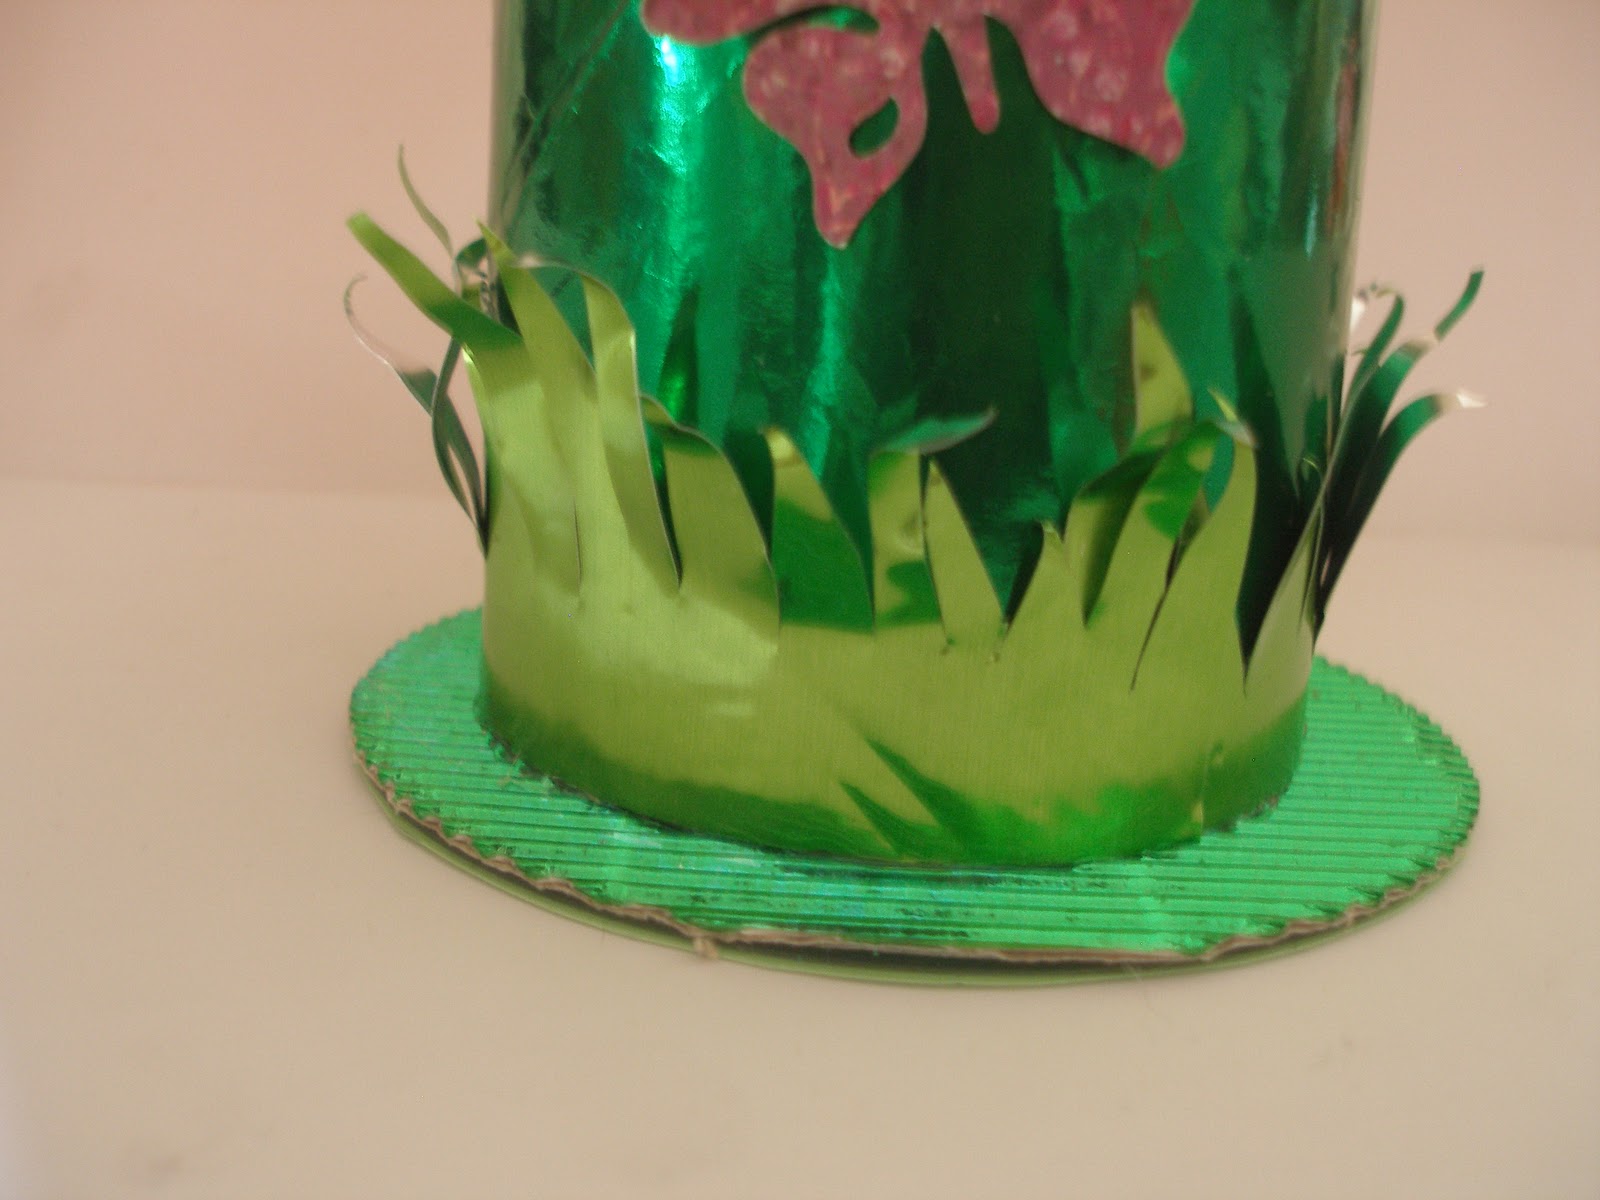
(Oh yeah, remember, all my challenges that I participate in are using up my stash.  I have been having a blast depleting my stash.)  Anyway, back to my project.  So I traced the cd on the backside of this corrugated cardboard and cut it out by hand.  Don't really think that my cricut could cut this.  I adhered it to the cd using a spray tack.  Love this stuff.  I also had some green metal in my stash, not sure where I got it and desperatly tried cutting the "grass" from the gypsy wanderings file.  I tried everything, my regular blade, my deep cut blade, slow, med pressure, etc.  You get the idea...but it would not cut.  Oh wait, it cut, but not how I wanted it to.  (If anyone can give me a pointer on how they cut metal I'd appreciate it).  So I just cut a 2.5 x 11 inch strip and cut it using my scissors.  Here is a closeup shot of how it cut.  Just like butter.
I also had some metalic looking paper.  I trimmed it to fit around the giant toilet paper roll and adhered it with my ATG gun.  I also adhered the metal grass to the gtp roll using my ATG.  I then hot glued the gtp roll to the corrugated cardboard and the vase is formed.  I then took some more floral foam and hot glued that inside the "vase".  I didnt' have any green tulle, but I still have plenty of the white stuff.  I used a green inkpad and rubbed the tulle in it.  Needless to say my fingers turned green too.  Just in time for St. Patty's Day  LOL  I then wrapped the tulle and placed it over the floral foam.  I had these yellow flowers in my "flower stash" from when I designed floral arrangements YEARS ago.  I took the flowery part off the stems because they were too thick to get through the tulle.  I put hot glue on one side of the toothpick and inserted it into the flowery piece.  Here is a closeup of that. 
I then inserted the toothpick flowery thing into the tulle wrapped over the floral foam.  EASY peasy. 

I cut all the butterflies from the gypsy wanderings file.  Some I embossed using my cuddlebug and the Divine Swirl.  I added some glimmer mist to one of them to give it a shinyness.  I used my heat gun to speed up the drying process and it curled a bit.  Perfect.  Love it sometimes when the unexpected happens.  I poked a hole in the bottom of the body and close to where the antennas are and threaded the floral wire through that.  I added a rhinestone "colored" to match and inserted them into the floral foam.  I added one butterfly to the front of the "vase" and viola, my Spring Vase.
I will be giving away the ingredients to making a "vase"  A gtp roll, a cd, some tulle (colored green), floral foam, 24 inches of floral wire and some flowers.  All you have to do is leave me a comment here on my blog and tell me what your favorite color is.  You are not required to become a follower, but I would love it if you were.  I will send the flowers in the color you specify or as close to it as possible.

As always, have a great day and god bless.

Thursday, March 10, 2011

Festive Fridays 3-11

Good morning and welcome to Festive Fridays,

Welcome all to another Festive Fridays. If you are new to us, sit back, grab a cup of coffee, relax and enjoy some wonderful Christmas Cards. Yes, I did say Christmas. Festive Fridays will be every other Friday with samples of Christmas cards. This way, you can be making your cards all year long and you will avoid the mad rush when you could be enjoying the Christmas Season. You should have just come from Debbie. If you stumbled upon this post you can go back to Terri and start at the beginning. I will also have a complete list of the Festive Friday hop at the end of this post in case you get lost along the way.


Today's card isn't a traditional Christmas card.  Sometimes I need a Thank You card during the Christmas Season and I thought I'd make a "Thanks Snow Much" card.  I cut a boot out in SCAL, used my white gel pen to add stitching for the laces.  I also used my Bic markers and colored all the rhinestones pink and used them as the eyelets.  I then cut 3 different snow flakes in SCAL and blinged them up with some rhinestones also.  The sentiment is from My Pink Stamper, the Winterpunnies.  I am so glad I got this stamp set.  I also used my cuddlebug and snowflake folder to emboss the snowflake paper.  I popdotted the boot off of the layer and there you have it. 
I hope you enjoyed my "Thanks Snow Much" festive friday card and hope you join us again in 2 weeks for another great hop and now onto your next stop... midnightcrafting.blogspot.com and then onto Yolonda


Here is a complete lineup for all the next stops in case you get lost along the way:
Brenda Lee Burfeind (That's me)
Angela at midnightcrafting.blogspot.com

As always, have a great day and god bless


Wednesday, March 9, 2011

Layout Thursday "Mushroom"

Good day all,

Welcome to Layout Thursday. Every Thursday I will be posting a new layout and a challenge. You will have one week to link up your challenge and enter at the bottom of this post. Send your friends and fellow scrappers. This weeks challenge is to use any layout design but you must use a vegetation, ie something like a fruit, vegetable, tree, etc. So in this layout I used mushrooms.


The mushrooms were cut in SCAL. I added ribbon and red dots to simulate her outfit. It's a very simple yet colorful page I think. The bigger mushroom holds the journaling on the inside.  I also used SCAL to spell out Mushroom and then used the blackout feature to layer it.  I love the picture of her peaking out of the hood just too bad it was so dark. Though I am so glad that I can relive these memories through my scrapbooking.


Too bad this picture was so dark.

Journaling hidden inside of mushroom


Okay, now it's your turn. Use the link at the bottom to add your challenge submission. Everyone has his or her unique way of scrapbooking and I want to see how each of you interpret your own style. Remember, have fun!!!


As always, have a great day and god bless


Sunday, March 6, 2011

Guest Designer at Getting Cricky and giveaway

Good morning my fellow followers and friends

I am so excited to be Kandrew's FIRST guest designer.  I won a challenge over there and won an awesome stamp set and a chance to be a guest designer for her.  Krystal is sooooo talented and I don't come anywhere close to what she does, but she inspires and challenges me too.  If you have never seen any of her tutorials or videos, you are SO missing out.  Anyway, here we goooooooo.


Really bad picture.  So sorry.
She is hosting another challenge and she is using the Sugar and Spice Lite Cartridge.  Well, I do not own that one, but since it's all about babies and such I used my New Arrival cart.  I bought this cart when my daughter found out she was pregnant and have used it alot.  I love all the images it has to offer.  I've made invitations, layouts and cards with this cart.  The imagination is it's only limit.  I used my gypsy to lay this out.  Sometimes I feel the need to alter things up a bit.  I love the baby on this cart, but I thought I can could probably change it up.  The baby is sitting kinda, but I wanted my baby to be standing kinda.  
This is what the baby looks like cut from cart
LOL  Sitting, standing, who cares?  I do.  Once I had the baby cut, I wanted her to have clothes on.  I cut my baby at 2 x 3.12 and then I cut a dress form from the cart at 2.38 x 2.06.  I used the hide contour button to hide the other elements, like the hanger, panties, and flower.

Cut off arms and legs and glued to dress form
Then I cut off her arms and legs and glued them to the back side of the dress form to make her look like she was standing. 

Dressed

I added a purple bow to her hair and a ribbon to her dress with a gem.  I then cut the baby bottle at 1.07 x 1.82 in vellum and in white.  I handcut the white and made it look like milk in a bottle. 

Bottle cut in vellum with white background (milk)
LOL  Pretty cute huh?  The card base was from my stash (again, following my personal challenge of using my stash) from a swap I was in.  I love the embossing and wish I knew what folder it was from.  When I went to glue it to the card I accidently ran the tape gun on the embossed side.  Ugh.  Dumb, dumb, dumb.  It was the only piece I had to I added glitter to the taped part and it looks just fine.  The congrats stamp came from Michaels $ bin and the added gems for some bling.  Every card needs bling.  I hope you liked my card and please join in at Kandrewdesigns for her challenge.  She has lots of fun giveaways and is such a generous person.  Oh, speaking of giveaways...You do not need to be a follower, but I would love it if you were. Please leave a comment and I will pick a winner on Sunday, March 13th. Post my giveaway on your blog and leave me a comment with your blog addy and I will give you another chance. Post in the comments section at Kandrew and it will get a 3rd chance.  I am giving away


Crystal stickers
baby sayings
friendship sayings

As always, have a great day and god bless.